Here we are going to provide you a step by step guide on how to install an SSD (Solid State Drive) in your desktop PC.
How to Install an SSD in Your Desktop PC
First Step
Do not forget to gather all the necessary tools and materials before you start. Gather all the tools and materials you need for the installation. This includes your desktop PC, the SSD (Solid State Drive) you want to install. And collect a screwdriver (usually Phillips or Torx, depending on your PC) without fail.
It is very much important to have the right tools for a smooth installation process.
Second Step
Shut down and unplug your PC to ensure your safety and prevent any potential damage. Do not forget to shut down your desktop PC. And unplug it from the power source. This step is crucial because you are going to work with sensitive electronic components. And disconnecting the power supply eliminates the risk of electrical shocks.
Third Step
Open the computer case now. Since already that your PC is powered off and unplugged it is very safe to open the computer case. Most desktop PC cases have a side panel. That can be removed to access the internal components. Look for screws or latches securing the side panel and remove them accordingly. Gently slide off the panel to reveal the internals of your PC.
Fourth Step
Identify an available drive bay once the PC case is open:
You need to identify an available drive bay where you can install the SSD. Drive bays are slots designed to hold storage devices such as hard drives and SSDs. They are usually located in the front or side of the case. Most modern cases have 3.5″ or 2.5″ drive bays. The 3.5″ bays are larger. And they are normally used connect hard drives. The 2.5″ bays are smaller. And they are more suitable for SSDs. If your SSD is a 2.5″ form factor and your PC only has 3.5″ drive bays, you’ll need an adapter bracket to properly fit the SSD.
Fifth Step
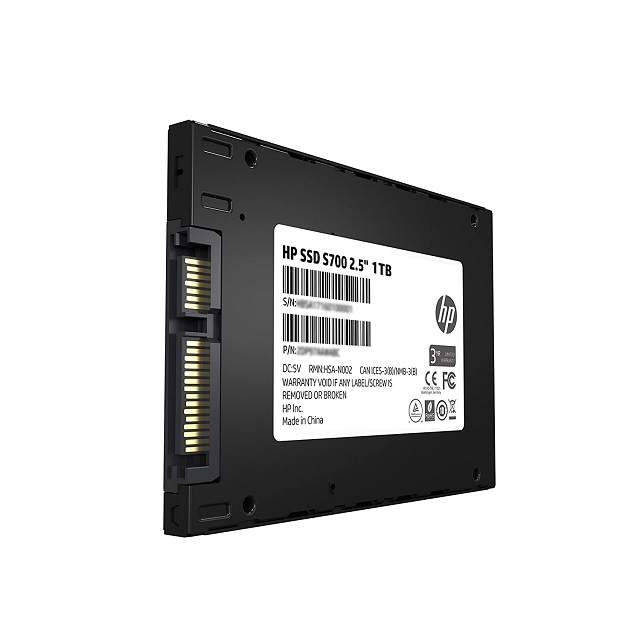
It is time to mount the SSD. Mount the SSD Once you’ve identified an available drive bay. If you have a 2.5″ drive bay, simply slide the SSD into the bay until it fits securely. The SSD should align with the screw holes in the bay. If you are using an adapter bracket, then attach the SSD to the bracket using the required screws. Make sure the screws are tightened enough to hold the SSD firmly in place. Then, slide the bracket (with the attached SSD) into the drive bay until it’s properly aligned and secured.
Sixth Step

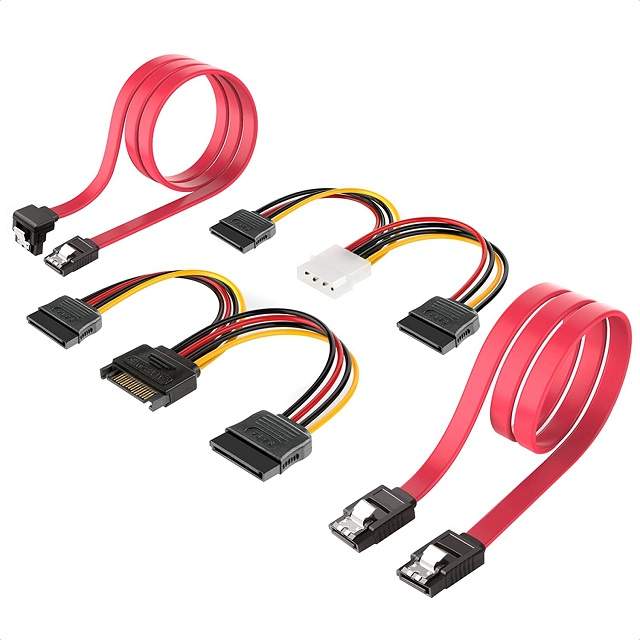
The other end of the SATA data cable should be connected to the SSD itself. The SSD will have a corresponding SATA data port. It’s usually a small L-shaped connector. Align the connector on the cable with the port on the SSD, and gently push them together until they are securely connected.
Seventh Step

Locate an available SATA power connector from your PSU. It should have the same shape as the power port on the SSD. Insert the connector into the power port on the SSD. Ensure it is connected securely. Apply gentle pressure to push the connector in until it’s fully inserted.
Eighth Step
The SSD need to be securely fixed to prevent any accidental movement or damage to the SSD. Therefore it’s highly recommended to secure it in place. Some drive bays have mounting points or brackets where you can secure the SSD with screws. If there are mounting points available near the drive bay, use the screws provided with your PC case to secure the SSD in place. Carefully insert the screws through the designated holes in the SSD or adapter bracket and tighten them enough to hold the SSD firmly.
If your drive bay doesn’t have mounting points or brackets, then you can also use cable ties or adhesive strips to secure the SSD to a stable location inside the case. Just ensure that the SSD is held securely and doesn’t move around.
Ninth Step
Close the computer case once the SSD is securely installed. It is time to close the computer case. Gently slide the side panel back into position. Do not forget to align it with the case. Make sure it fits properly and there are no loose edges. Use the screws or latches you removed earlier to secure the side panel back onto the case. Tighten the screws to ensure a snug fit. But be careful not to overtighten them.
Tenth Step
First power on your computer system. And check for the SSD working, with the computer case close. Plug in your desktop PC and turn on the power. Press the power button to start your PC. As the operating system loads, you’ll need to check if the SSD is recognized and functioning properly.
Checking SSD is recognized and Functioning Properly:
To do this, follow these steps:
If you’re using the Windows operating system, go to the “This PC” or “My Computer” section. You can usually find it on your desktop or in the Start menu.
Look for the SSD among the list of drives. The SSD should be labeled with a letter (e.g., C:, D:, E:) and display the storage capacity of your SSD.
If you see the SSD listed, congratulations! It means the installation was successful, and your PC has detected the SSD. You can start using it to store and access your files. It’s recommended to format the SSD before using it to ensure optimal performance.
Check in the List:
Check whether the SSD is shown in the list or not. If it is not shown in the list there are a couple of troubleshooting steps you need to try. First, make sure all the connections are secure. Check the SATA data cable and power cable connections on both the SSD and the motherboard. If necessary, disconnect and reconnect them to ensure a proper connection. Second, restart your PC and check again. Sometimes a simple reboot can solve recognition issues.
If the SSD is still not recognized, you may need to format the SSD or adjust BIOS settings. Formatting the SSD will erase any existing data. So make sure you have a backup if necessary. Accessing BIOS settings varies depending on your PC model. But it typically involves pressing a specific key (e.g., Del, F2, or Esc) during the boot process. Inside the BIOS, navigate to the storage or boot settings and ensure that the SATA port connected to your SSD is enabled.
Remember, if you are unsure about any of the steps or encounter any difficulties. Then it is always a good idea to consult the user manual of your desktop PC or seek assistance from a knowledgeable friend or professional.
Congratulations!
You have successfully installed an SSD in your desktop PC. The SSD will provide faster storage performance. It will offer quicker boot times. And it will improve overall system speed. Enjoy the benefits of your new SSD. Now it will provide you faster application loading, smoother multitasking, and quicker file transfers!
What is SATA Port label and color code?
Normally, SATA ports with different colors of ports indicate different SATA generations. That is one of the critical point to consider when connecting your drive. Generally, the SATA ports on the mother board are of three colors black, red and blue. There is no standardization as to what colors mean for SATA ports on different motherboards. Generally a mother board can have 4 to 6 SATA ports.
SATA ports on a motherboard that has different colors can be categorized follows:
Primary SATA controller ports
RAID-capable SATA controller ports
Secondary SATA controller ports
Usually the primary SATA Controller ports are of Black in color. The RAPID or Even numbered ports are Red or Yellow. And the Secondary SATA controller ports are usually red in color.
Even some manufacturers even color the ports to help the user to identify the port that can be used for an eSATA bracket.
Selecting which SATA port to use?
If you are going to install a single SATA hard drive, then it is best to use the lowest numbered port on the motherboard say SATA0 or SATA1. You have the liberty to use the other ports for optical drives.
You are going to install multiple hard drives on your system. but you are going to install the operating system on only one drive. Then you should use the lowest numbered port on the motherboard (SATA0 or SATA1) for this drive. Then you can use the next lowest numbered port for the second drive, and so on.
If you are going to install multiple hard drives and going to use RAID mode to increase storage space or create a backup disk. Then connect one of the drives to the lowest numbered port (SATA0 or SATA1). And then connect the remaining drives to ports on the same controller.
Color Coding:
SATA 1 has a supported throughput rate of 1.5 Gbps or 187.5 MB/s
And, SATA 2 has a supported throughput rate of 3.0 Gbps or 375 MB/s
SATA 3 has a supported throughput rate of 6.0 Gbps or 750 MB/s
Therefore in all the color code for DELL follows as follow:
SATA1- Blue
SATA2- Black
And, SATA3 –White
SATA 4- Black
On some latest high end mother boards, the different color codes represent the speed differences. And further they notify which ports can be used to connect RAID (Redundant Array of Independent Disks).
Generally, all SATA ports share the same color on any motherboard. If that is not the case and the SATA ports conform to a different version, they may be color-coded. For example, the white ports conform to the newer SATA 3 interface; where as the blue ports conform to the older SATA 2.


