Almost all PC users heard about the blue screen of death. But only a few are there who know about Green screen of death. Have you faced this issue on your PC too? If you are using an Insider Preview version of Windows 10, then you must face the error. You will get similar messages like the blue screen of death.
In simple words, problems due to which BSOD occurs on a basic version of Windows 10 cause GSOD. You will only see a message asking “Windows Insider Build.”
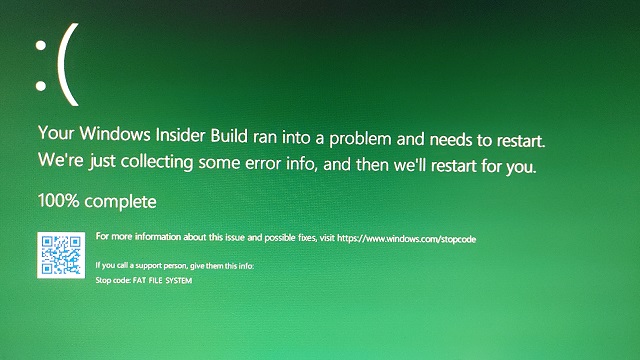
What is Green Screen of Death?
Green Screen Death error in windows 10 is a critical error similar to the Blue screen of death. It happens when you are running a Windows Insiders preview version. The hardware failure, bugs in the hardware and software, and software failure- such as low-level software working on in the kernel of Windows may be the reason. Sometimes, the other programs not related to the Operating system may cause the critical error that results in the system failure. If your application software does not function properly, the Windows operating system triggers a forced shutdown to protect it.
A Green Screen of Death is a display of green color that is available on a TiVo. It shows a message asking, “the DVR has detected a serious problem and is now attempting to fix it” or “A severe error has occurred.” Usually, while the message appears, it means that your PC’s hard drive has failed. The error can be seen on the Xbox One.
More About Green Screen of Death GSoD:
When the green screen of death error appears, ensure that it was unstable development builds of Windows 10 which generated the issue. You can see this Insider Builds often with crashes and bugs. These won’t appear on a standard version of Windows 10. Microsoft sometimes warns that Windows Insiders can face the problem when they use this development software.
You should know that the problem may be bigger related to your PC’s hardware or drivers. Until your windows come in stable condition, you will never be sure enough.
It was the Microsoft company that made the change. In April 2017, this change was released. Whether you use an Insider Preview build of Windows 10, you can use a registry hack to trigger the display manually with the “MANUALLY INITIATED CRASH” stop code.
What Causes GSoD?
Before knowing about GSOD error, you should know first about the standard system response. It is BSOD, a signal that windows can face due to which it can stop working correctly. Generally, the problem appears after hardware or software errors. Using low-level software can also cause the issue.
However, the main cause of GSOD is the malfunction of the hardware drivers. Besides, the problem may appear for the attached peripherals and conflicting third-party software.
How to Recover Data in Windows 10 While Encountering Green Screen of Death?
If you try to reinstall your windows, you may lose your essential information. Always keeping a backup will not help you. It is because sometimes you may lose all your data. However, you should not be panic. It is always possible to recover essential data. Use a good recovery tool just, and you can recover the data.With the help of bootable data recovery software, you can perform this step with ease. If your windows get crushed, broken, or non-bootable, you can use the tool.
Let’s have a look at the process of how you can recover the information on Windows 10.
Step 1:
First, you are required to install the recovery tool and complete the registration procedure on the Windows PC. As soon as you complete the installation, you need to launch the tool. Then, choose a Drive to keep it. After that, you should select a drive or location on the “Drive Selection window.” Use the location for recovering the lost information, and after that, tap on the “Start” button.
Step 2:
As soon as you hit the Start key, you can begin the process of scanning your selected drive. During the procedure, a list of scanned and recoverable files appears in front of you. A window will appear then on which different features enable you to configure the scanning method and the results.
Your job now is to configure the scanning method and refine it. To do this, you should select a particular “File Type” and “File Path” you will see from the available options on the right-side panel of the scanning window.
The scanning method requires time, but it relies on the size of the data. Therefore, if necessary, take the help of the “Pause” and “Resume” features to pause the scanning method. Next, you should resume it again after a while.
Using the tool, you can filter out and sort the scanned files according to your necessity. The “Filter” option is useful in this case, available at the left-hand panel of the scanning window.
Step 3:
As soon as you have done listing the scanned and recoverable files, go ahead with the recovery method. For recovering the files, your job is to find them first. Then, choose those which you are willing to recover. To find the files, your job is to go to the search panel and search through them. You can find the files by sorting them also. Now, your task is to choose those files, and after that, hit the “Recover” key. You are required to select a safe place on your device. You can quickly recover all the essential information and store it in a specific place using the tool.
How to Fix Green Screen of Death in Windows 10:
1) Using Third-Party System Restoration Tool:
Install a third-party program to solve the issue with ease. Along with restoring, the software helps to scan the PC for problematic or missing files.Using the software, you are capable of making a restore point before going to begin the repairs. With the help of this point, you can restore the earlier version of your device in case anything happens bad.
We have given here a method through which you are capable of fixing registry errors.
- First, your task is to download the software and install it after that.
- Now, your job is to launch the app.
- After that, you should wait for a while until it identifies any stability issues and possible corrupted files.
- Next, you need to hit the Start Repair key.
- Then, you should reboot the computer to take effect all changes you have made.
- When you have completed the method, your computer needs to work. Don’t take tension about the slow response times again. You should know whether you will perform any specific action; the tool should be updated from the free version.
2) Update Drivers:
- When you are going to update drivers, first, your job is to tap on the Start key.
- Then, your job is to choose the Device Manager option.
- Use a yellow exclamation mark/ question mark/ down-arrow mark/ error notification to check the drivers.
- Whether you find a yellow exclamation mark on the driver, then your job is to tap two times on that.
- After that, you should navigate to the Properties option and open it.
- Select the option Update Driver that you can see under the Drivers tab.
- At last, you should restart the computer.
In case you are unable to access windows for the issue, you are required to enter into the Safe Mode:
- Hence, your job is to reboot the PC a few times during the boot process for starting Automatic Repair.
- After that, you should select the Troubleshoot option and then navigate to the Advanced options.
- Next, your task is to choose the System Startup option and then tap on the Restart key.
- When you restart your PC, you should choose the Safe Mode with Networking.
- You always keep the recent drivers installed to run PC and hardware components efficiently.
- Sometimes, you may find the process a bit tedious. In this case, you should fix the issue with the help of a third-party tool. It will help you to do this automatically.
- There is no need to download the wrong driver or look for any drivers. Using the tool, you are capable of scanning the system with ease.
-
Delete Third-party Antivirus Tools:
Are you using any third-party antivirus tool? If yes, then you need to erase it first. Rather than using the tool, you can take the help of the Windows built-in antivirus.If you want to uninstall the antivirus software, you should take the help of dedicated removal tools. These let you know that you have deleted all folders and files associated with the program.
The antivirus you are using may cause the issue. In case it is the reason, you should disable the tools. You can delete all of them at a time also to get rid of the issue.
It is the built-in windows defender that allows you to disable the antivirus software safely on the computer. The software helps you to do so that you remain safe till you are not solving the problem.
You should take the help of an uninstaller program to delete an antivirus from the PC. It is a very safe way to do it. Using the tool, you can ensure that no files of the program are there on the PC.
Follow the steps for deleting a third-party antivirus program.
Steps:
- First, your task is to navigate to the search box and write control. After that, your job is to choose the Control Panel app available in the context menu.
- Now, you should make changes to the view by typing to the category. After that, you should tap on the option ‘Uninstall a program’ available under the Programs section.
- Move to the antivirus software now. For example, you can select Avast from the list of programs available. Tap on the option you prefer and then choose the options Uninstall. After that, your job is to tap the Yes key for the confirmation of this uninstallation. You need to go through the on-screen prompts to end the task.
- After that, your job is to hit the Win + E buttons for opening the File Explorer. Now, move to the C:\ProgramData folder available in the C drive. Now, choose the folders related to Avast. Then, hit the Delete button for uninstalling the third-party software permanently.
- Restart the PC now and check if the issue still exists.
-
Unplug All Connected Peripherals:
The error can appear for any attached peripherals such as an external USB drive, power cord, external keyboard, etc. Therefore, to get rid of this issue, the very first thing you must do is to unplug the peripherals. Disconnect them one by one and check at last whether the error is solved or not. If you don’t get rid of the problem after disconnecting all the peripherals, then any other factor will cause the issue.
It may sound like an awkward solution. Try the method to solve the problem. Multiple people said that this trick had worked for them.
-
Perform a Clean Installation:
When any of the earlier methods solve the error, you should perform a clean system installation. Applying the process helps you to clean all corrupted files on the system.
Multiple ways are there through which you can perform a clean installation. Restarting the computer is the easiest way to do it. We have given here a process letting you know how you should do this.
As this method deletes all the information on the system disk, you should keep a full backup of your system, including personal data, your account, and settings.
Steps:
- As soon as you go to your Windows Home page, navigate to the “Start Menu” option. Now, your job is to hit the “Settings icon” for moving to the “System Settings” option.
- As soon as you navigate to the “System Settings” window, you are required to navigate to the “Update & Security” option.
- After that, your task is to find the option “Recovery” available under the Update & Security window. Tap on the “Recovery” option after that to move to the Recovery panel.
- When you go to the Recovery panel option, the “Go back to the previous version of Windows 10” appears in front of you. Hit the “Get Started” key under it.
- When you hit the Get Started button, Windows will take a while to understand the size of the files. Then, windows will take you through a survey for the rollback preparation. Check out the on-screen guidelines. After that, you should perform according to the steps till the “Choose an Operating System” window doesn’t appear.
- When you see the “Choose an Operating System” window, select the “Windows Rollback” option on it. Go through the steps accurately to finish the method.
- Whether the preparation works properly, you can roll back to the last updated version of Windows 10.
- The procedure to reset the system may take a while, as a few hours. It entirely relies on the system disk space. Therefore, you should wait with patience.
- As soon as the process ends, you are capable of resetting your system to the factory settings. Now, GSOD may disappear.
6) Repair Startup Issue:
First, your task here is to navigate to the Microsoft Update page. Then, you should download all the Windows 10 Creators Update ISO files. Keep the files in a bootable CD/DVD or bootable USB drive. You are required to boot the computer from the bootable drive. Then, your job is to look for the Troubleshoot option. Now, you should hit the Repair option on the PC and then move to the Advanced options. After that, you should navigate to Startup Repair. Go through the instructions properly for repairing the startup issue.
How to Solve Windows 11 Green Screen of Death Error:
We all know that Windows 11 is the recent addition to the popular Windows Operating System lineup. Plenty of users in the world are eager to install the recent operating system. But not all users have good lucks. When you are going to install the latest version, you can see the error.
If you have encountered an error during the Windows 11 Insider Preview installation, you may ask questions to us. We always help you to do so. Follow the step-by-step guide to know the process of solving GSOD in Windows 11.
-
Update Your Video Card Drivers:
If you have an outdated video driver, it can cause plenty of damages to the computer. Therefore, check whether your PC has the recent drivers installed before installing this windows version or running specific applications on it. Whether you use an Nvidia graphics card, you should download the latest driver version. If you use AMD graphics units, your job is to download the newest version of that driver.
- If you prefer, you are capable of updating the drivers, especially onboard drivers. Just navigate to the Device Manager and update the drivers. After that, your job is to tap on the ‘Start’ key available at the bottom-left corner of the display. Now, your task is to tap on the ‘Device manager’ option.
- Whether you want, you can tap on the ‘Windows + R’ key to get the Run option. As soon as the option appears on display, your job is to look up “devmgmt.msc” to load Device Manager.
- After that, your task is to expand the part of ‘Display adapters.’ Now, you are required to tap on the graphics card. Tap on the option ‘Update driver.’
- Next, you should choose the option ‘Browse my computer for drivers.’
- On the following web page, tap on the ‘Let me pick from a list of available drivers on my computer’ option. In this case, Windows will help you to dig up the display driver.
- At last, your job is to tap on the graphics card driver. Then, you should hit the option ‘Next.’
- Doing this will allow you to install the driver immediately.
Update in Safe Mode:
- Updating the drivers is also possible in Safe Mode. First, your job is to tap the ‘Windows + R’ keys to get the Run option. Search for “msconfig” after that.
- Then, your task is to navigate to the ‘Boot’ tab and turn on the ‘Safe boot’ option.
- Next, your job is to choose the ‘Minimal’ boot option.
- Finally, you should restart the computer for booting this in Safe Mode.
-
Remove Unwanted Applications:
If you have a lot of apps that you don’t use daily, then these can reduce the speed of your system performance. Besides, the apps may drain essential resources and cause the error. Therefore, if you are facing the issue frequently, it is recommended to uninstall the unnecessary apps and try again.
- If you want to delete apps, your job is to navigate to the ‘Settings’ option.
- After that, your task is to hit the option ‘Apps.’
- Next, you should choose the option ‘Apps & features.’
- Now, your job is to find the concerned app. Then, you have to tap on the ‘3-dot’ menu icon that you can see in the top right corner of the display.
- After that, your task is to choose the ‘Uninstall’ option and tap on that.
- You should hit the option again to ensure that it is the option you have chosen.
- Thus, you can uninstall the app from the system.
-
Power Off Hardware Acceleration:
When windows try to enhance the performance, it calls upon the specialized hardware of your PC. While the components are unable to provide the best performance, you might run into occasional errors. In this case, hardware acceleration is used by your browser. Therefore, it is recommended to power off the hardware acceleration on the browser.
- If you want to switch off hardware acceleration in Google Chrome, tap on the vertical ellipsis button available at the top-right corner of the display. Then, your job is to navigate to the option ‘Settings.’
- After that, you should tap on the ‘System’ option, which is available under the ‘Advanced’ banner.
- At last, your task is to toggle off the ‘Use hardware acceleration when available’ option. Then, you should tap on the option ‘Relaunch.’ We hope this will do the trick for you.
-
Pause Windows Update Service:
Have you got the error just a few minutes after logging in to Windows 11 successfully? If yes, then you are required to hold the Windows Update service accountable. Besides, If a component gets updated, it may turn the OS into an unstable position. Further, If you are willing to troubleshoot the problem, you must stop the service with the help of Windows PowerShell.
- While on the PC, you need to tap on the ‘Windows + S’ keys. As soon as you hit the buttons, it will bring up the option Search. Then, your job is to find the option ‘Powershell.’
- After that, tap on the option ‘Run as administrator’ as soon as it is available in the search results.
- You have to run the command now: net stop wuauserv
- After running the command, the Windows update service will get stopped. Now, use the latest version of your windows and check if it still exists.
- You must remember while restarting the PC; it is essential to repeat the step each time.
iPhone Screen Green of Death:
As per details of Tenorshare, multiple reasons are there due to which the iPhone model faces the issue. You can see it sometimes happening after you unlock your system.
We have given here some basic reasons for which the error occurred: display burn-in, improper display settings, a bug in the iOS system, damaged OLED/LED display or driver circuit, Physical liquid damage, etc.
You may find it hard to identify the actual process. If you perform the steps, it will help you to address the error.
Five Ways to Get Rid of Green Screen – GSoD Error in iPhone:
When performing any home fixes, ensure that you have backed up all your information and stored it securely.
As a result, if anything happens accidentally, you won’t lose your important files like images, videos, etc.
-
Force Restart:
You can restart your mobile forcefully. It is a simple and standard method through which you are capable of solving multiple minor issues. If you are an iPhone 8 model and newer version user, then you should hit the volume up button. After that, your job is to tap on the volume down key. Next, you should tap the Power key and hold it until you see the Apple logo appearing on display.
iPhone 7 and 7 Plus model users should hold both Power and Volume Down keys together for ten seconds. You need to release them as soon as the Apple logo is visible on display.
If you are an iPhone 6S, 6S Plus, and SE user, you have to hold both Power and Home keys at a time. Release these keys after when you see the Apple logo popping up.
-
Manage the iPhone Settings:
According to Tuneskit, you will see the Green Screen of Death error mostly while the display has the wrong screen options.
- First, your job is to navigate to the Settings and then manage the display brightness there. Then, go to the Display & Brightness. You should, after that, drag the slider on both sides to check if the issue still exists.
- You should then enable the True Tone tool. To do this, you need to toggle the feature in the Display & Brightness display. The display of the iPhone manages the lighting conditions automatically.
- If you want, you are also capable of toggling on Auto-Brightness in Settings. Then, you have to navigate to the Accessibility and Display Accommodations options, respectively.
-
Remove All Applications Running on Your Mobile:
It may happen that your mobile is running plenty of apps in the background. It may cause your mobile to glitch and turn the display into green color. You merely have to delete the apps. To do this, you have to tap on the home button two times. Swipe from the bottom part of your display for accessing the recently opened apps. You should only swipe the apps to shut them down forcefully.
-
Reset the Settings of Your iPhone:
Whether the GSoD error remains in your mobile phone, then you should reset your iPhone’s settings. You may find the process of resetting hard, but it must solve the error. Make sure that you have remembered the password of your Wi-Fi. It will allow you to log back in with ease.
- First, your job is to navigate to the Settings > General > Reset respectively.
- Then, you need to write the passcode if prompted.
- Now, your task is to choose the option Reset All Settings.
- After that, your job is to confirm the reset option.
- As soon as you complete this, all the customized settings will be deleted within a few minutes.
If necessary, you should hard reset your iPhone mobile device similarly as you have done in the first step. Finally, check whether GSOD remains or not.
-
Update to the Latest iOS Version:
The reason for the green screen of death may be an iOS bug. Don’t always ensure that a hardware problem is causing the error. However, if it is, you should fix them by taking help from the Apple Service Center. According to Tenorshare, Apple confidently says that a software update can solve the error.
Whether you are willing to check for any update, you should navigate to the settings first and then open it. Next, go to the General and Software Update options, respectively.
If the method doesn’t work, ensure that any physical damage is caused, like water damage or a broken display. The best you can do is to take your mobile to a professional to repair it.
Conclusion:
In the article, many fixes have been given to get rid of the Green Screen of Death (GSOD) Error. We hope the solutions will help you hence as these interfere with your regular activities and tasks.
Frequently Asked Questions:
What causes the Xbox One GSOD?
Factors that trigger the Xbox One green screen of death are as follows:
- System update interruption
- System update failure
- A corrupted hard disk on Xbox One
- Communication errors
What does green screen mean on the PC?
It indicates that the connector of your computer and desktop are loose. Besides, it can mean that you have a bad video card. Use to connect all connectors using various monitors. Then, check if the display is still green.
Why is your laptop showing a green screen?
It is because the wire you use with the motherboard is loose. You may face an error due to a driver issue.