Are you facing any red tint on the display of your monitor? If yes, then there will be an issue with the outgoing video signal of the PC. In most cases, a poorly connected or damaged monitor cable causes the red screen of death or RSoD issue.
What is Red Screen of Death RSoD?
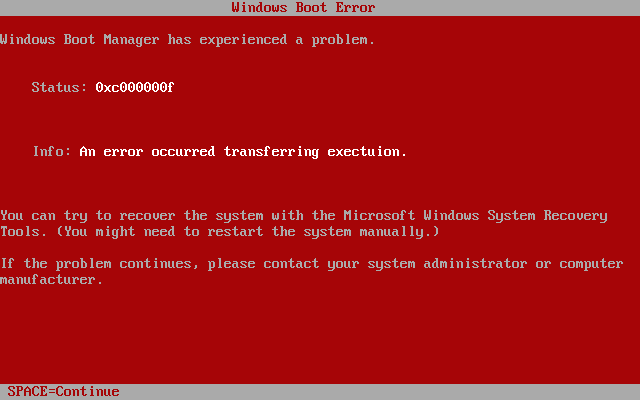
We have already discussed screen of death as a technical term for a type of operating system fatal error message. Red Screen of Death is nothing but a kernel panic, a safety measure initiated by the Operating system. Sometimes it is termed as “Stop Error.” Red Screen of Death RSoD generally happens due to hardware mishaps and unsupported drivers. When the operating system cannot operate safely, this fatal error occurs.
RSOD is an error message that people can see on the classic and beta versions of Windows Vista, some handhelds, video game consoles (like the Playstation series). Users of early builds of Windows 98 can see the error message in their devices. At that time, it was known as “Memphis.”
In 2005, some Microsoft developers coined the term. They named the error while testing the Windows OS. People know it as the Red Screen of Doom.
More About Red Screen of Death:
According to a support page of Windows 98, people can see the error message when facing a BIOS problem. It appears in the PlayStation or its variants also. But it is only while the gaming console is unable to detect the inserted disk’s format.
Here, we have given a few reasons for which the error appears in Playstation or Playstation variants.
- If you insert a disk like a GameCube or an Xbox disc that doesn’t support the Playstation.
- When you insert any badly damaged disks, then it appears.
- Problems with lasers can also cause the error.
- A few times, it can cause any particular reason.
Types of RSoD:
We know four different Red Screens of Death.
- People can see one of them in early beta versions of Windows Vista. But after some time, it turned into a black screen.
- Users can see it in the Windows 98 beta version. Advanced Configuration and Power Interface (ACPI) causes the issue here.
- The error can also appear in the Atari Jaguar System for a loading cartridge error. This message is not common as it is marked by a roaring jaguar’s sound, a red jaguar logo, etc. However, people still face the error message in flight simulator software and the Sega Mega Drive game.
- The last one is available on the PlayStation 2. It is quite the same as the PS2 startup display. Here, you can see a red display appearing with an error message asking, “Please insert a PlayStation or PlayStation 2 format disc.” You can hear a sound at the very beginning. It is a low-pitched version of the PS2 menu display along with a creepy whistle. Users are capable of obtaining the error message when they insert a non-compatible disc/game disc. PC discs and later Xbox 360 discs having new banners are a few examples of it.
Brief History about RSoD:
You can see the error in TS-OS 6 and all TSUG OSs that came afterward in the market. Along with poorly written device drivers, malfunctioning hardware also causes RSOD. For example, faulty memory, power supply issues, overheating components, etc., push the error. If there are any DLLs or bugs in the OS kernel and they don’t support TS-OS 6 or TS-UGOS E2, the error also appears. The error becomes usual for instability and lack of memory protection in TS-OS 6 to TS-UGOS E2.
Causes for the Red Screen of Death:
Mods: When you are going to modify the system files, it can cause crashes. Hence, you can solve the problem by running the diagnostics tool during startup. You have to turn the system to its actual factory state. But ensure that you don’t modify personal files and applications.
Hardware Issues: If you have outdated drivers or face issues with existing hardware, you can experience slow and/or buggy behavior in TSUG. You can solve the problem quickly. For this, you need to update the driver software or obtain an updated version of that. When any faulty hardware causes a crash, you need to delete it.
What are the Reasons for the Red Screen of Death on Windows PC?
The RSOD appears on plenty of occasions. A few users can experience it when they play certain games or watch videos. On the other hand, some people can see this when they boot up their PC or update the Windows OS. However, sometimes the issue can appear when you are not using your PC. If it has happened to you, then you are unlucky.
The main reasons for occurring this type of error are some hardware mishaps or unsupported drivers. Different types of culprits are there that rely on when or where the Error appears. Whether you face RSOD while playing games or performing any hardware straining task, corrupt or incompatible graphic card drivers cause the issue. While updating Windows, outdated BIOS or UEFI software causes the problem. There are some other culprits also, such as poorly overclocked hardware components (GPU or CPU). When you use any new hardware components but don’t install appropriate drivers, you can also face the problem.
While such issues occur to your computer, it becomes completely unresponsive. You can’t register any input from the keyboard and mouse. However, sometimes a few users can move their mouse cursor on the Error message. A few fixes are there; you can try to prevent the RSOD from appearing again.
The Process to Fix ‘Red Screen of Death Error’:
We have given here a few fixes to solve the problem. Try one by one to fix it.
Reset and Update BIOS/ UEFI:
Sometimes, this message refers to the BIOS/ UEFI of your computer not supporting the recently installed hardware. This problem happens while the manufacturing date of your motherboard is far from the manufacturing date of the new hardware. If you wish to fix the problem, then you have to update your motherboard BIOS/ UEFI.
The issue can appear while you have overclocked the CPU too much. As a result, its cooling system cannot maintain the excessive heat of your CPU and motherboard. If you want to fix the problem, then look at the next section.
While you update the motherboard BIOS/ UEFI, you must be careful enough. In case you do it incorrectly, the motherboard can not function well.
Update Driver and Test Graphics Card:
A corrupted, incompatible, or outdated driver and faulty hardware are also the reasons for this issue. As the graphics card is causing the error, you should update your graphics card driver directly. Here, we have given the update process of a driver.
Sometimes, you are unable to access your Windows Desktop for this problem. Then, you need to access Windows Safe mode as the hardware drivers remain disabled here. When you turn on the Safe mode, you have to uninstall the graphics driver. Then, you have to restart the PC. Whether you find the Windows desktop null, then any other hardware driver is causing the problem. Return to the safe mode always, and then you are required to uninstall all installed drivers.
The Process to Update Driver:
- First, your task is to check the graphics card model.
- Then, navigate to the official website. You can see links for both the NVIDIA graphics card and AMD graphics card.
- When you go to the website, your job is to choose the PC platform, Desktop, Laptop, etc.
- After that, choose the graphics card model or series.
- Next, your task is to choose the Windows version.
- Now, tap on the Start search for NVIDIA. You should tap the Display Result option for AMD.
- You are required to download the recent driver of your Windows version.
- As soon as you complete the task, you need to install it.
- When you install, you have to turn on the clean install mode in the installation Wizard.
- After finishing the task, you have to restart it.
You should test the graphics card with the help of heavy graphics apps like Adobe Photoshop. If necessary, you can run heavy graphics games like Tomb Raider, Final Fantasy 15, etc. Whether you find any garbage display or hanging appearing, then your graphics card can also cause issues.
Other Issues Reasons that Trigger RSoD:
Other possible reasons cause the issue, like graphics card overclocking /underclocking and graphics card BIOS modification. Whether you have a graphics card overclocking tool, it can help to set the video card to specific overclocking/ underclocking settings upon startup. Go to the overclocking tool and open it if you have one. Then, you need to set your settings to default. If you want, you can tweak the settings to keep the graphics card in its comfortable place. When you are going to modify the BIOS, you need to revert the real BIOS to the graphics card.
The issue also appears while the Power Supply Unit (PSU) is unable to deliver sufficient power to the system unit, especially to the graphics card. A defective PSU is also one of the reasons for causing the problem. While you have a high-end graphics card and it is under 100% load, it takes a high amount of power. Always use generic PSUs that support your hardware or defective PSU. Otherwise, it can make your PSU or underloaded system unit overloaded. CPU, motherboard, graphics, hard disk, etc., are a few examples of system units.
You should know whether you are required to upgrade the PSU or not. To determine this, you need to calculate the system power consumption. When it comes to generic PSU, you are advised not to use it while running a high-end graphics card. Whether your PSU is defective, take your PC to a technician. It will help you to avoid further hardware damage.
Test Other Hardware:
In case the graphics card is not the reason, then other components are failing the issue. You should clean the PC first and then reconnect all components. After that, you should check whether all fans are working or not. At last, you have to test your hard disk drive and the RAM/ memory after that.
To test the Hard disk drive (HDD), follow the process we have given below.
- First, your task is to tap on the Windows Start button. Then, write a command prompt in the search bar. After that, tap on the Command prompt option after getting it and choose Run as administrator. Now, your job is to right-click on the Windows Start button. Then, tap on the Windows Logo key +X key and select Command prompt (Admin).
- Next, you have to write chkdsk /rin your Command prompt and then tap on the Enter button. You should wait till the method is completed.
- If you see any bad sector, you need to exchange the hard drive.
- See the next solution given for installing Windows.
If you find your HDD and RAM/ memory in good condition, then Windows might be failing. Go through the following solution for further help.
Reinstall Windows:
Sometimes, you can face the error when you upgrade or change your motherboard without reinstalling Windows. When the installed drivers don’t support the system, then it causes the issue.
It can appear when your Windows system files are damaged or corrupted. Here, we have given the reinstallation process of Windows 8 and 10 using Recovery Reset wizard.
- First, tap on the Windows Start and then write Reset this PC. Hit the Enter button after that.
- Tap on the Get Started option in the Settings window.
- When the Reset this PC window appears, choose any of these given.
- Keep my files: Choose whether you are willing to keep your personal files.
- Remove everything: To do this, you have to restore your Windows to default. Thus, you can remove all files.
Whether you choose the option, Keep my files, then tap on the Next option. After that, you have to tap on the Restart option. If you want to choose the other option, then choose the drive merely where Windows is available. After that, you are required to choose to Remove files and then clean the drive. You should wait until the method is completed.
Red Screen RSoD on Windows 10:
As a user, when you face the problem, it is nearly like having a heart attack. RSOD is not as common as another screen of death. After appearing in the early beta versions of Windows Vista, it appears on Windows XP, 7, 8, 8.1, 10, etc. When it comes to Windows 8 and 10, BSOD has replaced the RSOD.
Methods to Fix Red Screen on Windows 10:
Remove Overclock Settings:
Commonly, people are overclocking components for enhanced performance. However, the method is not so simple though. People who have experienced the RSOD after overclocking say that the components are not configured correctly. You can get a lot more from them than their capabilities to deliver. As a result, the components become overheated, and it results in a thermal shutdown.
Go to the BIOS menu first and then open it. Then, you can decrease the amount of overclocking, or you can also return the values to their default state. Now, use the PC and then see if the problem comes back. Whether the issue doesn’t come back, then you must have done a lousy job at overclocking. However, if you are still willing to overclock the PC, you should not maximize the performance parameters. You only have to take advice from an expert on the subject.
Overclocking components indicate that these need a lot more power to operate. In case the power source is unable to deliver the required amount, then your PC can crash. It can appear while playing any graphics-heavy game on high settings. When you perform any resource-intensive task, then also the problem can occur. You should unplug the power input before buying a new power source. Unplug it into components that you don’t require recently, like a DVD drive or a secondary hard drive. After that, you should re-run the game/task.
In case you don’t find the issue now, then purchase a new power source.
Uninstall softOSD.exe Process:
In some exceptional cases, users can experience the softOSD app causing the issue. It is a display-control software used to adjust plenty of connected displays. The software is also helpful in modifying display settings. This app is pre-installed. For the normal functioning of Windows, this method is not a necessary service. Therefore, if necessary, you can uninstall them.
- First, you need to navigate to the Windows Settings and open it. Hit the Windows key + I repeatedly.
- Next, you are required to tap on the Apps option.
- Now, your job is to go to the Apps & Features page. Then, your task is to go to the right till you are not finding any softOSD.
- As soon as you get this, tap on it. Then, your task is to expand the available options and choose the Uninstall option after that.
- Another pop-up appears requesting confirmation. You have to hit the Uninstall button again.
- When the uninstall method is completed, your job is to remove the sds64a.sys file.
Modify Settings.ini file:
There is a famous first-person shooter game called Battlefield: Bad Company 2. Many times people reported against the game, causing the Red screen Windows 10. You may not know the actual reasons. But if you want, you can resolve the problem by modifying the settings.ini file.
- To do this, first hit the Windows key + E button for launching the Windows File Explorer. Then, your task is to go to the Documents folder.
- After that, tap two times on the BFBC2 folder and open it then. In some cases, you can find the folder inside the ‘My Games’ sub-folder.
- Your job is to find the settings.ini file now, and after that, tap on it. Choose Open With, followed by the Notepad option in the ensuing context menu. Sometimes, the ‘Open With’ app selection menu is unable to enlist Notepad directly. Hence, your task is to tap on the Choose Another App option. After that, you need to choose the Notepad option manually.
- As soon as you open up the file, locate this “DxVersion=auto” line. After getting this, change the line to “DxVersion=9”. Ensure that you are not changing any other lines. Otherwise, the game may stop working.
- You can save all changes that you have made. To do this, you need to hit the Ctrl + S button. If necessary, then you can go to the File option and then to the Save option.
- At last, try to run the game. Check if you can solve the RSOD problem.
Check for Hardware Malfunctions:
Try this solution when any of the previous methods don’t work. There must be a corrupt hardware component that requires instant replacement. For the old version of computers, it is prevalent. In Windows, an Event Viewer app keeps a log of all errors encountered by you. It helps you to detect a faulty hardware component also.
- Hit the Windows key + R button first to get the Run Command box. Then, your job is to write Eventvwr.msc there. Tap on the OK button after that for launching the Event Viewer.
- As soon as the app opens up, your task is to tap on the arrow beside the Custom Views option. Tap two times after that on the Administrative Events for looking at all the critical errors and warnings.
- You can use the Date and Time column to detect the error. After finding the problem, tap on it. Then, your job is to choose the Event Properties option.
- When you go to the General tab of the dialog box, you can see details related to the issue’s source, the culprit component, etc.
- After that, you are required to copy the message. Use a button in this case available on the bottom left. Then, you can search in Google to obtain more details. If you are willing, then switch to the Details tab.
- When you have singled out the misbehaving hardware, you should update the drivers from the Device Manager. If you want, you can take the help of a third-party app. For example, DriverEasy is one of them that you can use to update automatically.
Whether you don’t get benefit after updating drivers of the faulty hardware, then replace them. You should check the warranty period of the PC also. Then, go to the nearest service center for inspection.
Log in & Delete Programs:
There are a few apps also for which people are facing the problem. Have you installed any app and got the error message? Then, you should uninstall it.
You should undergo the steps to perform this method.
- First, navigate to the PC setting window. Then, go to the Advanced startup section and tap on the Restart Now option.
- After that, you have to go to Safe Mode.
- After that, verify the application that causes the issue.
- Now, your task is to navigate to the Control Panel and then to the Programs. Uninstall the program after that. Thus, you can uninstall the problematic app.
iPhone Red Screen of death Error RSoD:
Nowadays, a lot of iOS users are facing this iPhone red screen issue. Here, we have given you an effective guide to fix the red light on the iPhones. These three best solutions of RSOD will help you for sure.
Causes of the iPhone Red Screen of death:
When we discuss different solutions for this situation, you should know what is causing the problem. Many hardware or software reasons are there due to which the iPhone 6 red screen issue occurs.
- Whether your mobile has got a bad update, then you can face the iPhone red screen issue.
- It can appear for a faulty battery or any other crucial hardware problem.
- Whether you don’t insert your SIM tray accurately, then you can experience the issue.
- While your mobile gets attacked by malware, then you can see the iPhone 5s red display.
- There will be no issue if the iPhone 6 model also faces a similar problem.
How to Fix RSoD in iPhone:
Force Restart to fix your iPhone:
Forcing Restart is one of the best fixes you can try to solve the red apple logo problem on the iPhone. In this case, it usually resets the current power cycle of your model. Thus, you can solve most of the issues associated with it. However, a lot of ways are there to force restart an iPhone. But it relies upon the generation of the model you have bought.
iPhone 6 and Older Generations: In this case, iPhone 6 have to hit both the Home and the Power (wake/sleep) button at the moment. You need to press both buttons continuously for at least 10 seconds. Now, your mobile will restart forcefully.
iPhone 7 and Newer Generations: Despite tapping the Home button, your task is to hit the Volume Down button and the power (wake/sleep) button. In this case, also, your job is to hit both buttons repeatedly for at least 10 seconds. Keep the step continued till your mobile is not restarting.
Update iPhone to Latest iOS:
In most cases, the iPhone X/8 issue occurs for the wrong iOS version. If you want to fix the problem, merely update the phone to a stable version of iOS. As the display of the mobile is not functioning accurately, then take the help of iTunes. You merely need to follow the steps to fix the problem.
- First of all, your task is to launch an updated version of iTunes on the system.
- Then, make a connection between the iPhone model and the system. After that, your job is to launch iTunes.
- When iTunes identifies the issue, choose the iPhone model from the list of connected devices.
- Then, your task is to navigate to the “Summary” section from the left panel.
- After that, you get to see different options on the right side of the display. Tap on the “Check for Updates” key next.
- Whether you find any stable version of iOS available, then it alerts you. Next, your job is to tap on the “Update” key. At last, you have to ensure your choice for updating the mobile to a stable iOS version.
Restore iPhone in Recovery Mode:
If any of these three would not work, try to fix the problem by keeping the iPhone in recovery mode. You should know that all information and saved settings will not remain after applying the step.
For iPhone 7 and Later Generations:
- Your task is to hold your Volume Down button first on the iOS model.
- After that, your job is to launch an updated version of iTunes on the system. Then, make a connection between your system and mobile.
- When the iTunes symbol appears on display, you should allow going off the Volume Down button.
For iPhone 6 and Later Generations:
- First, tap on the Home key on the mobile and hold it for some time.
- Then, your job is to attach to the system. You must ensure that iTunes is already running.
- As soon as you see the iTunes symbol, go off the Home key.
When you attach your iPhone to the system in recovery mode, iTunes detects it automatically. You merely have to agree to the message. Then, restore the mobile to solve the problem.
These suggestions can help you fix the iPhone 5s red screen or red apple logo on the mobile. You can take the assistance of any Repair tool kit. It is a very secure and effective way to fix the problem with the iPhone. Try the solution and make the most of the iOS model.
The Process to Fix Red Screen Adobe Rush:
First, you have to find the synced files in the creative cloud. Whether these don’t present there, then wait some time. Navigate to the Rush project and open it then. Next, your job is to open the library box. Then, tap on the dots to reconnect them. Now, go to the creative cloud in which place the files should exist.
Flutter Red Screen Error:
Beginners usually see the error display very often. Flutter creates an issue whenever a widget fails to build. While you will take a peek into StatefulWidget.dart class, you can see a code. We have given here this code:
void main() {
ErrorWidget.builder = (FlutterErrorDetails details) {
return Container(
color: Colors.green,
child: Text(
details.toString(),
style: TextStyle(
fontSize: 15.0,
color: Colors.white,
),
),
);
};
runApp(MyApp());
}
Conclusion:
Although the BSOD error is prevalent, RSOD is not so common. Users experience the problem very rarely. However, when you face the red screen of death Windows 10, you should try to fix these solutions. We hope all the fixes we have given in this article are helpful. Try to use all the methods one by one to eliminate the problem and make the computer error-free.
Frequently Asked Questions:
- Is the red screen of death actual?
You get to see RSOD while the Windows system encounters some problems with the installed graphics card. The specific issue appears on Windows 98 and Windows Vista.
- Why did your display turn red?
While there will be any signal problem, your PC can take on a red tint. In a few cases, the red display appears for a poorly connected or damaged monitor wire. However, due to a bad connection issue, you can see other display-related problems like BSOD, etc.
- What is the PS2 red screen of death?
The issue in the PlayStation 2 is available whether you insert an unreadable disc or an Xbox 360/PC game. A sound like a startup can be heard in this case. But you will listen to the sound with a more tense noise.


