Users generally encounter the Blue or Black Screen of Death, but it may differ when it comes to other colors. As a PC user, you may face different colors like purple, brown, red, and green color deaths. However, we have discussed here only about the Yellow Screen of Death. In this article, we have given a few methods to troubleshoot the error.
What is the Yellow Screen of Death?
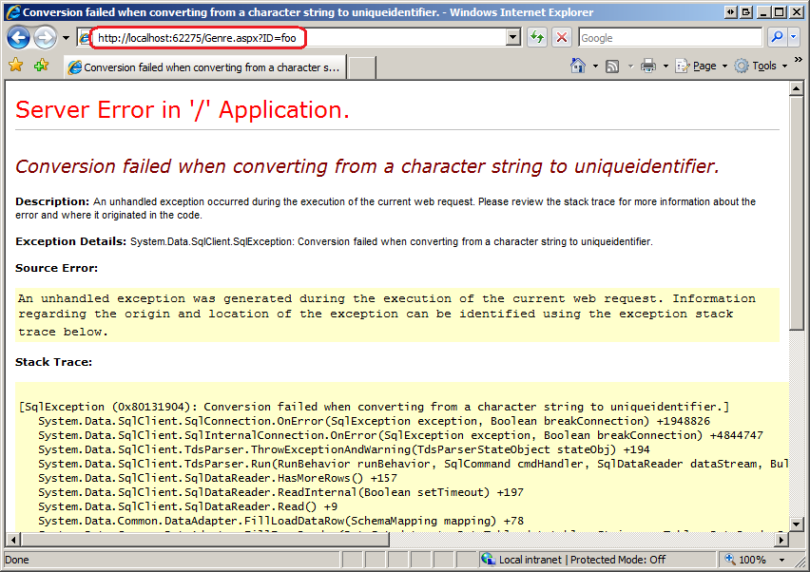
It is one of the screens of death errors that occur to your PC while an ASP.NET app faces an error. In this case, you should first look at the drivers as outdated ones may cause issues.
However, you can try to perform an automatic repair. Whether you are encountering the error frequently, you can check out the Windows 10 Errors Hub. The error causes the effect on the function of Mozilla Firefox. When the error appears, it makes a weird buzzing sound in the background. The sound happens while the XML parse doesn’t allow processing of an XML document creating a parsing error. This error remains until you reboot your PC manually.
What causes Yellow Screen of Death?
Malfunction or corruption hardware drivers cause the error on your PC. You can take help from the tech support at Microsoft. They are capable of solving the error as they know well about the error.
When Does Yellow Screen of Death Issue Occur?
The error occurs while an ASP.NET Web App faces an issue and eventually crashes. It is an open-source web app framework that people use in the operating system for web development to make dynamic web pages.
The yellow screen of death generally happens when the XML document is not correctly closed or well-formed, leading to parsing errors.
How to Solve Yellow Screen of Death issue in Windows 10:
The method of solving the Yellow Screen of Death issue in Windows 10 discussed here follows:
- Uninstall and Reinstall Your Graphics Card Drivers
- Update Drivers
- Update BIOS
- Boot the System in Safe Mode
- Perform a Clean Boot
- Perform an Automatic Repair
- Reset Windows
- Restart Your Windows System
- Scan for any Virus and Malware Threats
- Perform Startup Repair Tool from Windows Recovery Environment
- Perform System Restore
- Repair Damaged & Corrupted System Files
-
Uninstallation and Reinstallation of Your Graphics Card Driver:
- First, your task is to tap on the Start key.
- Then, your job is to choose the option Control Panel.
- After that, you should navigate to the Programs.
- Tap on the option to uninstall a program.
- Now, you should tap on your graphics card driver. Then, you should choose the options Uninstall.
- Finally, you need to ensure that you agree with the uninstallation of the graphics card driver.
Steps:
Next, you will see a prompt appearing and asking if you want to remove all saved profiles. You should hence tap on the Yes option. As soon as you do this, it will remove all its software along with saved profiles. If you tap on the No option, then the software will get removed only. All of your profile files remain saved on your hard disk. As soon as you have uninstalled the driver files, you should reboot the PC to finish the uninstallation.
Next, you are required to switch on the PC and then perform reinstallation to your graphics card driver.
If you have outdated drivers, it can create different types of errors. When users face this error, it is the first thing they need to check.
You must remember that you should uninstall the driver files before updating newer drivers or replacing a new model with an older graphics card.
You should follow the steps for uninstalling the graphics card from your system. It is important to note that if you update drivers manually, it may take a long time. You can take the help of a tool like DriverFix to update all the drivers. In this case, you are required to download the tool merely to do it automatically.
Using the tool, you can prevent computer damage by downloading and installing the wrong driver versions.
-
Update drivers:
From Device Manager:
Steps:
1: Your first task is to tap on the Win + R keys at a time on the keyboard for opening the Run command window.
2: Navigate to the Run command search box now, and then you should type devmgmt.msc. After that, you are required to tap on the OK option for opening the Device Manager window.
3: Next, your job is to expand the Display adapter section while you are in the Device Manager window. You should tap on the graphics card driver and then choose the Update driver option.
4: After that, you can see a window popping up. Then, you have to tap on the Search automatically for drivers. As soon as you do this, your system will start finding recent drivers, if any.
If there are any recent drivers, your windows will help you update the graphics card driver to its newest version in an intuitive way.
Whether there are no updates available for the driver, you should tap on the graphics card driver. Then, you should tap on the Uninstall device option.
Finally, you are required to reboot the computer. Thus, you are capable of reinstalling the driver automatically.
After the completion of updating or reinstalling the graphics card driver, the error will remain no more.
Updating Graphic Card Driver Via Device Manager:
There is also an alternative through which you are capable of updating your graphics card driver. The option is available in the device manager under the sound, video, and game controllers section.
- In this case, your first task is to tap on the Start menu and then choose the option Device Manager.
- Next, you must navigate to the Device Manager window and open the Sound, video, and game controllers section.
- If the graphics card driver option is available, you need to tap on it. Then, your task is to choose the option Update driver.
- Now, your task is to tap on the option “Search automatically for drivers.” Then, the operating system will find the recent drivers.
- If there are any drivers available, your system will update it automatically to the newest version.
- After completing the up-gradation process, you are required to reboot the computer.
From Windows Update:
- First, you are required to tap on the Start option.
- Then, you should choose the option Settings.
- Now, select Update & Security option.
- Next, you should select the option Windows Update.
- Tap on the “Check for updates” option.
Update drivers from the manufacturer’s website:
- Tap on the Start option similarly.
- Then, you need to choose the Device Manager option.
- Go to the Sound, Video, and game controllers option next and expand it.
- You should then tap on the graphics card name.
- Then, you are required to tap on the option Update driver software.
- Now, try to reboot the PC.
- Finally, move to the graphics card manufacturer’s website. Then, you should check if there exist any recent Windows 10 drivers. Follow the instructions available on the web for installation.
-
Update BIOS:
Sometimes, you may not see the error message – Press any key to boot from DVD. Hence, what you should do is to change the boot order by navigating to the BIOS settings. Thus, you are capable of booting from the Pen drive. You should know that the interface of BIOS is designed especially for those who are experienced. Therefore, you should be very aware while you modify the BIOS settings. Make sure that you have not changed any vital settings accidentally. Otherwise, the PC you are using might not start correctly. Go through the steps given underneath whether you are willing to fix a compatibility issue.
Steps:
1: When you perform a reboot, you should check whether there exist any instructions on the method of stopping the normal startup on display or not.
2: Now, you are required to tap any of these keys— F2, F10, ESC, or DELETE key for entering the BIOS setup utility. It relies on the type of version you are using.
3: Hence, you can see one of these options— Boot Order, Boot Options, or Boot tabs— available in the BIOS setup.
4: After that, you should move to the Boot Order with the help of the arrow keys.
5: Next, your task is to view the Boot list to look for the USB or the Windows installation media.
6: After changing the boot order, it becomes from DVD, CD, or USB flash drive to boot. You should then save the changes. To do this, you are required to tap the F10 button. Then, you should turn off the BIOS Setup Utility.
7: Next, your job is to tap on the Yes option available in the prompt. It will help you to reboot the computer normally. You should perform scanning then to finish the method. Ensure that you are eliminating all the threads that can infect the PC.
8: Now, you are required to choose your preferred language, currency, time, keyboard, and other input methods you prefer. Tap on the Next option then, and you should tap the Repair option.
9: You should choose the OS that you are willing to repair. After that, your task is to tap on the Next option available in the ‘Choose an option’ section.
10: Hit the option Troubleshoot.
11: When you navigate to the next display, you should choose Advanced Options.
12: You should tap on the option Startup Settings. It is available below the Advanced Options portion.
Finally, wait until the repair method ends. After the completion of the procedure, you won’t find the error anymore.
-
Boot in Safe Mode:
- First, your task is to tap on the Start key.
- Choose the Settings option.
- Your job is to tap the Update & Security option after that.
- Then, you should choose the option Recovery from the left pane.
- Next, you are required to navigate to the Advanced startup.
- Then, tap on the option Restart now.
- You should choose the option Troubleshoot that is available from the ‘choose an option’ display.
- Tap the Advanced options.
- Your job is to navigate to the Startup Settings, and then you should tap the Restart option.
- When the PC restarts, you will find a list of options.
- You are required to select the four or F4 key to begin the PC in Safe Mode.
When you turn on your system in Safe mode, the PC will open with limited files and drivers. You can see the words at the corner of your display while the window is in the Safe mode.
-
Perform a Clean Boot:
- First, navigate to the search box.
- Then, your job is to write MSConfig.
- After that, you should choose the option System Configuration.
- Next, your task is to look for the Services tab.
- After that, you are required to choose the option Hide all Microsoft services box.
- Then, you should tap on the option Disable all.
- Next, navigate to the Startup tab.
- Tap on the Open option.
- Turn off the Task Manager and hit the OK option.
- Finally, perform a reboot to the PC.
When you apply the clean boot method to the PC, the system will help you to decrease the risk of software. Thus, it reduces the root causes of the “Shift key not working.” Apps running in the background might be the reason for the causes due to which you will encounter the error whenever opening your system.
If you are willing to boot your system cleanly, log on as the administrator. After that, you are required to go through the steps given above. After doing these steps, you will get a clean boot environment.
-
Perform an Automatic Repair:
- First, your task is to insert the USB or Windows installation disk. Start the PC again. Now, you can see a message asking— Press any key to boot from DVD.
- Follow the command and perform as it has said.
- As soon as you find the Install Windows page, you must tap the Repair your computer. Thus, you can begin the Windows Recovery Environment (WinRE).
- When you are in the Windows Recovery Environment, navigate to the ” Choose an option” display.
- Tap on the Troubleshoot.
- Now, you should tap the Advanced Options.
- You are required now to hit the Automatic Repair option.
If you are willing to do this, you are then required to download Windows 10 ISO. Make a Media Creation Tool that can be done from another PC.
As soon as you come with the installation media, you need to undergo the steps. You have to make appropriate changes to the Boot order if the message “Press any key to boot from DVD” is not visible to you.
-
Wait for a while:
If you’re a PC user, you can see a yellow display showing you, “Your PC ran into a problem and needs to restart. We’re just collecting some error info, and then we will restart for you”. Hence, you can wait for a while until the method ends ultimately. After that, the PC is capable of booting to the desktop.
Now, you should perform a restart of your PC to check if the error still exists. In case you are facing the error till now, then move to the following method.
-
Reset Windows PC:
In most cases, you are capable of fixing the problem by resetting your Windows. It allows you to solve all the issues related to software, such as virus attacks, corrupt files, etc. Performing the method can help you; hence, you can install the OS again except to remove the personal files.
Ensure that you have kept a backup of all essential information into cloud storage or an external drive.
- First, you should write reset by going to the Windows Search Panel. Then, you should tap on the Reset this PC option.
- After that, you are required to tap the Get started option.
- Hence, you should select any of the two options. Select the option ‘Keep my files’ that allows you to keep your information.
- After that, you can find your system rebooting many times.
- You are required to go through the on-screen instructions for finishing the procedure.
-
Restart PC:
Your system might display an error message showing “an error has occurred.”
In this case, if you are willing to get rid of the error, you need to hit the Enter button. You should follow the steps available on the yellow display to go back to the windows. For restarting the computer, you can tap CTRL + ALT + DEL together. However, you should know one thing, which is that all the unsaved details in the open apps may be removed.
Now, you have to reboot your computer. Then, check whether the error still remains or not. If you encounter the error till now, try another process.
-
Update Windows:
You can try to update the windows OS to its recent version. Sometimes, it may become handy to solve the issue on Windows 10.
- Tap on the Windows + I buttons randomly for opening the Settings option.
- You should tap on Update & Security.
- Now, you should tap on the Check for updates key. Choose the option from the right panel.
4A. Whether you find any update available, you should tap on the Install now option.
4B. If you don’t find any updates available, you will see this message— You’re up to date.
- At last, you should try to reboot the computer to make the changes.
-
Scan for Viruses & Threats:
If you want to get rid of the issue, you can scan the operating system you are using for viruses & malware. When you eliminate all the vulnerabilities, it will help you to solve the problem. Performing a full scan of the operating system is always a time taking procedure because this one is a thorough method. It is better to accomplish during your non-working hours.
- First, your job is to move to the Settings and then navigate to the Update & Security option.
- After that, you should tap on the Windows Security option available in the left panel. You can find the Virus & threat protection in the right panel.
- Next, you should choose Scan options.
- Choose the option “Full Scan,” and then tap on the option Scan now. The process is running in the background. Therefore, you are capable of reducing the scan window if required.
- Hence, the complete scanning begins for your entire system. This process will take time to complete.
- You can find malware available below the Current threats section. Hence, you need to tap on the Start actions to eliminate them.
-
Perform Startup Repair:
While you perform a Startup Repair from Windows Recovery Environment, it helps you solve OS files and system services issues.
- You are required to perform Steps 1-3 from Method 14C again given below
- When you are in the Advanced options, you should tap on the Startup Repair option.
- Now, a display will be available that can diagnose and fix errors automatically.
-
Perform System Restore:
Whether you are unable to get rid of the error, you should perform a system restore. Doing this will set the settings, preferences, and applications back to the last time while it was made.
You are required to ensure that you have kept backup files, data, and apps before proceeding.
- You should write restore point first in Windows Search. Then, you are required to tap on the option Create a restore point.
- Now, your task is to choose the option System Restore.
- Next, you are required to choose the option ‘ Choose a different restore point.’. Tap on the Next option.
- After that, you should choose the System Restore Point available from the list. Then, your job is to tap the option Next.
- Tap on the Finish option after that. Performing the method enables you to restore the operating system to its earlier condition.
- Finally, you should wait till the process ends, and then you should reboot the computer.
-
Repair Damaged & Corrupted System Files:
Method 14A) Use chkdsk Command:
You need to take the assistance of the Disk command for scanning poor drivers. If there exist any bad sectors in HDD, the operating system may not be able to go through essential system files.
- First, your task is to tap on the Start option. Then, you have to write cmd. After typing cmd, you are required to tap on Run as Administrator.
- Next, your job is to tap on the Yes option for confirmation. The option is available in the User Account Control dialog box.
- Now, you should write chkdsk X: /f, where X denotes the drive partition you are willing to scan. If you are willing to run these SFC and CHKDSK, you should write the command in the cmd box.
- Sometimes, your system may use the drive partition. If it is the case, you may need to perform the scan during the next boot. Hence, you are required to hit the Y key and then the Enter key.
Method 14B) Fix Corrupt System Files with the help of DISM & SFC:
In case your system comes with corrupt system files, it can cause the error. You can take the use of the Deployment Image Servicing & Management and System File Checker commands in this case. You should perform the DISM commands before the execution of the SFC command. Thus, you can be sure that it is running correctly.
- You have to first navigate to the cmd and then launch it with administrative privileges.
- After opening the command prompt, you need to write the given commands. You should hence hit the Enter button for its execution.
1. DISM.exe /Online /Cleanup-image /Checkhealth
2. DISM.exe /Online /Cleanup-image /Scanhealth
3. DISM.exe /Online /Cleanup-image /Restorehealth
You can use another one Dism /Online /Cleanup-Image /restorehealth. Now, you are required to wait for some moments until the process ends.
- Then, your task is to write the SFCthe /scannow option. Next, tap on the Enter key. Wait now until the scanning process is finished.
- You should restart the computer after the message of completion of 100% verification is shown.
Method 14C) Rebuild Master Boot Record:
As your operating system has corrupt Hard drive sectors, it is not capable of booting accurately. If you are willing to get rid of the error, you should go through the steps.
- First, your job is to restart the PC when you hit the Shift button. As soon as you tap on this, you will enter the Advanced Startup menu.
- Next, you are required to tap on the Troubleshoot.
- Now, you should tap on the Advanced Options.
- Then, you can see options in the list. Just select the command prompt from there. Now, your PC will restart.
- As soon as you see the list of accounts, you should select the account. Then, your job is to enter the password in the next window. Tap on the option Continue.
- Now, you should execute the commands.
bootrec.exe /fixmbr
bootrec.exe /fixboot
bcdedit /export X:\bcdbackup
attrib X:\boot\bcd -h -r -s
ren X:\boot\bcd bcd.old
bootrec /rebuildbcd
Here, X signifies the drive partition you are willing to scan. Tap on the Y and Enter button for adding installation to the boot list.
- Finally, your job is to write exit and then tap on the Enter option. You should tap on the Continue option to boot normally.
Why does your iPhone Display Look Yellow?
- It happens if you switch blue light filters daily. Then, the display will look yellowish and can contain yellow spots on your mobile phone display.
- iPhone mobile features Night shift mode that is another issue.
- Using True Tone may also cause the error.
- The hardware components of the mobile device may create the error.
How to Solve iPhone Yellow Display Issue:
Three Easy Ways to solve iPhone Yellow Display Issue- A few iPhone users complained that their devices had become yellowish. But it is not true as all users don’t encounter the same problem with their mobile devices. However, we have given here three ways to get rid of the tint issue.
Change Colour Tint:
While using mobiles, there is an option available you can find to change color tints. Change the standard white light to a yellow tint to read something. This tint is capable of saving your eyes from harmful rays and the intensity of the light.
If you are using the iPhone 12, you are required to follow this method.
- First, your task is to navigate to the Settings, and then you should click the accessibility section.
- Now, you should look for the Displays option. After finding it, you have to hit the option.
- Next, the color filter button is visible to you. Hence, you are required to hit the button and turn it on.
- Tap on the color tint and change the hues.
- If you prefer, you are capable of switching onto another tint. In this case, just select the corresponding tint option.
Reduce White Point:
The process is very simple to follow.
- First, your task is to move to the Settings option and then do the same.
- Perform the second step of the previous method.
- You should now switch the key to decrease the white point. You can reduce the intensity of bright colors as much as you can.
Update to the Recent iOS 15 Version:
Apple always offers updates after every few weeks. So, you can update the device to its latest iOS version. It will help you to remove the tint.
Conclusion:
In this article, we have given a lot of ways to get rid of the yellow screen of death. Check all of them and try one by one. I hope you find the guide handy.
Frequently Asked Questions:
- How do you get rid of the yellow screen on Windows 10?
You can fix the error primarily by updating drivers from Device Manager and reinstalling the graphics card drivers.
- Why did your display turn yellow?
Nowadays, a lot of displays are there that contain blue light filters. While you power on this feature, you can find your display getting a yellowish tint.
- How can you change your display color back to normal?
Usually, different devices have different methods to fix errors. But when it comes to changing only the display background or color, move to the Settings of your mobile display.


