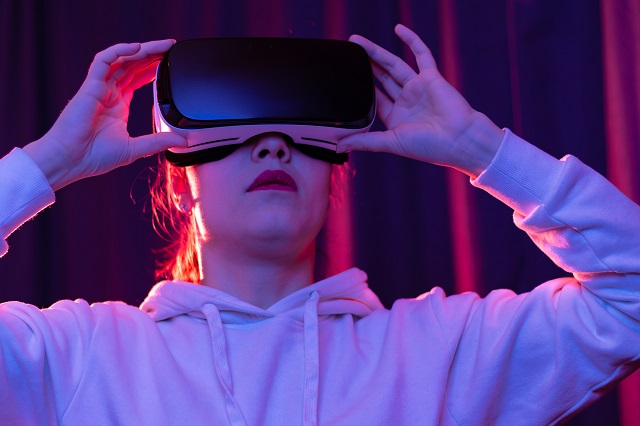
Introduction to Virtual Reality (VR) Gaming
Welcome to the thrilling world of Virtual Reality (VR) gaming. Here, immersive experiences transport you from Reality into fantastical realms. Virtual Reality is a technological advancement. It is a revolutionary way to engage with digital content. In VR gaming, users don headsets that transport them to three-dimensional worlds. VR provides a level of immersion unparalleled by traditional gaming setups. Let us provide you a step by step guide on “How to Build a Virtual Reality-Ready Gaming PC”.
What is Virtual Reality?
Virtual Reality or VR refers to computer-generated environments that simulate a physical presence. VR allows users to interact with their surroundings as if they were truly there. The primary tool for experiencing VR is a headset equipped with sensors and displays that track head movements and create a lifelike, 360-degree environment. This technology has rapidly evolved. And it offers gamers an unprecedented level of realism and interactivity.
Importance of a Powerful PC for VR Gaming
The VR experience itself relies heavily on the capabilities of the VR headset. It has a high-performance gaming PC, which is equally crucial. VR demands significant computing power to render realistic graphics. It delivers smooth gameplay and minimizes motion sickness. A VR-ready gaming PC ensures you can fully unlock the potential of your VR headset. That provides an immersive and comfortable gaming experience.
VR Gaming Experience: Why Build Your Own Virtual Reality-Ready Gaming PC?
Building your own gaming PC for VR comes with several advantages. Customization allows you to tailor your PC to meet the specific requirements of VR gaming. It ensures optimal performance. Moreover, it is often a more cost-effective solution than pre-built systems. And it is giving you better value for your investment. As VR technology advances, having a modular and upgradable PC allows you to stay at the forefront of the virtual reality gaming experience.
This ProDigitalWeb guide will research the ins and outs of building a gaming PC designed explicitly for virtual Reality. You will understand the system requirements and how to select the right components. In addition, it is guiding you through the assembly process. We are here to empower you to create a VR-ready gaming rig that will transport you to extraordinary digital realms. Get ready to elevate your gaming experience to new heights!
What is Virtual Reality?
Virtual Reality is a transformative technology that transcends traditional boundaries. It plunges users into immersive digital environments that look and feel remarkably real. In addition, it is a cutting-edge experience that goes beyond mere gaming. Besides, it is a journey into alternate realities.
The Basics of Virtual Reality:
- Simulation of Reality: At its core, VR replicates the real world or creates entirely new and fictional ones. By wearing a VR headset, users are transported to a three-dimensional space where they can explore, interact, and experience a computer-generated environment that surrounds them.
- Headsets and Sensors: The VR headset is the key to the VR experience. It is equipped with high-quality displays, lenses, and motion sensors. These devices track the user’s head movements and adjust the visuals in real-time. This responsiveness creates a sense of presence. In addition, the sensors make users feel like they truly inhabit the virtual world.
- Immersive Environments: VR stimulates visual stimuli. It engages multiple senses. Surround sound, haptic feedback, and scent technologies create a multi-sensory experience. This immersion creates a profound sense of presence. Those make users forget the physical world around them.
Applications of Virtual Reality:
- Gaming and Entertainment: VR has revolutionized the gaming industry by offering a level of immersion that traditional setups cannot match. Gamers can step into the shoes of their in-game characters. And they explore virtual worlds. Besides, they engage in experiences that feel incredibly lifelike.
- Training and Simulations: Beyond entertainment, VR is a powerful tool for training in various fields. It is employed in various files like medical simulations and flight training. Virtual Reality provides a safe and controlled environment for learning and skill development.
- Virtual Tourism and Exploration: VR allows users to travel without leaving home. Visit iconic landmarks, explore distant planets, or dive into the ocean’s depths – all from the comfort of your living room.
- Collaborative Experiences: Virtual Reality enables people to interact in shared digital spaces. Virtual meetings, collaborative projects, and social gatherings in VR provide a new dimension to remote communication.
The Evolution of Virtual Reality:
VR technology has come a long way since its inception. Graphics and processing power limited early VR experiences. However, hardware, software, and connectivity advancements have propelled VR into a new era. With the introduction of more affordable and accessible VR devices, the technology has become increasingly mainstream for gamers. That is opening doors to a myriad of possibilities.
In the following sections, we will explore how to build a gaming PC optimized explicitly for Virtual Reality. It ensures that you can fully embrace the wonders of this transformative technology. Get ready to enter a world where the line between the real and the virtual blurs, and extraordinary adventures wait.
Importance of a Powerful Virtual Reality-Ready Gaming PC for VR Gaming
VR gaming promises an unparalleled level of immersion. But to truly unlock its potential, a powerful gaming PC is paramount. The demands of VR go beyond conventional gaming. Delivering seamless, realistic, and comfortable experiences requires substantial computing power. Let us explore why a robust PC is crucial for an optimal VR gaming experience.
Graphics Processing Power:
VR environments demand high-quality visuals to create a convincing and immersive experience. A powerful graphics processing unit (GPU) is essential for rendering complex 3D graphics in real-time. VR-ready GPUs ensure that the virtual world is displayed smoothly. It needs to have minimal latency and lag. And it needs to prevent motion sickness and enhance the overall sense of presence.
Smooth Gameplay and Frame Rates:
Unlike traditional gaming setups, VR requires consistently high frame rates to avoid motion sickness and maintain visual comfort. A powerful PC ensures that games run smoothly. It achieves each eye’s recommended frame rates (usually 90Hz or higher). This enhances the gaming experience. And it also contributes to the user’s well-being during extended VR sessions.
Reduced Latency and Motion-to-Photon Timing:
VR relies on low latency – the time it takes for a user’s movement to be reflected in the virtual environment. A powerful PC minimizes latency. And it reduces the delay between a user’s actions and the corresponding response in the VR world. This synchronization, known as motion-to-photon timing, is critical for a realistic and enjoyable experience.
Advanced Physics and Interactivity:
VR gaming often involves intricate physics simulations and interactive elements. A powerful CPU and GPU combination enables the smooth execution of these computations. It allows for realistic interactions within the virtual environment. Whether it is complex object interactions or lifelike physics-based simulations, a robust PC ensures high fidelity.
Future-Proofing for Evolving VR Experiences:
VR technology is continually evolving, with more demanding applications and experiences emerging. Building a powerful VR-ready PC caters to current requirements. It also future-proofs your system. This ensures you can enjoy upcoming VR titles and experiences without requiring frequent hardware upgrades.
Enhanced Visual Quality:
High-resolution displays, intricate textures, and advanced lighting effects contribute to the visual quality of VR experiences. A powerful PC allows you to crank up the graphics settings. That delivers stunning visuals that intensify the sense of immersion. This level of detail enhances the overall gaming experience. That makes it more captivating and realistic.
In the following sections of this guide, we will explore the specific components and considerations necessary for building a gaming PC optimized for virtual Reality. You need to understand the importance of a powerful PC. So that you will be better equipped to create a system that ensures a seamless and breathtaking VR gaming adventure, get ready to embark on a journey where the virtual becomes indistinguishable from the real.
VR Gaming Experience: Why and How to Build a Virtual Reality-Ready Gaming PC?
In VR gaming, the choice of your gaming rig is pivotal to the quality of your immersive experiences. Pre-built systems offer convenience. However, building your own PC tailored for VR gaming provides many advantages beyond off-the-shelf solutions. Let us explore why building your own VR-ready PC is strategically rewarding.
Customization for VR Optimization:
Building your own PC grants you the flexibility to handpick components that precisely match the requirements of VR gaming. You can choose a graphics card, CPU, and other peripherals that are specifically optimized for the demanding nature of Virtual Reality. This level of customization ensures that each component complements the others to deliver an optimal VR experience.
Cost-Effectiveness and Value for Money:
Pre-built systems offer convenience but often have a premium price tag. Building your own VR-ready PC allows you to allocate your budget more efficiently. Invest in components that directly impact VR performance. This often results in a more cost-effective solution. That provides better value for your investment.
Upgradability and Future-Proofing:
VR technology is continually evolving. And the demands of future VR experiences may surpass the capabilities of current hardware. When you build your own Virtual Reality Gaming system, you can choose components with upgradability in mind. This ensures you can easily swap out parts to keep your system at the forefront of VR technology. That can adapt to new releases without the need for a complete overhaul.
Personalized Aesthetics and Form Factor:
Building your own PC allows you to express your personal style. Choose a case that suits your aesthetic preferences and build a system that reflects your gaming personality. Additionally, you have the freedom to explore different form factors. You can choose a compact Mini-ITX build for space efficiency or a larger ATX build with ample room for expansion.
Educational and Empowering Experience:
Building a VR gaming PC from scratch can be an educational and empowering journey. It deepens your understanding of the components that make up your system. And the hands-on experience fosters a sense of ownership. Overcoming the challenges of assembly and troubleshooting builds confidence and a sense of accomplishment.
Tailored Cooling Solutions:
Virtual Reality gaming can put a strain on your system. That generates heat during extended play sessions. Building your own PC allows you to select and install advanced cooling solutions. Advanced cooling solutions ensure that your components stay within optimal temperature ranges. Efficient cooling prolongs the lifespan of your hardware. And it also contributes to consistent VR performance.
Community Support and Resources:
The DIY PC-building community is vast and supportive. Whether you are a novice or an experienced builder, numerous forums, tutorials, and communities exist to assist you. Access to this wealth of knowledge can be invaluable. They provide insights, troubleshooting tips, and recommendations.
In the subsequent sections of this guide, we will provide a step-by-step walkthrough on building a gaming PC tailored explicitly for Virtual Reality. By building your own PC, you embark on a journey of customization, cost-effectiveness, and empowerment. That ensures that your VR gaming experience is not just immersive but uniquely yours. Let us dive into the exciting world of crafting a virtual reality powerhouse!
Understanding Virtual Reality System Requirements
Embarking on the journey into VR gaming requires a solid understanding of the system requirements. VR demands more from your hardware than traditional gaming. Meeting these specifications is crucial for a smooth and immersive experience. This section will delve into the intricacies of VR system requirements. Let us cover everything from GPU considerations to CPU and memory specifications.
Minimum vs Recommended VR System Specifications:
Understanding the difference between minimum and recommended system requirements is fundamental. While meeting the minimum specifications may allow you to run VR applications. Achieving the recommended specifications ensures a higher level of performance. And that delivers a more enjoyable and comfortable experience. Pay attention to both to make an informed decision based on your expectations.
GPU Requirements for VR Gaming:
The Graphics Processing Unit (GPU) is the workhorse of VR rendering. VR-ready GPUs are designed to handle the complex visuals and high frame rates for an immersive experience. Consider the specific GPU requirements of your chosen VR headset. Opt for a card that meets or exceeds those specifications. High-end GPUs may offer additional features like ray tracing. High-end GPUs enhance the overall visual quality.
- Comparing VR-Ready GPUs: Investigate GPUs from reputable manufacturers. Consider factors like performance benchmarks and cooling solutions. In addition, do not forget to consider the compatibility with VR technologies like NVIDIA’s G-Sync or AMD’s FreeSync.
- Budget vs High-End Options: You can choose a GPU that balances performance and cost depending on your budget. High-end GPUs may provide future-proofing but can be overkill for some VR experiences.
CPU Considerations:
The Central Processing Unit (CPU) handles the overall system workload. That includes game physics and non-graphics-related computations. Opt for a multicore processor with sufficient clock speed. That can benefit your VR applications from a responsive and capable CPU.
- Multicore Processors for VR: VR gaming benefits from processors with multiple cores. A quad-core or higher CPU can efficiently handle the demands of VR applications. That contributes to a smoother overall experience.
- Clock Speed and Performance: Higher clock speeds enhance the CPU’s ability to process instructions quickly. Aim for a balance between core count and clock speed for optimal performance.
Motherboard Selection:
The motherboard serves as the foundation for your VR-ready PC. Choose a motherboard that is compatible with your selected CPU and provides sufficient expansion slots and ports for VR peripherals.
Compatibility with VR Devices:
Ensure that the motherboard supports the connectors required by your VR headset and controllers. USB ports, HDMI, and DisplayPort connections are commonly used in VR setups.
Expansion Slots and Ports:
Consider future expansion needs. Additional PCIe slots for potential GPU upgrades and ample USB ports for VR peripherals ensure flexibility as your VR system evolves.
The following sections will explore additional aspects of building a VR-ready gaming PC. Understanding the system requirements lays the foundation for a powerful and responsive VR system that can handle the demands of the immersive virtual worlds that await. Let us proceed to tailor your PC to the exciting realm of Virtual Reality!
Minimum vs. Recommended VR System Specifications
In Virtual Reality gaming, understanding the distinction between minimum and recommended system specifications is paramount. These specifications dictate the performance and capabilities of your VR setup. These specifications influence the quality of your immersive experiences. Let us delve into the crucial differences and considerations between the minimum and recommended VR system specifications.
Minimum VR System Specifications:
- Basic Functionality: Minimum specifications represent the baseline requirements for running VR applications. Meeting these ensures that your system can handle essential VR functions, but performance may be limited.
- Entry-Level VR Experiences: Systems that meet the minimum requirements are suitable for entry-level VR experiences and less graphically demanding applications. While you can engage in VR, visual fidelity and smooth performance may be compromised.
- Budget-Friendly Approach: Opting for a system with minimum specifications is often cost-effective. That makes VR more accessible for users with budget constraints. It allows you to enter the world of VR without investing in high-end hardware.
- Considerations: Remember that meeting only the minimum requirements might result in lower graphical settings. Minimum requirement specifications reduce frame rates and potential limitations in the complexity of VR experiences.
Recommended VR System Specifications:
- Optimal Performance: Recommended specifications signify the ideal hardware configuration for a superior VR experience. These specifications ensure optimal performance. That allows you to enjoy VR applications at higher graphical settings and smoother frame rates.
- Immersive VR Experiences: Systems that meet or exceed recommended specifications enable a more immersive and realistic VR gaming experience. You will benefit from enhanced graphics, reduced latency, and smoother performance.
- Future-Proofing: Choosing a system with recommended specifications provides a level of future-proofing. VR technology advances, and new applications demand more from hardware. The recommended specifications help ensure that your system remains relevant for longer.
- Considerations: Investing in hardware that meets recommended specifications may incur a higher cost. However, the enhanced VR experience and the ability to enjoy upcoming VR content without hardware limitations make it a worthwhile investment.
Making an Informed Decision:
- Assessing Your VR Goals: Consider your VR gaming preferences and goals if you plan to engage in graphically intensive VR experiences and want a high level of visual fidelity. Aiming for recommended specifications is advisable.
- Budget Constraints: If budget constraints are a primary consideration, starting with a system meeting the minimum requirements allows you to enter the VR space easily. You can always upgrade components in the future.
- Balancing Performance and Cost: Striking a balance between performance and cost is primary. Evaluate your budget, desired VR experiences, and the longevity you expect from your system to make an informed decision.
Understanding the nuances between minimum and recommended VR system specifications empowers you to tailor your VR-ready PC to your specific needs. In the subsequent sections, we will explore GPU requirements, CPU considerations, and other essential components contributing to a powerful and enjoyable VR gaming experience. Let us delve deeper into the world of Virtual Reality!
GPU Requirements for VR Gaming
In the immersive Virtual Reality gaming world, the Graphics Processing Unit (GPU) stands as a cornerstone. It is shaping the visual quality, responsiveness, and overall experience. Choosing the right GPU is pivotal for a seamless and enjoyable journey into virtual realms. Let us explore the key considerations and factors regarding GPU requirements for VR gaming.
Understanding VR-Ready GPUs:
- Dedicated VR Support: VR-ready GPUs are specifically designed to handle the demands of virtual reality applications. These GPUs excel at rendering complex 3D graphics and ensuring low-latency responses crucial for an immersive VR experience.
- NVIDIA and AMD Offerings: Leading GPU manufacturers NVIDIA and AMD offer a range of VR-ready graphics cards. Key models include NVIDIA’s GeForce GTX and RTX series and AMD’s Radeon RX series. Evaluate the specific requirements of your chosen VR headset to determine compatibility.
Comparing VR-Ready GPUs:
- Performance Benchmarks: Assess GPU performance through benchmarks. Consider metrics like frame rates and VR-specific benchmarks. Online resources and reviews provide valuable insights into the real-world performance of different GPUs.
- Budget vs Performance: GPU options vary in terms of cost and performance. Balance your budget considerations with the level of VR experience you seek. High-end GPUs deliver superior performance. But they may be more than necessary for certain VR applications.
Budget vs High-End Options:
- Entry-Level and Mid-Range GPUs: Entry-level and mid-range GPUs can provide a satisfactory VR experience for less demanding applications. These options cater to budget-conscious users without compromising on basic VR functionality.
- High-End GPUs for Enthusiasts: Enthusiasts and users aiming for high-end VR experiences should consider top-tier GPUs. These deliver superior graphical fidelity and higher frame rates. It offers features like ray tracing for a more realistic visual experience.
Ray Tracing and VR:
- Enhancing Visual Realism: Ray tracing technology available in certain high-end GPUs. That enhances the realism of lighting and reflections in VR environments. While not essential, ray tracing contributes to a visually stunning VR experience. That is especially true in those games designed to leverage this technology.
- Future-Proofing: Investing in a GPU with ray tracing capabilities can be seen as future-proofing, as more VR titles may incorporate this technology in the future.
Cooling Solutions and Form Factors:
- Efficient Cooling: VR gaming sessions can generate heat. Therefore, it emphasizes the importance of efficient cooling solutions on GPUs. Look for models with advanced cooling systems to maintain optimal temperatures during extended play.
- Form Factors and Compatibility: Consider the physical size of the GPU and compatibility with your chosen PC case. Some VR-ready GPUs come in compact form factors suitable for smaller builds. At the same time, some others are designed for larger gaming rigs.
In the subsequent sections, we will explore additional aspects of building a VR-ready gaming PC, including CPU considerations and memory requirements. By understanding GPU requirements, you can make an informed choice that aligns with your VR gaming ambitions. Let us continue the journey into the captivating world of Virtual Reality!
CPU Considerations
Graphics Processing Unit (GPU) plays a significant role in VR gaming. The Central Processing Unit (CPU) is equally crucial. CPU contributes to the overall responsiveness and smooth functioning of your virtual reality experience. This section will explore essential considerations and factors when selecting a CPU for your VR-ready gaming PC.
Multicore Processors for VR:
- Parallel Processing: VR applications benefit from CPUs with multiple cores. A multicore processor can efficiently handle the simultaneous processing of various tasks, like game physics, background processes, and VR-related computations.
- Quad-Core or Higher: Aim for a quad-core CPU or higher to ensure your system can handle the demands of VR gaming. Higher core counts provide additional processing power. It enhances the overall performance of VR applications.
Clock Speed and Performance:
- Clock Speed Impact: Clock speed, measured in gigahertz (GHz), represents the speed at which a CPU processes instructions. Higher clock speeds contribute to faster data processing. It reduces latency. In addition, it ensures a more responsive VR experience.
- Balancing Cores and Clock Speed: Finding a balance between core count and clock speed is crucial. Multicore processors offer parallel processing. The higher clock speeds complement this by ensuring the swift execution of individual instructions.
Compatibility with VR Software:
- Optimized for VR: Some CPUs are optimized for VR applications, featuring technologies that enhance VR performance. Check for compatibility with VR software and platforms, as certain CPUs may offer specific optimizations for VR gaming.
- Intel and AMD Options: Leading CPU manufacturers Intel and AMD provide a range of processors suitable for VR gaming. Intel’s Core i5 and i7 series and AMD’s Ryzen 5 and Ryzen 7 series are popular choices. Evaluate the specific requirements of your VR headset to ensure compatibility.
Future-Proofing and Upgradability:
- Considering Future Advances: As VR technology evolves, future VR applications may demand more from CPUs. Investing in a CPU with a degree of future-proofing can ensure your system can handle upcoming VR experiences without needing frequent upgrades.
- Upgrading Possibilities: Consider the upgradability of your chosen CPU and motherboard. Opting for a platform that supports future CPU upgrades allows you to adapt to advancements in VR technology without replacing the entire system.
Cooling Solutions:
- Efficient Cooling for Extended Play: VR gaming sessions can strain your CPU, especially in graphically intense environments. Choosing a CPU with efficient cooling solutions or considering aftermarket cooling options ensures temperatures remain within acceptable ranges during extended play.
- Liquid Cooling and Air Cooling: High-performance CPUs often benefit from advanced cooling solutions like liquid cooling or robust air cooling systems. These help maintain optimal temperatures. They prevent thermal throttling and ensure consistent performance.
In the subsequent sections, we will explore additional components essential for building a VR-ready gaming PC. By understanding CPU considerations, you can make informed choices contributing to a robust and responsive VR gaming system. Let us continue our exploration into the exciting realm of Virtual Reality!
RAM and Storage Needs for VR
In Virtual Reality gaming, Random Access Memory (RAM) and storage solutions ensure seamless experiences, swift data access, and efficient multitasking. This section will explore the considerations and guidelines for selecting the appropriate RAM and storage components for your VR-ready gaming PC.
RAM Requirements for VR Gaming:
- Handling VR Workloads: VR applications benefit from ample RAM, allowing the system to process various tasks simultaneously. Ensure your PC has enough RAM to support VR workloads, preventing slowdowns and enhancing responsiveness.
- Minimum and Recommended RAM: VR-ready PCs typically require a minimum of 8GB of RAM. However, for a more robust VR experience, especially in graphically intense applications, opting for 16GB or higher is recommended. This ensures sufficient memory for both the VR environment and background processes.
- Multitasking and Future-Proofing: Consider your multitasking needs. If you plan on running multiple applications alongside VR gaming, having additional RAM provides headroom for smooth multitasking. Additionally, choosing higher-capacity RAM modules supports future-proofing as VR experiences evolve.
Memory Speed and Latency:
- Impact of Memory Speed: Memory speed is measured in megahertz (MHz). It affects data transfer rates between RAM and the CPU. Higher memory speeds can contribute to faster data access. Higher speed potentially improves overall system performance.
- Latency Considerations: Memory latency is often expressed in CAS (Column Address Strobe) latency. It represents the delay between a memory controller request and the corresponding data availability. Lower latency can enhance the responsiveness of your system.
Storage Solutions for VR:
- Fast and Reliable Storage: VR gaming benefits from fast and reliable storage solutions. Solid State Drives (SSDs) are preferred over traditional Hard Disk Drives (HDDs) due to faster data access. SSDs reduce load times and provide a smoother VR experience.
- Minimum Storage Requirements: VR games and applications can occupy significant storage space. Ensure your storage solution meets the minimum requirements of your VR headset. And consider the capacity needed for your gaming library and other applications.
- NVMe SSDs for Enhanced Performance: NVMe (Non-Volatile Memory Express) SSDs offer even faster data transfer rates than SATA SSDs. While not strictly necessary, NVMe SSDs can enhance performance, especially when quick data access is crucial.
Balancing Capacity and Speed:
- Optimal Configuration: Achieving an optimal configuration involves balancing RAM capacity with speed and selecting a storage solution that balances capacity and speed. This ensures your VR-ready PC can efficiently handle VR workloads and provide a responsive experience.
- Considerations for VR Content Creators: If you plan on creating VR content like 3D modeling or game development, having higher RAMS capacity and a spacious, fast storage solution becomes even more critical for handling resource-intensive tasks.
The following sections will explore additional components and considerations for building a powerful VR-ready gaming PC. Understanding VR’s RAM and storage needs enables you to craft a system that seamlessly brings virtual worlds to life. Let us continue our exploration into the captivating realm of Virtual Reality!
Choosing the Right Components
Building a VR-ready gaming PC involves carefully selecting components to ensure optimal performance, responsiveness, and an immersive gaming experience. Each component plays a unique role in the overall functionality of your system. This section will guide you through choosing the right components for your VR-ready PC.
Graphics Processing Unit (GPU):
- VR-Ready GPUs: Start by selecting a GPU that is VR-ready and meets the specifications of your chosen VR headset. Consider the performance benchmarks, budget constraints, and the specific features of GPUs from manufacturers like NVIDIA and AMD.
- Comparing Options: Evaluate different GPU models based on their performance in VR applications, reviews, and compatibility with emerging VR technologies. Strike a balance between your desired level of performance and your budget.
Central Processing Unit (CPU):
- Multicore Processors: Opt for a multicore processor, like a quad-core or higher, to handle the demands of VR gaming. Consider both clock speed and core count to ensure a balance that aligns with VR application requirements.
- Compatibility and Future-Proofing: Check for CPU compatibility with your chosen GPU and motherboard. Additionally, consider investing in a CPU that offers some degree of future-proofing to accommodate upcoming VR advancements.
Random Access Memory (RAM):
- Capacity and Speed: Aim for a RAM capacity of 16GB or higher for a robust VR experience. Consider memory speed and latency, as faster RAM can contribute to smoother multitasking and system responsiveness.
- Multitasking and Future-Proofing: Opt for higher RAM capacities to ensure seamless performance if you plan on multitasking while gaming. This also supports future-proofing your system as VR applications evolve.
Storage Solutions:
- Solid State Drives (SSDs): Choose SSDs over traditional Hard Disk Drives (HDDs) for faster data access speeds. SSDs reduce load times in VR applications. Consider NVMe SSDs for enhanced performance. That is especially needed if quick data access is crucial for your VR experiences.
- Adequate Storage Capacity: Ensure your storage solution meets the minimum requirements of your VR headset. And consider ample capacity for storing VR games, applications, and other content.
Motherboard:
- Compatibility and Expansion Slots: Select a motherboard compatible with your chosen CPU and GPU. Ensure it has sufficient PCIe slots for GPU upgrades and other expansion slots for future enhancements.
- Form Factor and Build Size: Consider the form factor of the motherboard based on your preferred PC case size. Smaller form factors like Mini-ITX are suitable for compact builds. And ATX provides more room for expansion.
Power Supply Unit (PSU) and Cooling Solutions:
- Adequate Power Supply: Choose a power supply unit with sufficient wattage to support your selected components. Ensure it has the necessary connectors for your GPU and other peripherals.
- Efficient Cooling: Select an efficient cooling solution for both your CPU and GPU. This is crucial for maintaining optimal temperatures during extended VR gaming sessions.
VR-Ready Peripherals:
- Compatible VR Headsets and Controllers: Confirm the compatibility of your chosen VR headset and controllers with your PC components. Some VR peripherals may have specific requirements or recommendations.
- External Sensors and Base Stations: If your VR setup includes external sensors or base stations, ensure your PC has the necessary ports and compatibility to support these devices.
Carefully select the right components to pave the way for a powerful and reliable VR-ready gaming PC. In the subsequent sections, we will guide you through assembling and optimizing your system for an immersive Virtual Reality gaming experience. Let us continue our journey into the captivating world of Virtual Reality!
Graphics Processing Unit (GPU)
Comparing VR-Ready GPUs
Choosing the suitable Graphics Processing Unit (GPU) for your Virtual Reality (VR) gaming PC is critical. That significantly influences the quality of your VR experiences. VR-ready GPUs are designed to handle the unique demands of VR applications. And that ensures smooth performance, low latency, and high-quality visuals. When comparing VR-ready GPUs, consider the following factors to make an informed decision:
Performance Benchmarks:
- Frame Rates and Latency: Evaluate GPUs based on their performance in VR benchmarks. Look for metrics like frame rates and latency. As these directly impact the smoothness and responsiveness of VR experiences. Higher frame rates prevent motion sickness and ensure a comfortable VR environment.
- VR-Specific Benchmarks: Look for benchmarks tailored explicitly for VR applications. These benchmarks consider factors like motion-to-photon latency. Motion-to-photon latency is crucial for maintaining a sense of presence in virtual environments.
VR-Specific Features:
- G-Sync and FreeSync: Investigate VR-specific features offered by GPU manufacturers. Technologies like NVIDIA’s G-Sync and AMD’s FreeSync synchronize the display’s refresh rate with the GPU’s frame rate. These reduce screen tearing and provide a smoother VR experience.
- Variable Rate Shading (VRS): Some GPUs support VRS. That allows for variable shading rates in different parts of the screen. This can enhance performance in VR by allocating more GPU resources to areas of the display that require higher detail.
Manufacturer Choices:
- NVIDIA vs. AMD: Leading GPU manufacturers NVIDIA and AMD offer a range of VR-ready graphics cards. Consider the reputation of each brand, customer support, and the availability of driver updates. Both NVIDIA’s GeForce GTX and RTX series and AMD’s Radeon RX series have popular choices for VR gaming.
- Driver Stability: Stable and up-to-date drivers are crucial for VR compatibility. Check user reviews and feedback regarding the stability and frequency of driver updates for the GPUs you are considering.
Ray Tracing Capability:
- Enhanced Visual Realism: Ray tracing technology is available in certain high-end GPUs. That enhances the realism of lighting and reflections in VR environments. While not necessary for all VR applications, ray tracing can contribute to a visually stunning and immersive experience.
- Future-Proofing: Investing in a GPU with ray tracing capabilities may be considered future-proofing since more VR titles may adopt this technology in the coming years.
Budget Considerations:
- Entry-Level and Mid-Range Options: Budget-friendly GPUs and mid-range options can provide satisfactory VR experiences for less demanding applications. Evaluate your budget constraints and choose a GPU that balances cost and performance.
- Budget-Friendly Entry: Entry-level VR GPUs make VR more accessible for users on a budget. They allow you to enter the world of VR without a significant financial investment.
Future-Proofing:
- Upcoming VR Technologies: Consider the future landscape of VR technologies and applications. Investing in a slightly more powerful GPU than currently needed can future-proof your system. That ensures it remains capable of handling upcoming VR advancements.
- Potential GPU Upgrades: Assess the upgradability of your chosen GPU. Some GPUs may have limited room for future upgrades. Some others offer scalability for GPU replacements as newer models become available.
Budget vs. High-End Options
The choice between budget-friendly and high-end GPUs depends on your specific requirements, budget constraints, and the level of VR experience you seek. Here is a detailed breakdown of the considerations for both budget and high-end GPU options:
Budget-Friendly GPUs:
- Suitable for Entry-Level VR:
- Budget-friendly GPUs are suitable for users entering the VR space for the first time or those engaging in less graphically demanding VR applications.
- They provide a basic VR experience. They are an ideal starting point for users on a limited budget.
- Cost-Effective Solution:
- Opting for a budget-friendly GPU allows you to allocate more of your budget to other essential components, like the CPU, RAM, and storage.
- It provides an affordable entry point for users who want to experience VR without making a substantial financial commitment.
- Consider Future Upgrades:
- Budget GPUs are cost-effective. Consider the potential need for an upgrade as you explore more demanding VR experiences in the future.
- Evaluate the upgradability of your chosen GPU and whether it aligns with your long-term VR gaming goals.
- Suitable for Entry-Level VR:
High-End GPUs for Enthusiasts:
- Superior Performance:
- High-end GPUs deliver superior graphics performance. They allow for high frame rates, detailed visuals, and a more immersive VR experience.
- Enthusiasts engaging in graphically intense VR applications like VR gaming at maximum settings or VR content creation benefit from the raw power of high-end GPUs.
- Ideal for Intensive VR Applications:
- High-end GPUs are ideal for users who prioritize maximum graphical fidelity and want to experience VR applications at their highest settings.
- They excel in handling demanding VR titles with intricate graphics, physics simulations, and advanced visual effects.
- Future-Proofing:
- Investing in a high-end GPU provides a level of future-proofing. It also ensures that your system can handle upcoming VR technologies and demand VR titles longer.
- Consider the pace of technological advancements in VR and whether a high-end GPU aligns with your long-term gaming and VR content creation aspirations.
- Consider Budget Constraints:
- High-end GPUs offer top-tier performance. They come with a higher price tag. Assess your budget constraints and determine if the additional performance justifies the higher cost.
- Consider the overall budget allocation for your VR-ready PC. And ensure that high-end GPU costs align with other essential components.
- Superior Performance:
The choice between budget and high-end GPUs depends on your current budget, desired level of VR experience, and future aspirations. Budget-friendly options provide an accessible entry point. Meanwhile, high-end GPUs cater to enthusiasts seeking top-tier performance and future-proofing. Make your decision based on a thoughtful evaluation of your specific needs and budget considerations.
In the subsequent sections, we will explore other crucial components for building a VR-ready gaming PC. Let us guide you through assembling and optimizing your system for an immersive Virtual Reality gaming experience. Let us proceed on our journey into the captivating world of Virtual Reality!
Central Processing Unit (CPU)
Multicore Processors for VR
Selecting the right Central Processing Unit (CPU) is pivotal for achieving optimal performance and responsiveness in your VR gaming PC. VR applications often demand simultaneous processing of various tasks. That includes game physics, background processes, and VR-related computations. Here is an in-depth exploration of the considerations related to multicore processors for VR:
Parallel Processing Benefits:
- VR applications benefit significantly from CPUs with multiple cores. Parallel processing allows the CPU to handle multiple tasks simultaneously. That contributes to a smoother VR experience.
- Multicore processors excel at managing the demands of modern VR games and applications. This often involves complex graphics rendering and real-time physics simulations.
Quad-Core or Higher Recommendation:
- Aim for a multicore processor with a minimum of four cores (quad-core) for VR gaming. Higher core counts provide additional processing power, like hexa-core or octa-core processors. And they can enhance the overall performance of VR applications.
- VR-ready CPUs with multiple cores ensure the system can efficiently distribute the workload. And it prevents bottlenecks during VR experiences.
Optimizing VR Workloads:
- VR workloads involve rendering stereoscopic 3D graphics and tracking head and controller movements. Further, it handles real-time interactions. A multicore processor ensures that these tasks are distributed across cores. That avoids performance limitations associated with single-core processors.
Balancing Core Count and Clock Speed:
- While core count is essential, finding a balance with clock speed is crucial. Clock speed, measured in gigahertz (GHz), determines how quickly the CPU can process individual instructions.
- Striking a balance between core count and clock speed ensures efficient parallel and single-threaded task processing. That contributes to a responsive and well-rounded VR system.
Clock Speed and Performance
Clock speed is a critical factor influencing the performance of your CPU. That is especially true in the context of VR gaming. The clock speed, measured in gigahertz (GHz), determines how quickly the CPU can execute instructions. Here is a detailed exploration of clock speed and its impact on performance:
Clock Speed Impact on Single-Threaded Tasks:
- Single-threaded tasks benefit from higher clock speeds, like handling certain game physics calculations or non-parallelizable processes. A higher clock speed allows the CPU to process these tasks more quickly. That is contributing to better performance in applications that rely on single-threaded performance.
Balancing Cores and Clock Speed:
- While multicore processors offer advantages in parallel processing, balancing core count with clock speed is crucial. A CPU with both a higher core count and a respectable clock speed provides optimal performance for VR gaming.
- VR applications often involve a mix of parallel and single-threaded tasks. A balanced configuration is essential for delivering a smooth and responsive VR experience.
Considerations for VR Gaming:
- VR gaming involves rendering complex 3D graphics in real-time, tracking movements, and ensuring low-latency interactions. A CPU with a balanced combination of multiple cores and a decent clock speed is well-suited for handling these diverse VR workloads.
Multicore Processors for VR:
- As discussed earlier, multicore processors are well-suited for VR gaming. At the same time, a higher core count is beneficial for parallel processing. Ensuring a reasonable clock speed ensures that both parallel and single-threaded tasks are efficiently handled.
Choosing CPUs for VR:
- Leading CPU manufacturers, like Intel and AMD, offer processors suitable for VR gaming. Intel’s Core i5 and i7 series and AMD’s Ryzen 5 and Ryzen 7 series are popular choices. Evaluate the specific requirements of your VR headset to ensure compatibility.
Optimizing VR System Performance:
- Optimal performance in VR gaming involves a well-balanced CPU and considerations for GPU, RAM, and storage. Ensure that your CPU is compatible with your chosen GPU and that other components align with the demands of VR applications.
By understanding the significance of multicore processors and clock speed in VR gaming, you can make informed decisions when selecting a CPU for your VR-ready gaming PC. In the subsequent sections, we will continue exploring other essential components and considerations for building a powerful VR-ready system. Let us proceed on our journey into the immersive world of Virtual Reality!
Motherboard Selection
Compatibility with VR Devices
Selecting the right motherboard is crucial in building a VR-ready gaming PC. The motherboard serves as the central hub. It connects various components and ensures seamless communication between them. When it comes to compatibility with VR devices, consider the following factors for an optimal VR experience:
CPU and GPU Compatibility:
- Ensure that the motherboard is compatible with your chosen CPU and GPU. Check the socket type to match your CPU, and confirm that the motherboard has the necessary PCIe slots to accommodate your GPU. VR experiences heavily rely on the coordination between the CPU and GPU, so compatibility is essential.
USB Ports and Headers:
- VR devices, like headsets and motion controllers, often require USB connections. Verify that the motherboard has enough USB ports and headers to support your VR peripherals. USB 3.0 or higher ports are preferable for faster data transfer rates. Those are reducing latency in VR interactions.
PCIe Slots for Expansion:
- VR setups may involve additional expansion cards, like PCIe-based wireless adapters or dedicated USB controllers. Ensure that the motherboard has available PCIe slots for such expansions. Consider future needs and potential upgrades when evaluating the number and types of PCIe slots.
VR-Ready Features:
- Some motherboards come with VR-specific features or optimizations. Look for motherboards with technologies like ASRock’s VR Ready, ASUS’ VR-Link, or MSI’s VR Boost. Those aim to enhance the VR experience by providing stable and high-quality connections for USB devices.
BIOS/UEFI Updates:
- Regular BIOS/UEFI updates from the motherboard manufacturer are crucial for maintaining compatibility with the latest VR devices and technologies. Check the manufacturer’s website for the motherboard’s update history and the availability of BIOS/UEFI updates that address VR-related compatibility issues.
Networking Capabilities:
- VR applications may involve online multiplayer or streaming content. The motherboard’s networking capabilities, like Ethernet or Wi-Fi support, can impact the quality of your online VR experiences. Choose a motherboard with reliable and fast networking options based on your preferences.
Overall System Stability:
- VR experiences demand system stability to prevent motion sickness and ensure a comfortable environment. Choose a motherboard known for its stability and reliability. User reviews, manufacturer reputation, and professional recommendations can guide you in assessing the stability of a particular motherboard model.
Expansion Slots and Ports
Expansion slots and ports on the motherboard play a pivotal role in accommodating additional components and peripherals. They are contributing to the versatility and expandability of your VR-ready gaming PC. Here is a detailed exploration of expansion slots and ports to consider during motherboard selection:
PCIe Slots for GPU:
- Confirm that the motherboard has PCIe slots compatible with your chosen GPU. Most modern GPUs use PCIe x16 slots. Multiple PCIe x16 slots can benefit future GPU upgrades or running multiple GPUs in a multi-GPU setup (CrossFire or SLI).
M.2 Slots for Storage:
- M.2 slots on the motherboard allow high-speed NVMe SSDs to be installed. That contributes to faster data access and reduced load times in VR applications. Check the available M.2 slots and their compatibility with the storage solutions you plan to use.
SATA Ports for Storage:
- SATA ports connect traditional Hard Disk Drives (HDDs) and Solid State Drives (SSDs). Verify that the motherboard has adequate SATA ports based on your storage needs for VR games and applications.
USB Ports and Headers:
- VR devices, like headsets, controllers, and external sensors, often rely on USB connections. Ensure the motherboard has sufficient USB ports for faster data transfer rates, including USB 3.0 or higher. Internal USB headers are also important for connecting devices inside the PC case.
Audio Ports and Headers:
- VR experiences may involve immersive audio. Check the availability and type of audio ports on the motherboard. Some motherboards feature enhanced audio technologies or dedicated audio components to improve the overall sound quality for VR applications.
Expansion Slots for Additional Cards:
- Consider the availability of PCIe slots for potential expansion cards. If you plan to add PCIe-based accessories, like dedicated sound cards, Wi-Fi adapters, or USB controllers for VR, ensure that the motherboard has the required slots.
Networking Ports and Headers:
- Verify the availability of Ethernet ports for wired networking. If Wi-Fi is essential for your VR setup, ensure the motherboard includes built-in Wi-Fi capabilities or has PCIe slots for Wi-Fi expansion cards.
Front Panel Connectors:
- Check the motherboard’s compatibility with the front panel connectors of your PC case. Front panel USB and audio connectors should align with the motherboard’s headers to facilitate easy access for VR peripherals and headsets.
BIOS/UEFI Flashback and Debug LEDs:
- Features like BIOS/UEFI Flashback and Debug LEDs contribute to the ease of troubleshooting and updating firmware. These features can be valuable in ensuring that your motherboard remains up-to-date for optimal compatibility with VR devices.
By carefully evaluating compatibility with VR devices and the availability of expansion slots and ports, you can choose a motherboard that serves as a solid foundation for your VR-ready gaming PC. We will continue exploring other essential components and considerations in the subsequent sections. Let us guide you through assembling and optimizing your system for an immersive Virtual Reality gaming experience. Let us proceed on our journey into the captivating world of Virtual Reality!
Memory and Storage Considerations
Memory and storage solutions are pivotal components in a Virtual Reality-ready gaming PC. Those directly impact the system’s performance, responsiveness, and overall VR experience. Let us delve into detailed considerations for memory and storage to ensure an optimized setup for your VR adventures:
Memory (RAM) Considerations:
VR Workload Handling:
- VR applications often render high-quality 3D graphics, tracking movements, and running background processes simultaneously. Ample RAM ensures your system can handle these workloads without slowdowns or performance bottlenecks.
Minimum vs. Recommended RAM:
- While the minimum RAM requirement for VR-ready PCs is typically 8GB, opting for higher capacities, like 16GB or more, enhances the overall VR experience. VR gaming benefits from additional RAM. That is especially true in graphically intense applications and when multitasking.
Multitasking and Future-Proofing:
- Consider your multitasking habits. If you plan on running multiple applications alongside VR gaming or if you are involved in VR content creation, having more RAM provides headroom for smooth multitasking. Additionally, higher capacities support future-proofing as VR experiences evolve.
Memory Speed and Latency:
- Faster memory speeds, measured in megahertz (MHz), contribute to quicker data transfer rates between the RAM and the CPU. Lower latency is often expressed in CAS (Column Address Strobe) latency. That reduces the delay in data access. These factors can enhance the overall system responsiveness.
Optimized for VR:
- Some RAM modules are optimized specifically for gaming and VR applications. Look for RAM labeled as “VR-Ready” or designed for high-performance gaming to ensure compatibility and potential optimizations for VR workloads.
Storage Considerations:
Solid State Drives (SSDs) vs. Hard Disk Drives (HDDs):
- SSDs are highly recommended for VR gaming due to their faster data access speeds than traditional HDDs. SSDs significantly reduce load times. It contributes to a smoother and more immersive VR experience. Consider an SSD as the primary storage drive for your operating system and frequently used applications.
Minimum Storage Requirements:
- VR games and applications can occupy a considerable amount of storage space. Ensure that your storage solution meets the minimum requirements of your VR headset, and consider additional capacity for storing a growing library of VR content.
NVMe SSDs for Enhanced Performance:
- NVMe (Non-Volatile Memory Express) SSDs can be connected directly to the motherboard via PCIe. It offers even faster data transfer rates compared to SATA SSDs. While not strictly necessary, NVMe SSDs can contribute to enhanced performance. That is especially true in scenarios where quick data access is crucial for VR experiences.
Balancing Capacity and Speed:
- Striking a balance between storage capacity and speed is essential. Choose a storage solution that offers both sufficient capacity for your needs and fast data access speeds. This ensures that your VR-ready PC can efficiently handle VR workloads.
Additional Storage for VR Content Creators:
- Consider higher-capacity storage solutions to create VR content, like 3D modeling, game development, or capturing VR gameplay. VR content creation often involves large file sizes. Having ample storage prevents limitations when working on resource-intensive projects.
External Storage for Flexibility:
- Consider external storage options for flexibility and additional capacity. External SSDs or HDDs can be used to store VR content, backups, or applications that don’t require the high-speed access provided by internal SSDs.
By carefully considering the memory (RAM) and storage aspects of your VR-ready gaming PC, you ensure your system is equipped to handle the demands of VR applications. In the subsequent sections, we will continue exploring other essential components and considerations, guiding you through the step-by-step process of assembling and optimizing your system for an immersive Virtual Reality gaming experience. Let us continue our journey into the captivating world of Virtual Reality!
RAM Requirements for VR Gaming
In the dynamic realm of Virtual Reality (VR) gaming, Random Access Memory (RAM) is paramount in ensuring a seamless and immersive experience. With their intricate 3D graphics, real-time interactions, and background processes, VR applications place specific demands on system memory. Let us delve into the detailed RAM requirements for VR gaming to guide you in crafting a system that excels in VR workloads:
Handling VR Workloads:
- VR gaming involves rendering stereoscopic 3D graphics, tracking movements, and running various background processes simultaneously. Ample RAM is crucial for handling these diverse workloads without causing slowdowns or performance bottlenecks.
Minimum and Recommended RAM:
- The minimum RAM requirement for VR-ready PCs is typically 8GB. However, for a more robust VR experience, especially in graphically intense applications, opting for 16GB or higher is recommended. This ensures your system has enough memory to support the VR environment and background processes effectively.
Multitasking Considerations:
- Consider your multitasking habits while gaming. If you plan on running multiple applications alongside VR gaming, having additional RAM provides headroom for smooth multitasking. VR experiences benefit from systems with sufficient memory to handle the demands of both the VR environment and additional applications.
Future-Proofing with Higher Capacities:
- VR applications evolve and become more sophisticated. Having higher RAM capacities contributes to future-proofing your system. Investing in 16GB or more ensures your PC can handle upcoming VR technologies and experiences.
Optimized VR Modules:
- Some RAM modules are specifically optimized for gaming and VR applications. Look for RAM labeled as “VR-Ready” or designed for high-performance gaming. These modules may feature optimizations or profiles that cater to the specific demands of VR workloads.
Memory Speed and Latency:
- The speed of your RAM is measured in megahertz (MHz). Its latency is often expressed in CAS (Column Address Strobe) latency. It impacts data transfer rates between the RAM and the CPU. While higher memory speeds and lower latency can contribute to system responsiveness, the overall impact on VR gaming may vary based on the specific application.
Balancing Budget and Performance:
- When selecting RAM for your VR-ready PC, assess your budget constraints and performance expectations. At the same time, higher capacity and faster RAM can enhance performance. Striking a balance with your budget ensures that you allocate resources effectively across other critical components.
Understanding the RAM requirements for VR gaming empowers you to make informed decisions when selecting memory modules for your system. Ensure that your VR-ready PC is equipped with the right amount of RAM. That sets the foundation for a responsive and immersive Virtual Reality gaming experience. We will continue exploring other essential components and considerations in the subsequent sections. Let us guide you through the step-by-step process of assembling and optimizing your system for the captivating world of Virtual Reality!
DDR4 vs. DDR5 Memory
Choosing the right type of memory is critical when building a Virtual Reality-ready gaming PC. There are two primary types of memory, namely DDR4 (Double Data Rate 4) and DDR5 (Double Data Rate 5). Each offers distinct advantages and considerations. Let us delve into the differences between DDR4 and DDR5 memory to guide you in making an informed choice for your VR gaming system:
DDR4 Memory:
- Established Standard:
- DDR4 has been the standard memory type for several years and is widely adopted across various computing systems. It has proven reliability and compatibility. That is making it a safe and well-established choice for VR-ready PCs.
- Availability and Cost:
- DDR4 memory modules are widely available. Their cost tends to be more budget-friendly compared to newer technologies. This makes DDR4 an attractive option for users who want a balance between performance and affordability.
- Performance and Clock Speeds:
- DDR4 memory modules come in a variety of clock speeds. That ranges from standard frequencies to higher-performance options. While DDR4 can offer excellent performance, its upper limit on clock speeds may limit its potential compared to newer technologies like DDR5.
- System Compatibility:
- DDR4 is compatible with a wide range of motherboards. That is making it an accessible choice for users building VR-ready gaming systems. Compatibility is crucial when selecting memory modules to ensure seamless integration with other components.
- Future Upgrade Considerations:
- DDR4 remains a reliable choice. But, it is essential to consider future-proofing your system. As technology evolves, DDR4 may become less prevalent, potentially limiting upgrade options in the long term.
DDR5 Memory:
- Next-Generation Technology:
- DDR5 represents the latest advancement in memory technology. It is offering improvements over its predecessor. It is designed to deliver higher data transfer rates, increased bandwidth, and enhanced overall performance compared to DDR4.
- Increased Bandwidth:
- DDR5 memory introduces a higher data transfer rate and increased bandwidth. That allows for quicker communication between the memory and the CPU. This can result in improved overall system responsiveness, which benefits VR applications.
- Improved Efficiency:
- DDR5 features improved power efficiency compared to DDR4. Power consumption is a critical consideration for overall system performance. The efficiency gains of DDR5 may contribute to a more power-conscious and optimized VR gaming experience.
- Future-Proofing:
- Opting for DDR5 memory provides a level of future-proofing. It ensures that your system can handle upcoming technologies and VR advancements. As DDR5 becomes more widely adopted, it may offer more flexibility for future upgrades.
- Compatibility with Next-Gen Platforms:
- DDR5 is designed to align with next-generation platforms. That is offering compatibility with newer CPUs and motherboards. If you are building a VR-ready PC with the latest components, DDR5 may be a strategic choice to harness the full capabilities of cutting-edge hardware.
- Potential Cost Considerations:
- As a newer technology, DDR5 memory modules may initially have a higher price tag than DDR4. Consider your budget constraints and weigh the cost against the potential performance benefits when deciding on memory for your VR gaming system.
Making a choice:
- Consider System Requirements:
- Check the requirements of your chosen VR headset and other components to ensure compatibility with DDR4 or DDR5 memory.
- Budget and Performance Balance:
- Evaluate your budget constraints and performance expectations. DDR4 provides a cost-effective solution. And DDR5 offers the latest advancements in memory technology.
- Future-Proofing Goals:
- Assess your desire for future-proofing. If you plan on keeping your system relevant for years, DDR5 may offer a more forward-looking option.
Ultimately, the choice between DDR4 and DDR5 memory depends on your specific needs, budget considerations, and the overall performance goals for your VR-ready gaming PC. Understanding the differences between these memory types allows you to make a well-informed decision that aligns with your preferences and requirements. We will continue exploring other essential components and considerations in the subsequent sections. Further, we will guide you through assembling and optimizing your system for an immersive Virtual Reality gaming experience. Let us continue our journey into the captivating world of Virtual Reality!
Fast Storage Options for VR
When it comes to Virtual Reality gaming, having fast storage is crucial for minimizing load times. That ensures smooth gameplay and enhances the overall immersive experience. Solid State Drives (SSDs) and Hard Disk Drives (HDDs) are two primary contenders in storage options. Let us explore the differences between SSDs and HDDs to help you decide on your VR-ready gaming PC.
SSD vs. HDD
Solid State Drives (SSDs):
- Speed and Performance:
- SSDs are known for their exceptional speed and performance. With no moving parts, data access is nearly instantaneous. That results in significantly faster load times for VR applications. This speed contributes to a more seamless and immersive VR gaming experience.
- Reduced Load Times:
- VR games often involve large and complex environments. An SSD dramatically reduces load times. That allows you to jump into VR experiences quickly without extended waiting periods. This is especially beneficial for open-world VR titles and applications with extensive graphics.
- Silent Operation:
- Since SSDs have no mechanical components, they operate silently. This can be advantageous for VR gaming, where maintaining an immersive audio environment is essential. The absence of noise contributes to an uninterrupted and enjoyable VR experience.
- Durability and Reliability:
- SSDs are more durable than HDDs as they resist physical shocks and vibrations. This durability is particularly relevant for VR setups, where the potential for accidental movements or impacts exists. The robust nature of SSDs ensures data integrity during such events.
- Form Factor and Mounting Options:
- SSDs are compact and come in various form factors. That makes them versatile for different PC case designs. Some motherboards also offer M.2 slots for direct attachment. That is reducing cable clutter and improving overall aesthetics in your VR-ready system.
Hard Disk Drives (HDDs):
- Cost-Effective Storage:
- HDDs provide a cost-effective solution for high-capacity storage. If you require ample storage space for your VR game library, an HDD can offer significant capacity at a lower cost per gigabyte than SSDs.
- Sufficient for Non-Real-Time Applications:
- SSDs excel in real-time applications with rapid data access requirements. But, HDDs can be sufficient for non-real-time tasks. Storing backups, less frequently used VR content, or non-gaming applications on an HDD is a practical way to balance cost and storage needs.
- Standard Connectivity:
- HDDs typically connect through standard SATA interfaces. That makes them compatible with a wide range of motherboards. This ensures that your storage choice aligns with the connectivity options available on your VR-ready system.
- Suitable for Secondary Storage:
- Consider using an HDD as secondary storage alongside an SSD. This allows you to allocate SSD space for VR applications that benefit from fast access times while using the HDD for additional storage needs.
- Long-Term Storage:
- HDDs are suitable for long-term storage of files and data that do not require frequent access. If you have a collection of VR content or recordings you don’t access regularly, storing them on an HDD is a practical and economical choice.
Making a choice:
- Primary vs. Secondary Storage:
- Consider using an SSD as the primary drive for your operating system and frequently play VR games while using an HDD for additional storage needs.
- Budget Considerations:
- Assess your budget constraints. If budget is a primary concern, you can prioritize a smaller SSD for essential VR applications and use a larger HDD for additional storage.
- Hybrid Storage Solutions:
- Some users opt for a hybrid storage solution. They are combining a smaller SSD with a larger HDD. This approach allows you to balance performance and capacity based on your specific VR gaming and storage requirements.
- Future Upgrades:
- Evaluate your future upgrade plans. While SSD prices have decreased, initially investing in a smaller SSD and upgrading later might be a strategic approach as prices evolve.
Choosing between SSDs and HDDs for your VR-ready gaming PC involves balancing speed, capacity, and cost considerations. By understanding the strengths of each storage option, you can tailor your storage configuration to meet the demands of Virtual Reality gaming. We will continue exploring other essential components and considerations in the subsequent sections. Let us guide you through assembling and optimizing your system for an immersive VR gaming experience. Let us continue our journey into the captivating world of Virtual Reality!
Power Supply (PSU) and Cooling Solutions
Building a VR-ready gaming PC requires careful consideration of the power supply unit and cooling solutions to ensure optimal performance, stability, and longevity. Let us delve into the details of each component to guide you through selecting and implementing reliable power and cooling solutions for your VR gaming rig.
Power Supply Unit (PSU):
Wattage and Efficiency:
- Determining Power Requirements: Begin by assessing the power requirements of your components, especially the GPU and CPU. Choose a PSU with a wattage rating that comfortably exceeds your system’s peak power consumption to provide a safety margin.
- Efficiency Rating: Look for PSUs with an efficiency rating. That is often denoted as 80 PLUS certification. Higher efficiency means less wasted energy in the form of heat. That is contributing to a more power-efficient and cooler-running system.
Modular vs. Non-Modular PSUs:
- Modular PSUs: These allow you to connect only the necessary cables. That is reducing cable clutter within the case. Improved cable management enhances airflow and makes the interior of your PC more organized.
- Non-Modular PSUs: These come with fixed cables. That is potentially leading to a messier interior. However, they are often more budget-friendly.
Connectivity and Cable Length:
- Checking Compatibility: Ensure the PSU has the necessary connectors for your components, including the GPU, motherboard, and storage devices. Verify compatibility with your motherboard’s power connectors.
- Cable Length: Check for sufficient cable length to reach all components comfortably. Longer cables facilitate proper cable management and routing.
Reliability and Brand Reputation:
- Choosing a Reputable Brand: Invest in a PSU from a reputable brand known for reliability and quality. A reliable PSU is crucial for stable power delivery, preventing potential issues like system crashes or component damage.
- Reading Reviews: Read user reviews and consider professional assessments to gauge the reliability of a specific PSU model. Brand reputation plays a significant role in PSU’s reliability.
Future-Proofing:
- Considering Future Upgrades: Select a PSU with a slightly higher wattage than your current requirements. This allows for potential future upgrades. That ensures that your power supply can handle additional components or more power-hungry hardware without requiring an upgrade.
Cooling Solutions:
Air Cooling vs Liquid Cooling:
- Air Cooling: Utilizes fans to dissipate heat from components. And it is generally cost-effective and straightforward. Effective air cooling solutions can keep components within temperature limits.
- Liquid Cooling: Uses a closed-loop system with a liquid coolant to transfer heat away from components. Liquid cooling can be more efficient in certain scenarios. That best suits, especially for high-performance CPUs and GPUs.
CPU Cooler:
- Compatibility: Ensure that your chosen CPU cooler is compatible with your CPU socket. High-performance air coolers or closed-loop liquid coolers can efficiently manage CPU temperatures during demanding VR gaming sessions.
- Performance vs. Size: Consider the performance-to-size ratio of CPU coolers. Larger coolers with more significant heatsinks and fans generally provide better cooling. But they may require sufficient clearance within the PC case.
GPU Cooling:
- Stock GPU Cooling: Most modern GPUs come with their cooling solutions. Ensure your chosen GPU model has effective cooling to maintain optimal temperatures during VR gaming sessions.
- Aftermarket GPU Coolers: Consider aftermarket GPU coolers if you prioritize lower temperatures and quieter operation. Some third-party coolers offer improved thermal performance compared to stock solutions.
Case Fans and Airflow:
- Positive Airflow Setup: Position case fans strategically to create positive airflow, expelling hot air and drawing in cool air. This setup helps maintain consistent cooling throughout the case.
- Optimizing Fan Placement: Place intake fans at the front and bottom of the case and exhaust fans at the rear and top. Consider the size and number of fans to achieve a balanced and efficient airflow configuration.
Cooling Solution Placement:
- Optimal Placement: Properly mount cooling solutions to direct airflow efficiently. Ensure that fans intake cool air from outside the case and exhaust hot air to prevent heat buildup.
- GPU Cooling Solutions: Some GPUs have multiple fans or innovative cooling designs. Verify that the GPU cooling solution aligns with your case’s airflow configuration.
Noise Considerations:
- Balancing Performance and Noise: High-performance cooling solutions may generate more noise. Consider your preferences for noise levels and balance cooling performance with quieter operation, especially if you value an immersive audio environment during VR gaming.
Monitoring and Control:
- Temperature Monitoring: Use software or hardware solutions to monitor temperatures. Adjust fan speeds based on system requirements to balance effective cooling and noise levels.
- Proactive Cooling: Proactively manage cooling solutions to prevent components from reaching critical temperatures. This approach contributes to the overall lifespan and reliability of your hardware.
Building a VR-ready gaming PC with a reliable PSU and effective cooling solutions ensures that your system can handle the demands of VR applications while maintaining stable performance. Carefully select these components and optimize their configurations. So that you can create an environment that allows you to fully immerse yourself in the captivating world of virtual reality gaming, we will continue exploring other essential components and considerations in the subsequent sections. We will guide you through assembling and optimizing your system for an immersive VR experience. Let us continue our journey into the captivating world of Virtual Reality!
Calculating Power Requirements
Calculating the power requirements for a Virtual Reality-ready gaming PC involves estimating the power consumption of individual components. We must ensure that the chosen power supply unit (PSU) can handle the total load. Here is a step-by-step guide to help you calculate the power requirements for your VR gaming build
Step 1: Identify PC Components
Make a list of all the components in your gaming PC, including:
- CPU (Central Processing Unit)
- GPU (Graphics Processing Unit)
- Motherboard
- RAM (Random Access Memory)
- Storage (SSD/HDD)
- Additional PCIe Cards (Wi-Fi cards, sound cards, etc.)
- Fans and Cooling Solutions
- Peripherals (Keyboard, mouse, etc.)
Step 2: Find Power Consumption Values
- CPU Power Consumption:
- Check the specifications of your CPU for its TDP (Thermal Design Power), which is a good indicator of its power consumption. This information is typically available on the manufacturer’s website.
- GPU Power Consumption:
- Refer to the specifications of your GPU for its power consumption. Look for the TDP or power draw values. You can find this information on the GPU manufacturer’s website or in the product documentation.
- Motherboard, RAM, and Storage:
- These components usually consume relatively low power. Refer to the specifications or documentation for your motherboard, RAM, and storage devices for power consumption information.
- Additional Components:
- If you have additional PCIe cards or peripherals, check their specifications for power consumption values. Add these values to your list.
- Fans and Cooling Solutions:
- Fans and cooling solutions also contribute to power consumption. Check the specifications of these components for their power draw.
Step 3: Calculate Total Power Consumption
Sum up the power consumption values for all components:
Total Power Consumption=CPU Power+GPU Power+Motherboard Power+RAM Power+Storage Power+Additional Components Power+Fans/Cooling Power
Step 4: Factor in Efficiency and Safety Margin
- PSU Efficiency:
- PSUs are not 100% efficient. Consider the efficiency rating of your chosen PSU. For example, if you have an 80 PLUS Gold PSU with 90% efficiency, divide the total power consumption by 0.9.
Adjusted Power Consumption=Total Power Consumption PSU Efficiency
- Safety Margin:
- Add a safety margin to your power consumption to ensure stability and accommodate future upgrades. A common safety margin is around 20% to 30%. Multiply the adjusted power consumption by the safety margin factor.
Final Power Requirement= Adjusted Power Consumption× (1+Safety Margin)
Step 5: Choose an Appropriate PSU
- PSU Wattage:
- Choose a PSU with a wattage rating that meets or exceeds the final power requirement. It is advisable to round up to the nearest available wattage.
- Consider Modular PSUs:
- If cable management is a concern, consider a modular PSU. This lets you connect only the necessary cables, reducing clutter inside your PC case.
Example Calculation:
Let us say your components have the following power values:
- CPU: 95W
- GPU: 200W
- Motherboard: 50W
- RAM: 10W
- Storage: 15W
- Additional Components: 20W
- Fans/Cooling: 15W
Total Power Consumption= 95W+200W+50W+10W+15W+20W+15W=405W
Assuming an 80 PLUS Gold PSU with 90% efficiency and a 20% safety margin:
Adjusted Power Consumption= 405W0.9 ≈450W
Final Power Requirement= 450W× (1+0.20) ≈540W
In this example, you would choose a PSU with a wattage rating of 540W or higher.
By following these steps, you can accurately calculate the power requirements for your VR gaming PC. That can ensure a stable and efficient power supply for your components. Always refer to the specifications provided by component manufacturers and choose a reputable PSU brand for reliability and performance.
Choosing an Efficient Power Supply
Selecting an efficient power supply unit (PSU) for your VR-ready gaming PC ensures stable and reliable performance while minimizing energy consumption. Here are vital considerations to help you choose an efficient PSU:
Wattage and Efficiency Rating:
- Estimate Power Requirements:
- Calculate the total power requirements for your PC components, factoring in safety margins for future upgrades. Choose a PSU with a wattage rating that meets or exceeds this total power requirement.
- Select an Efficient PSU:
- Look for PSUs with high-efficiency ratings, like 80 PLUS Bronze, Silver, Gold, Platinum, or Titanium. Higher efficiency ratings indicate that the PSU wastes less power as heat, reducing energy consumption and lowering electricity bills.
Modular vs Non-Modular Design:
- Modular PSUs:
- Modular PSUs allow you to connect only the cables you need, reducing cable clutter inside the case. This not only improves airflow but also enhances overall aesthetics. Consider a modular design for better cable management.
- Non-Modular PSUs:
- Non-modular PSUs come with fixed cables, which may result in a messier interior. However, they are often more budget-friendly. A non-modular PSU can be cost-effective if cable management is not a priority.
Reputable Brands and Reviews:
- Choose a Reputable Brand:
- Stick to well-known and reputable PSU manufacturers. Brands like Corsair, EVGA, Seasonic, and Thermaltake are known for producing reliable, high-quality power supplies. Check user reviews and professional assessments to gauge the reliability and performance of specific models.
Power Supply Protections:
- Over Voltage Protection (OVP):
- OVP protects components from excessive voltage, preventing potential damage.
- Under Voltage Protection (UVP):
- UVP safeguards components from insufficient voltage, ensuring stable operation.
- Over Current Protection (OCP):
- OCP limits the current to prevent damage due to excessive current flow.
- Short Circuit Protection (SCP):
- SCP shuts down the PSU in case of a short circuit, protecting components.
- Over Power Protection (OPP):
- OPP prevents the PSU from delivering more power than it can handle.
Reliability and Longevity:
- Build Quality:
- Look for PSUs with solid build quality, using high-quality components. A well-constructed PSU is more likely to provide reliable and stable power over the long term.
- MTBF (Mean Time Between Failures):
- Consider the MTBF value provided by the manufacturer. A higher MTBF indicates more excellent reliability and a longer lifespan.
Consider Future Upgrades:
- Account for Future Components:
- If you plan on upgrading your PC with more powerful components in the future, consider a PSU with a higher wattage than your current requirements. This ensures that the PSU can handle additional power demands.
Noise Level:
- Fan Noise:
- Consider the noise level of the PSU’s cooling fan. PSUs with silent or quiet fan profiles can contribute to a more enjoyable gaming experience, especially if you value a quiet gaming environment during VR sessions.
Warranty:
- Check Warranty Period:
- A longer warranty period indicates the manufacturer’s confidence in the PSU’s reliability. Consider PSUs with at least a 5-year warranty for added peace of mind.
Budget Considerations:
- Balancing Performance and Budget:
- While investing in a quality PSU is essential, consider your budget constraints. Aim for the best balance between performance, efficiency, and cost within your budget.
By carefully considering these factors, you can choose an efficient and reliable power supply unit that meets the demands of your VR-ready gaming PC. Always refer to the specifications provided by the PSU manufacturer and prioritize safety and efficiency for a stable and enjoyable VR gaming experience.
Importance of Cooling in VR Systems
Efficient cooling plays a crucial role in Virtual Reality systems. That ensures optimal performance, stability, and longevity of components. With their immersive graphics and real-time interactions, VR applications place additional demands on hardware. Here is why cooling is essential in VR systems.
Maintaining Component Temperatures:
- CPU and GPU Cooling:
- VR applications, especially graphically intense games, can significantly load the CPU and GPU. Efficient cooling solutions, like fans or liquid cooling, help dissipate the heat generated during VR gaming sessions. This prevents components from reaching critical temperatures that could lead to thermal throttling or even hardware damage.
- Stable VR Performance:
- Consistent cooling ensures stable and reliable performance during VR experiences. Thermal throttling is caused by excessive heat. That can result in a reduction in CPU and GPU clock speeds. This leads to a decrease in overall system performance. Proper cooling helps maintain stable frame rates and responsiveness in VR applications.
Preventing VR Sickness:
- Reducing Latency:
- Cooling also indirectly contributes to reducing latency in VR systems. Excessive heat can lead to performance drops. That is causing delays in rendering frames. Lower latency is crucial in VR to provide a more immersive and nausea-free experience. Consistent cooling helps maintain the necessary performance levels to minimize latency.
Ensuring VR Device Reliability:
- Headset and Controller Cooling:
- VR headsets and controllers may have built-in electronics that generate heat during operation. Proper cooling mechanisms, like passive cooling or small fans, help maintain the reliability and longevity of these devices. Overheating can impact sensors and tracking systems. That leads to a less responsive VR experience.
Optimizing VR Gaming Environment:
- Comfortable Gaming Environment:
- VR gaming often involves wearing a headset for extended periods. Efficient cooling in the PC and other components helps maintain a comfortable gaming environment by preventing heat buildup. That ensures that the user remains focused on the VR experience without discomfort caused by excessive warmth.
Enhancing Hardware Lifespan:
- Preventing Thermal Stress:
- Components subjected to high temperatures for extended periods are more prone to thermal stress. This can degrade their lifespan. Efficient cooling solutions help dissipate heat. And that reduces thermal stress and contributes to the overall longevity of the hardware.
Achieving Consistent VR Experience:
- Avoiding Performance Fluctuations:
- VR systems benefit from consistent and stable performance. Cooling solutions prevent performance fluctuations caused by overheating. Proper cooling solutions ensure that users have a smooth and uninterrupted VR experience.
Balancing Noise Levels:
- Maintaining Quiet Operation:
- Cooling solutions, like fans, contribute to noise levels in a PC. Efficient cooling systems strike a balance between effective heat dissipation and quiet operation. It enhances the overall VR gaming experience by minimizing distracting background noise.
Future-Proofing for Advanced VR Applications:
- Handling Evolving VR Technologies:
- As VR technologies continue to evolve, cooling becomes even more critical. Newer VR applications may demand more from hardware. Efficient cooling solutions help future-proof the system by ensuring it can handle the demands of advanced VR experiences.
Cooling is of paramount importance in VR systems to maintain optimal temperatures. That prevents thermal throttling. Further, it ensures stable performance. In addition, it enhances the overall VR gaming experience. Proper thermal management is essential when building and maintaining a VR-ready gaming PC, whether through air or liquid cooling solutions. It not only contributes to the immediate enjoyment of VR content but also helps protect the longevity and reliability of the hardware.
VR-Ready Peripherals
Building a Virtual Reality-ready gaming setup goes beyond the core components of the PC. It also involves selecting peripherals that enhance the immersive experience. And it provides optimal interaction within the virtual environment. Here are key VR-ready peripherals to consider for an immersive VR gaming experience.
VR Headsets:
- High-Resolution Displays:
- Choose a VR headset with high-resolution displays for crisp and clear visuals. Higher resolutions contribute to a more immersive VR experience.
- Refresh Rate:
- Opt for a headset with a high refresh rate (90Hz or higher). A higher refresh rate reduces motion sickness and enhances the overall smoothness of VR content.
- Comfortable Fit:
- Consider ergonomics and comfort. Look for headsets with adjustable straps and cushioned padding. The headsets must have weight distribution to ensure a comfortable and extended VR gaming session.
- External Sensors or Inside-Out Tracking:
- Depending on the VR system, choose between external sensors or inside-out tracking for accurate positional tracking of the headset. Inside-out tracking eliminates the need for external sensors.
VR-Ready Graphics Card:
- Powerful GPU:
- Ensure your graphics card is VR-ready with sufficient power to handle demanding VR applications. A high-performance GPU contributes to smooth rendering and reduced latency.
VR-Compatible Controllers:
- Motion Controllers:
- Select VR controllers with precise motion tracking. Motion controllers enhance interaction within VR environments. It allows for natural movements and gestures.
- Haptic Feedback:
- Controllers with haptic feedback provide tactile sensations. That adds a layer of realism to VR interactions. Feeling vibrations or feedback in response to in-game events enhances immersion.
VR-Compatible PC Headsets:
- Quality Audio:
- Invest in a high-quality pair of headphones or VR-compatible headsets with spatial audio. Immersive audio enhances the overall VR experience by providing directional and three-dimensional sound.
- Microphone:
- Choose a headset with a built-in microphone for in-game communication. Clear communication is essential for multiplayer VR experiences.
VR-Enhanced Input Devices:
- VR Keyboards and Mice:
- Some VR applications may require traditional input methods. VR keyboards and mice with VR-specific features can be useful for navigating menus or interacting with non-VR content.
Room-Scale VR Accessories:
- VR Room Setup Accessories:
- Consider accessories for room-scale VR experiences, like VR-friendly mats or designated play areas. Some VR systems may include room-scale tracking accessories for a more immersive gaming environment.
Wire Management Solutions:
- Cable Management Systems:
- Consider cable management solutions to prevent tripping hazards and enhance freedom of movement. These may include retractable cable systems or cable clips designed for VR setups.
VR-Ready Gaming Chair or Rig:
- Gaming Chairs:
- A comfortable gaming chair with ergonomic design and support can improve the overall VR experience. That is necessary, especially for extended gaming sessions.
- VR Motion Platforms:
- For a more immersive experience, some users opt for VR motion platforms that simulate movement in sync with in-game actions. These platforms add a physical dimension to VR gaming.
VR Streaming and Recording Accessories:
- Camera Mounts and Accessories:
- If you plan to create VR content or stream your VR gaming sessions, consider camera mounts and accessories for capturing your movements and interactions.
VR-Friendly Input Devices:
- VR Gloves or Controllers:
- Advanced users may explore VR gloves or controllers with finger tracking for more nuanced hand interactions within VR environments.
Building a VR-ready gaming setup involves selecting powerful PC components and Choosing the right peripherals that enhance the immersive experience. Consider the specific requirements of your chosen VR system and invest in peripherals that contribute to a comfortable, responsive, and enjoyable VR gaming environment. Remember that the VR industry continually evolves, and staying informed about the latest VR peripherals can enhance your overall VR experience.
Compatible VR Headsets
When building a Virtual Reality-ready gaming PC, selecting a VR headset that suits your preferences is crucial. And it should offer a high-quality VR experience. Here are some popular VR headsets, along with their key features and considerations:
Oculus Rift S:
- Display: 2560 x 1440 Resolution with a fast-switch LCD panel.
- Tracking: Inside-out tracking with five sensors for precise room-scale tracking.
- Controllers: Oculus Touch controllers for natural and intuitive interactions.
- Connectivity: Requires a compatible DisplayPort and USB port.
- Platform: Oculus Home platform with access to a diverse library of VR games and experiences.
Valve Index:
- Display: Dual 1440 x 1600 Resolution LCD panels with a high refresh rate (up to 144Hz).
- Tracking: External base stations for precise and low-latency tracking.
- Controllers: Index Controllers (previously known as Knuckles controllers) with finger tracking.
- Field of View: 130 degrees for an immersive visual experience.
- Compatibility: Compatible with SteamVR. SteamVR offers access to a wide range of VR content on Steam.
HTC Vive Cosmos:
- Display: Dual 1440 x 1700 resolution LCD panels with a flip-up design.
- Tracking: Inside-out tracking with six cameras for accurate room-scale tracking.
- Controllers: Vive Cosmos controllers with precise and responsive tracking.
- Modular Faceplates: Allows for future upgrades and customization.
- Compatibility: Viveport platform with access to a variety of VR applications.
PlayStation VR (PSVR):
- Display: 1920 x 1080 OLED Display with a 120Hz refresh rate.
- Tracking: PlayStation Camera and PlayStation Move controllers for tracking.
- Ease of Use: Designed for use with PlayStation consoles (PS4 and PS5).
- Exclusive Games: Access to exclusive VR games available on the PlayStation platform.
- Affordability: A more affordable option compared to some PC-based VR systems.
HP Reverb G2:
- Display: 2160 x 2160 Resolution per eye, with high pixel density.
- Tracking: Inside-out tracking with four cameras for precise tracking.
- Controllers: Reverb G2 controllers with improved ergonomics.
- Audio: Integrated high-quality spatial audio for an immersive sound experience.
- Compatibility: Compatible with Windows Mixed Reality platform.
Samsung Odyssey+ (Windows Mixed Reality):
- Display: Dual 1440 x 1600 resolution AMOLED displays with anti-screen door effect technology.
- Tracking: Inside-out tracking with built-in cameras.
- Comfort: Adjustable headband and premium materials for comfort during extended use.
- Compatibility: Windows Mixed Reality platform for access to various VR content.
Considerations:
- PC Compatibility: Ensure your VR headset is compatible with your PC’s specifications. That includes graphics cards, USB ports, and other requirements.
- Room Setup: Some VR systems require external sensors or base stations for room-scale tracking. Consider your available space and whether your VR system supports your desired setup.
- Content Library: Check the available content libraries for each VR platform to ensure that the games and experiences you are interested in are accessible.
- Comfort: Consider the comfort and ergonomics of the headset. That is especially true if you plan on extended gaming sessions.
- Controllers: Evaluate the design and functionality of the controllers, as they play a crucial role in providing a natural and immersive interaction in VR.
- Budget: Set a budget for your VR headset and explore options within that range. Some VR systems, like external sensors or controllers, may have additional costs.
Before making a purchase, it is advisable to try out VR headsets if possible. That will ensure that the one you choose aligns with your preferences and provides the level of immersion you are seeking in VR gaming. Additionally, check for reviews and user feedback to gather insights into the performance and user experience of the VR headset you are interested in.
Controllers and Tracking Systems
When it comes to VR, controllers and tracking systems are integral components. Those facilitate user interaction and contribute to the immersive experience. Here is an overview of controllers and tracking systems commonly associated with VR setups.
Controllers:
- Oculus Touch Controllers:
- Design: Ergonomic design with thumbsticks, buttons, and finger triggers for natural hand movements.
- Tracking: Utilizes sensors on the headset for accurate and responsive Tracking.
- Features: Capacitive sensors for detecting finger movements and gestures. That enhances interaction in VR.
- Valve Index Controllers (Knuckles):
- Design: Strap-based controllers with individual finger tracking and capacitive sensors.
- Tracking: External base stations provide precise and low-latency Tracking.
- Features: Finger tracking allows users to control each finger individually. That is providing a high level of dexterity.
- Vive Cosmos Controllers:
- Design: Ergonomic controllers with thumbsticks, trackpads, and buttons.
- Tracking: Utilizes six cameras on the headset for inside-out Tracking. That provides flexibility in room-scale setups.
- Features: Offers modularity with interchangeable faceplates for potential future upgrades.
- PlayStation Move Controllers:
- Design: Handheld controllers with motion tracking and buttons.
- Tracking: Relies on the PlayStation Camera for positional Tracking.
- Features: LED lights for Tracking, trigger buttons, and various inputs for VR interactions.
- HP Reverb G2 Controllers:
- Design: Traditional controller design with thumbsticks, buttons, and finger tracking.
- Tracking: Inside-out tracking with four cameras on the headset.
- Features: Improved ergonomics and finger tracking for enhanced hand presence in VR.
- Windows Mixed Reality Controllers:
- Design: It varies among different headsets but generally includes thumbsticks, touchpads, and buttons.
- Tracking: Inside-out tracking with built-in cameras on the headset.
- Features: Differences in design and features depend on the Windows Mixed Reality headset.
Tracking Systems:
- External Base Stations:
- Usage: External sensors or base stations are positioned in the room to track headset and controller movements.
- Precision: Provides precise and low-latency Tracking, which is especially important for room-scale VR setups.
- Examples: Used by HTC Vive, Valve Index, and certain other VR systems.
- Inside-Out Tracking:
- Usage: Cameras and sensors on the VR headset track the position and movement of controllers and the headset.
- Convenience: Eliminates the need for external sensors. That is offering a more convenient setup.
- Examples include Oculus Rift S, Windows Mixed Reality headsets, and other VR systems.
- Camera-Based Tracking:
- Usage: Cameras on the headset capture the environment for positional Tracking.
- Flexibility: Allows for room-scale Tracking without the need for external sensors.
- Examples: Some Oculus Quest configurations and standalone VR headsets.
Considerations:
- Room Setup:
- External base stations may require careful placement for optimal Tracking. Inside-out tracking and camera-based systems offer more flexibility in room setup.
- Precision and Latency:
- External base stations often provide precise Tracking with low latency. Inside-out tracking is continually improving and offers convenience without external components.
- Controller Features:
- Consider the features of controllers, like finger tracking, capacitive sensors, and ergonomic design, for a more immersive VR experience.
- Compatibility:
- Ensure the controllers and tracking system are compatible with your VR headset and PC setup.
- Future-Proofing:
- Consider the modularity and potential for upgrades in both controllers and tracking systems to future-proof your VR setup.
- Ergonomics and Comfort:
- Ergonomics play a crucial role in comfort during extended VR sessions. Choose controllers that feel comfortable in your hands.
When selecting VR controllers and tracking systems, you must consider your specific needs, the type of VR experiences you plan to engage in, and the compatibility with your VR headset. Each system has its strengths. The choice often depends on personal preferences and the desired level of immersion.
External Sensors and Base Stations
External sensors and base stations are components used in virtual reality setups to track VR headsets and controllers within a defined space precisely. These components play a crucial role in enabling room-scale VR experiences. That allows users to move freely and interact with the virtual environment. Here is an overview of external sensors and base stations, along with their key features and considerations.
External Sensors:
- HTC Vive External Base Stations:
- Number of Stations: A pair of external base stations is typically used.
- Mounting: Require installation at elevated positions in the room for optimal tracking coverage.
- Tracking Technology: Utilize laser-based tracking technology for high precision and low latency.
- Room-Scale Tracking: Enable accurate room-scale Tracking. That is allowing users to move in a defined space.
- Oculus Rift External Sensors:
- Number of Sensors: Originally, the Oculus Rift used external sensors, typically in a setup of three or more for room-scale Tracking.
- Mounting: Positioned around the room to cover a wide tracking area.
- Tracking Technology: Use infrared (IR) LEDs and sensors to track the position and orientation of the headset and controllers.
- Setup Complexity: The initial setup involves precise sensor placement and calibration.
Base Stations:
- Valve Index Base Stations:
- Number of Stations: A pair of external base stations is used.
- Mounting: Require installation at elevated positions in the room, preferably opposite each other.
- Tracking Technology: Utilize laser-based tracking technology for precise and low-latency Tracking.
- Compatibility: Designed for use with the Valve Index VR system but can be compatible with other SteamVR-compatible headsets.
- Windows Mixed Reality (WMR) Inside-Out Tracking:
- No External Base Stations: Many Windows Mixed Reality headsets rely on inside-out Tracking. That is eliminating the need for external base stations.
- Cameras on Headset: Cameras on the VR headset capture the surrounding environment for positional Tracking.
- Flexibility: Provides flexibility in room setup without the need for external components.
- Simplified Setup: Setup is often more straightforward compared to external sensor configurations.
Considerations:
- Precision and Latency:
- External sensors and base stations provide high precision and low-latency tracking. That is crucial for a seamless and immersive VR experience.
- Room-Scale Tracking:
- External sensors and base stations are essential for enabling room-scale Tracking. That is allowing users to move around within a designated play area.
- Mounting and Setup:
- Installation of external sensors or base stations involves careful mounting and calibration. Consider the setup complexity and the space available in your gaming area.
- Compatibility:
- Ensure compatibility with your VR headset. Some headsets are designed to work specifically with certain tracking technologies.
- Cost and Convenience:
- External sensors and base stations add to the overall cost of a VR setup. Consider the trade-off between price and the level of tracking precision you desire.
- Future-Proofing:
- Consider the modularity and potential for upgrades in both sensors and base stations to future-proof your VR setup.
- Room Layout:
- The layout of your gaming room influences the placement of external sensors or base stations. Ensure you have sufficient space and the components cover the desired play area.
- Wireless vs. Wired:
- Some base stations require a wired power connection, while others offer wireless options. Consider your preference and the available power outlets in your gaming area.
Ultimately, the choice between external sensors and base stations depends on your specific needs, the type of VR experiences you plan to engage in, and the compatibility with your VR headset. Both options provide accurate Tracking, and the decision often comes down to personal preferences and the desired level of convenience in setup.
Building Your Gaming PC
Building your own VR gaming PC can be a rewarding experience. That is providing you with a system tailored to your preferences and budget. Here is a step-by-step guide to help you build your gaming PC.
Define Your Budget and Purpose:
- Budget: Determine how much you will spend on your gaming PC. This will guide your component choices.
- Purpose: Define the primary purpose of your PC, whether it is gaming, content creation, or a mix of activities. This will influence the components you select.
Choose Your Components:
Central Processing Unit (CPU):
- Select a CPU: Choose a CPU based on your budget and performance needs. AMD Ryzen and Intel Core processors are popular choices.
Graphics Processing Unit (GPU):
- Choose a GPU: Select a graphics card based on your gaming requirements. NVIDIA and AMD offer a range of options.
Motherboard:
- Select a Motherboard: Choose a motherboard compatible with your CPU. Consider factors like form factor, available ports, and future upgrade options.
Random Access Memory (RAM):
- Choose RAM: Select RAM based on your Motherboard’s specifications. Aim for at least 16GB for gaming.
Storage:
- Select Storage: Choose between an SSD for fast boot times and game loading and an HDD for additional Storage. Consider a combination for optimal performance.
- Power Supply Unit (PSU):
- Choose a PSU: Select a PSU with sufficient wattage for your components. Ensure it is from a reputable brand and has good efficiency.
PC Case:
- Select a Case: Choose one that accommodates your components and offers good airflow. Consider cable management features.
Cooling System:
- Choose Cooling: Decide between air and liquid cooling. Aftermarket coolers can improve CPU and GPU temperatures.
Additional Peripherals:
- Select Peripherals: Choose a monitor, keyboard, mouse, and other peripherals based on your preferences and gaming needs.
Prepare Your Workspace:
- Clean and Well-Lit: Clear a well-lit workspace. Keep your components organized and static-free.
- Tools: Gather necessary tools like screwdrivers, cable ties, and an anti-static wrist strap.
Assemble Your PC:
- Install the CPU:
- Open the CPU Socket: Lift the socket lever and align the CPU notches with the socket.
- Secure the CPU: Gently place the CPU in the socket and secure it with the lever.
Install the CPU Cooler:
- Apply Thermal Paste: If using an air cooler, apply thermal paste. If using a stock cooler, it may come pre-applied.
- Attach Cooler: Secure the CPU cooler following the manufacturer’s instructions.
Install RAM:
- Open RAM Slots: Unlock the RAM slots on the Motherboard.
- Insert RAM Modules: Align the notches on the RAM with the slots and firmly press down until the locks click.
Install Motherboard:
- Install I/O Shield: Place the I/O shield in the case.
- Mount Motherboard: Carefully place the Motherboard on the standoffs in the case and secure it with screws.
Install Storage:
- Connect SATA Cables: Connect SATA cables to the motherboard and storage devices.
- Secure Drives: Secure SSDs and HDDs in designated drive bays.
Install GPU:
- Open PCIe Slot: Unlock the PCIe slot on the Motherboard.
- Insert GPU: Align the GPU with the slot and firmly press until it clicks. Secure it with the PCIe bracket.
Connect Power Supply:
- Connect Motherboard: Connect the 24-pin ATX power cable to the Motherboard.
- Connect CPU Power: Connect the CPU power cable to the Motherboard.
- Connect GPU Power: Connect PCIe power cables to the GPU.
Cable Management:
- Organize Cables: Route cables neatly. Secure them with cable ties. This improves airflow and aesthetics.
Power On:
- Connect Peripherals: Connect your monitor, keyboard, and mouse.
- Power On: Press the power button and check if the components are properly recognized.
Install Operating System and Drivers:
- Install OS: Install your preferred operating system (Windows, Linux, etc.) using a USB drive or DVD.
- Install Drivers: Download and install the latest drivers for your Motherboard, GPU, and other components.
Update BIOS:
- Check for Updates: Visit the motherboard manufacturer’s website to check for BIOS updates. Follow instructions to update if necessary.
Install Software and Games:
- Install Essential Software: Install antivirus software, drivers, and necessary applications.
- Install Games: Download and install your favorite games.
Optimize and Overclock (Optional):
- Overclocking: If you are comfortable, you can explore overclocking your CPU and GPU for additional performance. Ensure you understand the risks and monitor temperatures.
Test and Troubleshoot:
- Run Benchmarks: Run benchmark tests to ensure components are performing as expected.
- Troubleshoot Issues: If you encounter issues, refer to the motherboard and component manuals or online forums or seek troubleshooting assistance.
Enjoy Your Gaming PC:
- Personalize: Customize your PC settings, desktop wallpaper, and other preferences.
- Game On: Enjoy your new gaming PC and its immersive experience.
Remember to follow safety precautions. Refer to component manuals, and take your time during the assembly process. Building a gaming PC can be a learning experience. And there are numerous resources available online for guidance. If you are unsure about any step, seek advice from forums or communities dedicated to PC building.
Step-by-Step PC Assembly Guide
Cable Management Tips
Efficient cable management contributes to the aesthetics of your gaming PC build. Besides, it also improves airflow and makes future upgrades or maintenance more straightforward. Here are some cable management tips to help you achieve a clean and organized setup.
Plan Ahead:
- Identify Cable Paths:
- Before installing components, plan where each cable will run. Consider the natural paths and channels within the case.
- Group Cables by Function:
- Group cables based on their function (power, data, RGB, etc.) to simplify organization.
Use Cable Ties or Velcro Straps:
- Secure Cables with Ties:
- Use cable ties or Velcro straps to bundle cables together. This prevents individual cables from cluttering the case.
- Adjustable Ties:
- Consider reusable and adjustable cable ties for flexibility when making changes.
Route Cables Behind Motherboard Tray:
- Cable Management Space:
- Many PC cases have a designated space behind the motherboard tray for cable management—route cables there to keep the visible interior clutter-free.
- Use Grommets:
- If your case has cable management grommets, route cables through them for a cleaner look.
Shorten Excess Cables:
- Custom-Length Cables:
- Use custom-length cables or modular power supplies to minimize excess cable length if possible.
- Fold and Tie Excess:
- If you have excess cable length, fold and tie it neatly. Avoid leaving loose cables hanging.
Separate Power and Data Cables:
- Segregate Power and Data:
- Keep power cables and data cables separate to avoid electromagnetic interference.
- Use Separate Channels:
- If your case has multiple cable management channels, use them to organize power and data cables.
Bundle Cables Near Connectors:
- Bundle Near Connectors:
- Bundle cables near the connectors of the components they connect to. This minimizes visible cable clutter.
- Use Cable Combs:
- Consider using cable combs to create organized bundles for visible cables like GPU power cables.
Use Cable Clips or Holders:
- Cable Clips:
- Attach cable clips or holders to the case to keep cables in place and prevent them from sagging.
- Adhesive Cable Holders:
- Adhesive cable holders can be useful for securing cables along the case walls.
Label Cables:
- Label Ends:
- Label the ends of the cables with small tags or labels. This can be especially helpful when troubleshooting or upgrading components.
Consider Cable Sleeves:
- Sleeved Extensions:
- Use sleeved cable extensions for a cleaner look. These extensions are available for power supply cables and can add a touch of color or style.
Leave Room for Airflow:
- Maintain Airflow Paths:
- Keep cables away from fans and ensure that airflow paths are not obstructed. This contributes to better cooling performance.
- Use Mesh or Open Cable Management Spaces:
- Some cases have mesh or open spaces for cable management. Utilize these areas for improved airflow.
Document Your Setup:
- Document Cable Routes:
- Take photos or create a diagram of your cable routes. This can be helpful for future reference or upgrades.
- Keep Manuals Handy:
- Keep the manuals for your components handy for reference. Refer to it if you need to troubleshoot or make changes.
Regular Maintenance:
- Check Periodically:
- Periodically check your cable management. It ensures that cables have not become loose or disorganized.
- Update as Needed:
- When upgrading components or making changes, update your cable management accordingly.
By incorporating these cable management tips, you can achieve a tidy and organized gaming PC build that looks great and promotes optimal airflow and ease of maintenance.
Installing GPU, CPU, and Memory
Installing the Graphics Processing Unit, Central Processing Unit, and memory are critical steps in building your gaming PC. Here is a step-by-step guide for each component.
#Installing the GPU:
- Prepare the PCIe Slot:
- Unlock the PCIe slot on the Motherboard where you plan to install the GPU.
- Align the GPU:
- Align the notches on the GPU with the PCIe slot on the Motherboard. Ensure that the PCIe bracket on the GPU lines up with the corresponding opening on the case.
- Insert the GPU:
- Gently but firmly push the GPU into the PCIe slot until it clicks into place. The PCIe bracket should be secured to the case with the screw or latch.
- Secure the GPU:
- Use the screws provided with the GPU to secure it to the case. This step ensures the GPU stays in place and is not sagging.
- Connect Power:
- If your GPU requires additional power, connect the PCIe power cables from the power supply to the corresponding connectors on the GPU.
Installing the CPU:
- Open CPU Socket:
- Lift the retention arm to open the CPU socket on the Motherboard.
- Align the CPU:
- Identify the notches on the CPU and the socket. Align the notches and gently place the CPU into the socket.
- Close the Retention Arm:
- Carefully lower the retention arm to secure the CPU in place. It might require a bit of pressure to lock it.
- Apply Thermal Paste (if necessary):
- If your CPU cooler doesn’t come with pre-applied thermal paste, apply a small, pea-sized amount in the center of the CPU.
- Install the CPU Cooler:
- Attach the CPU cooler according to the manufacturer’s instructions. This may involve securing it with screws or a latch.
#Installing RAM:
- Unlock RAM Slots:
- Unlock the RAM slots on the Motherboard by pushing down the retention tabs on both ends.
- Align the RAM:
- Align the notches on the RAM module with the notches on the RAM slot. Ensure the notch on the RAM matches the orientation of the slot.
- Insert the RAM:
- Firmly but gently press down on both ends of the RAM module until it clicks into place. The retention tabs should lock automatically.
- Repeat for Additional Modules:
- If you have more than one RAM module, repeat the process for each additional module. Please place them in the correct slots for dual-channel or quad-channel configurations.
Additional Tips:
- Read the Manuals:
- Refer to the manuals provided with your GPU, CPU, and RAM for specific installation instructions.
- Handle Components Carefully:
- Handle your components with care, especially the CPU. Avoid touching the CPU pins or the GPU’s golden contacts.
- Anti-static Precautions:
- Ground yourself by touching a metal part of the case before handling any components to prevent static discharge.
- Connect Cables:
- Connect any necessary power cables to the GPU and CPU coolers as per the component and power supply unit (PSU) manuals.
- Check Compatibility:
- Ensure that your chosen CPU, GPU, and RAM are compatible with your Motherboard. Check the Motherboard’s QVL (Qualified Vendor List) for RAM compatibility.
After installing these components, proceed with connecting other peripherals, like storage drives and power cables, and then power on your system to begin the installation of the operating system and drivers.
Connecting VR Peripherals
Connecting VR peripherals is crucial to ensure a seamless and immersive virtual reality experience. Here is a guide on connecting common VR peripherals, like VR headsets, controllers, and external sensors or base stations:
VR Headset Connection:
- Connect to PC:
- Use the provided cables to connect the VR headset to your gaming PC. Typically, this involves HDMI or DisplayPort for video and USB for data transfer.
- Power On:
- Power on the VR headset by following the manufacturer’s instructions. Some headsets may require a separate power source.
- Adjust Straps:
- Adjust the head straps and position the headset on your head for a comfortable and secure fit.
- Install Required Software:
- Download and install the VR platform’s software (SteamVR, Oculus Software) on your PC. Follow the on-screen instructions for setup.
- Sensor Setup (if applicable):
- Some VR headsets come with built-in sensors, while others may require external sensors or base stations for Tracking. Follow the manufacturer’s instructions to set up sensors if needed.
VR Controllers:
- Pair Controllers:
- Follow the instructions to pair the VR controllers with your VR headset or PC. This usually involves pressing specific buttons or following on-screen prompts.
- Charge Controllers:
- Ensure that your VR controllers are adequately charged before use. Most VR controllers have built-in rechargeable batteries.
- Calibrate Controllers:
- Some VR platforms may require you to calibrate or set up the controllers within the VR environment. Follow the on-screen instructions for calibration.
External Sensors or Base Stations:
- Mounting:
- If your VR setup requires external sensors or base stations, mount them in the designated locations. Ensure they have a clear line of sight to the VR headset and controllers.
- Connect to PC:
- Use the provided cables to connect external sensors or base stations to your gaming PC. This often involves power cables and data cables.
- Power On:
- Power on the external sensors or base stations according to the manufacturer’s instructions.
- Calibration:
- Follow the calibration process for the external sensors or base stations within the VR platform’s settings. This typically involves defining the play area and ensuring accurate Tracking.
Testing and Troubleshooting:
- Run VR Setup:
- Launch the VR platform’s setup or calibration tool. Ensure that all components are detected and functioning correctly.
- Update Firmware:
- Check for firmware updates for your VR headset, controllers, and external sensors or base stations. Keeping the firmware up-to-date can resolve potential issues.
- Troubleshoot Tracking Problems:
- If you encounter tracking issues, ensure that the external sensors or base stations are correctly positioned and that there are no obstructions in the play area. Follow the troubleshooting guidelines provided by the VR platform.
- Optimize Room Lighting:
- Ensure that the room where you are using VR has adequate lighting. Some VR systems may have difficulty tracking in extremely bright or dim environments.
- Review Compatibility:
- Verify that all VR components are compatible with each other and with your gaming PC. Check the manufacturer’s compatibility guidelines.
Connecting VR peripherals may vary slightly depending on your specific VR system. Refer to the manufacturer’s instructions and documentation for detailed setup and connection guidance. Once everything is set up, you can dive into immersive VR experiences and enjoy your gaming sessions.
BIOS Setup and System Optimization
Configuring the BIOS (Basic Input/Output System) and optimizing system settings are crucial steps in ensuring your gaming PC runs efficiently and stably. Here is a guide on navigating the BIOS setup and performing system optimization.
Accessing the BIOS:
- Reboot Your PC:
- Restart your computer.
- Enter BIOS Key:
- During the boot process, press the key indicated on your screen to enter the BIOS. Common keys include Del, F2, F10, or Esc, depending on your motherboard manufacturer.
- Navigate the BIOS Interface:
- Use the keyboard arrow keys to navigate through the BIOS menus. Different motherboards may have slightly different interfaces.
BIOS Setup:
- Update BIOS (if needed):
- Check your motherboard manufacturer’s website for the latest BIOS version. If an update is available, follow the instructions to flash the BIOS. Updating BIOS can bring compatibility improvements and bug fixes.
- Boot Order:
- Set the boot order to ensure that your primary storage drive (usually an SSD or HDD) is the first boot device. This speeds up the system boot time.
- Enable XMP/DOCP Profile:
- If you have high-performance RAM, enable the XMP (Extreme Memory Profile) or DOCP (Direct OverClock Profile) to ensure your RAM operates at its rated speed.
- CPU Settings:
- You may find clock speed, power, and virtualization settings depending on your CPU. Adjust these settings based on your preferences and system requirements.
- Fan Profiles:
- Set up fan profiles to control the speed of your CPU and case fans. This helps manage system temperature and noise levels.
- Integrated Graphics (if applicable):
- If you have a discrete GPU, turn off the integrated graphics to avoid conflicts. Ensure that the system uses the dedicated graphics card.
- Security Settings:
- Configure security settings like password protection and secure boot features if desired.
System Optimization:
- Power Management:
- Adjust power management settings to balance performance and energy efficiency. This includes settings related to CPU power states and sleep modes.
- Overclocking (if desired):
- If you are comfortable with overclocking, navigate to the overclocking section of the BIOS to adjust CPU and RAM frequencies. Be cautious and refer to overclocking guides specific to your components.
- Temperature Monitoring:
- Enable temperature monitoring features if available. This allows you to monitor your CPU and GPU temperatures to prevent overheating.
- Advanced CPU Features:
- Explore advanced CPU features like hyper-threading, virtualization, and other technologies. Turn these features on or off based on your specific requirements.
- Boot Optimization:
- Enable fast boot options to reduce the system’s startup time. This skips specific tests during boot-up for a quicker experience.
- Peripheral Configuration:
- Configure settings related to USB ports, SATA controllers, and other peripherals. Ensure that all necessary ports are enabled.
- Save and Exit:
- After making changes, save your settings and exit the BIOS. Typically, this involves navigating the “Save & Exit” menu and selecting “Save Changes and Reset” or a similar option.
Final Steps:
- Operating System Installation:
- If you haven’t installed the operating system yet, insert your installation media (USB or DVD) and follow the on-screen instructions to install the OS.
- Driver Installation:
- Install the necessary drivers for your Motherboard, GPU, and other components. Use the drivers provided by the manufacturers or download the latest versions from their official websites.
- Software and Game Installation:
- Install essential software, update your graphics card drivers, and install your favorite games to start enjoying your gaming PC.
By accessing the BIOS setup and optimizing system settings, you can ensure that your gaming PC operates at its best performance while maintaining stability. Remember to refer to your Motherboard’s manual for specific details about your BIOS interface and features.
BIOS Settings for VR Performance
Optimizing your BIOS settings for VR performance is essential to ensure a smooth and immersive virtual reality experience. Here is a guide on the key BIOS settings to focus on for enhancing VR performance.
Update BIOS:
- Before making any adjustments, ensure that your Motherboard’s BIOS is up to date. Check the manufacturer’s website for the latest BIOS version and follow their update instructions.
Enable XMP/DOCP Profile:
- Activate the XMP (Extreme Memory Profile) or DOCP (Direct OverClock Profile) in the BIOS to ensure your RAM operates at its rated speed. This helps in handling the data transfer demands of VR applications efficiently.
CPU Configuration:
- Adjust CPU-related settings for optimal VR performance:
- Multi-Core Enhancement: If available, enable multi-core enhancement to improve the CPU’s overall performance.
- Virtualization Technology (VT-x): Enable VT-x if your CPU supports it. This is beneficial for running virtual reality applications.
GPU-related Settings:
- Although GPU settings are primarily configured through graphics card drivers, you may find some relevant settings in the BIOS:
- PCIe Speed: Set PCIe speed to the maximum supported by your graphics card for optimal data transfer.
- Integrated Graphics: If you have a discrete GPU, ensure the integrated graphics are disabled to dedicate all resources to the VR-ready graphics card.
Power Management:
- Adjust power management settings to balance performance and energy efficiency:
- CPU Power States: Experiment with C-states and P-states settings. Some users find improved VR performance by disabling certain power-saving features.
Advanced CPU Features:
- Explore advanced CPU features that might impact VR performance:
- Hyper-Threading: Enabling or turning off hyper-threading may yield different results depending on your VR applications. Test and observe performance changes.
- Turbo Boost: Adjust Turbo Boost settings to optimize CPU clock speeds during demanding VR scenarios.
Temperature Monitoring:
- Enable temperature monitoring features to monitor your CPU and GPU temperatures. Maintaining optimal temperatures ensures consistent performance.
Boot Optimization:
- Optimize boot settings for faster startup:
- Fast Boot: Enable the fast boot option to reduce boot time. This skips specific tests during startup for quicker access to VR applications.
USB Configuration:
- VR headsets and peripherals often rely on USB connections. Adjust USB-related settings:
- USB Configuration: Ensure USB ports are set to their maximum supported speed (USB 3.0 or USB 3.1).
Security Settings:
- Configure security settings while prioritizing performance:
- Secure Boot: Ensure that Secure Boot is enabled for a secure system boot without compromising VR performance.
Save and Exit:
- After making changes, save your settings and exit the BIOS. Reboot your system to apply the optimizations.
Test and Monitor:
- Test your VR applications and games to evaluate performance improvements. Monitor system temperatures and stability during extended VR sessions.
Remember, every system is unique, and the impact of BIOS settings may vary. It is advisable to tweak settings gradually, testing performance after each adjustment. If you encounter issues or notice instability, revert settings to their defaults and seek guidance from your Motherboard’s manual or online communities. Additionally, check for any specific VR-related recommendations from your VR headset or GPU manufacturer.
Updating Drivers for VR Compatibility
Ensuring that your drivers are up-to-date is crucial for optimal VR compatibility and performance. Here is a step-by-step guide on updating drivers for a seamless virtual reality experience.
Graphics Card Drivers:
- Visit GPU Manufacturer’s Website:
- Go to the official website of your graphics card manufacturer (NVIDIA, AMD, or others).
- Download Latest Drivers:
- Locate the drivers section and download your specific GPU model’s latest graphics card drivers.
- Uninstall Existing Drivers:
- Before installing the new drivers, it is recommended to uninstall the existing ones. You can do this through the Control Panel on Windows.
- Install New Drivers:
- Run the downloaded driver installer and follow the on-screen instructions to install the latest graphics card drivers.
- Restart Your PC:
- After installation, restart your computer to apply the changes.
Motherboard Drivers:
- Visit Motherboard Manufacturer’s Website:
- Go to the official website of your motherboard manufacturer.
- Download Latest Chipset Drivers:
- Look for the chipset or motherboard drivers section and download the latest drivers compatible with your motherboard model.
- Install Chipset Drivers:
- Run the downloaded installer and follow the instructions to install the latest motherboard chipset drivers.
- Other Motherboard Drivers:
- Check for updates to other motherboard drivers, like audio, LAN, and USB controllers. Download and install any available updates.
VR Headset and Controller Drivers:
- Visit VR Headset Manufacturer’s Website:
- Go to the official website of your VR headset manufacturer (Oculus, HTC Vive).
- Download and Install VR Software:
- Download the VR software or drivers provided by the headset manufacturer. Follow the installation instructions for your specific headset.
- Connect VR Headset:
- Ensure that your VR headset is connected to your PC and recognized by the VR software.
- Update Controller Firmware (if applicable):
- If your VR system includes controllers, check for firmware updates through the VR software and update them if necessary.
USB and Audio Drivers:
- USB Drivers:
- Visit the official website of your motherboard manufacturer to check for USB controller driver updates. USB drivers play a crucial role in VR connectivity.
- Audio Drivers:
- Ensure that your audio drivers are up to date. VR experiences often rely on accurate spatial audio, and updated drivers can enhance this aspect.
Windows Updates:
- Check for Windows Updates:
- Regularly check for Windows updates, as they may include important system updates and driver enhancements.
- Install Updates:
- Install any pending Windows updates. Reboot your computer if prompted.
Automatic Driver Update Tools:
- Driver Update Tools:
- Consider using automatic driver update tools like “Driver Booster” or “DriverPack Solution” to scan your system for outdated drivers and update them.
- Caution:
- Use such tools cautiously. Ensure that they are from reputable sources to avoid potential issues.
Verify VR Application Compatibility:
- Check VR Application Requirements:
- Check the developer’s recommendations regarding driver versions for specific VR applications or games. Some VR experiences may have specific driver requirements for optimal performance.
- Update as Needed:
- If there are specific driver recommendations, update your drivers accordingly.
Regularly updating your drivers ensures your VR system runs on the latest improvements and optimizations. It enhances compatibility, stability, and overall performance. It provides a better virtual reality experience.
OverClocking Considerations
Overclocking can provide a performance boost to your gaming PC. But it comes with considerations and potential risks. Here is a guide on overclocking considerations. That is especially true when building a gaming PC for virtual reality.
Understand the Risks:
- Voiding Warranties:
- Overclocking may void warranties. Suppose it results in hardware damage. Check the warranty terms of your components before proceeding.
- Increased Heat Production:
- Overclocking generates more heat. And without proper cooling solutions, it can lead to component overheating. Ensure your cooling system can handle the increased thermal load.
- Reduced Lifespan:
- Overclocking may reduce the lifespan of components due to higher stress levels. Consider the long-term effects on your hardware.
Check Component Compatibility:
- CPU and GPU Support:
- Not all CPUs and GPUs are designed for overclocking. Check if your components have overclocking capabilities and are supported by your Motherboard.
- VRM Cooling:
- Ensure that your Motherboard has adequate VRM (Voltage Regulator Module) cooling. VRMs can become hot during overclocking. And that can affect stability.
Stability Testing:
- Run Stability Tests:
- After applying overclocking settings, run stability tests like Prime95 (CPU) or FurMark (GPU) to ensure your system remains stable under heavy loads.
- Monitor Temperatures:
- Use monitoring tools to keep an eye on temperatures. If temperatures rise excessively, it may indicate inadequate cooling or an unsustainable overclock.
Incremental Adjustments:
- Gradual Increases:
- When overclocking, make incremental adjustments rather than large leaps. This allows you to find the optimal balance between performance and stability.
- CPU Multiplier and Voltage:
- Adjust the CPU multiplier and voltage gradually. Monitor system stability and temperatures after each adjustment.
Memory Overclocking:
- XMP/DOCP Profile:
- Enable the XMP (Extreme Memory Profile) or DOCP (Direct OverClock Profile) for memory overclocking. Ensure your RAM is stable at the increased speed.
- MemTest86:
- Use tools like MemTest86 to verify the stability of your memory overclock. Unstable memory can lead to system crashes.
Backup BIOS Settings:
- Save Profiles:
- Modern motherboards often allow you to save BIOS profiles. Save your default settings and any stable overclocking profiles you find.
- BIOS Reset:
- In case of instability, having a backup of default settings makes it easier to reset the BIOS without losing configurations.
Power Supply Considerations:
- Adequate Power:
- Overclocking increases power consumption. Ensure your power supply unit (PSU) can provide sufficient power for the overclocked components.
- Stable Voltage Rails:
- Check the stability of voltage rails. Fluctuating voltages can cause instability and potential damage.
- VR Gaming Stability:
- Test VR Applications:
- After overclocking, specifically, test VR applications to ensure stability. VR environments are sensitive to performance fluctuations.
- Monitor Frame Rates:
- Use VR performance monitoring tools to ensure that frame rates remain consistent. Frame drops can cause motion sickness in VR.
Backup and Documentation:
- Document Settings:
- Keep a record of your overclocking settings. This documentation helps troubleshoot issues and serves as a reference for future adjustments.
- Regular Backups:
- Regularly back up critical data on your system. Overclocking introduces an element of risk. Having backups mitigates potential data loss.
Consult Online Resources:
- Online Communities:
- Join online communities or forums dedicated to overclocking. Seek advice and share experiences with users who have similar hardware.
- Review Stability Reports:
- Read stability reports and experiences from other users who have overclocked similar components. Learn from their successes and challenges.
Remember that the decision to overclock should be based on your needs and potential trade-offs. If you are uncomfortable with overclocking or primarily building a system for VR gaming, running components at their stock settings might be the safer option. Always prioritize stability and consider the long-term effects on your hardware.
Software Installation and VR Platform Setup
Installing the necessary software and setting up your chosen VR platform is crucial. It ensures a smooth and enjoyable virtual reality gaming experience. Here is a comprehensive guide on software installation and VR platform setup.
Operating System Installation:
- Install a Supported OS:
- Ensure that your gaming PC has a supported operating system for VR. Most VR platforms are compatible with Windows. But check specific requirements.
- Update Windows:
- Install the latest Windows updates. That ensures your operating system is equipped with the latest features and security patches.
Graphics Card Drivers:
- Download Latest GPU Drivers:
- Visit the official website of your graphics card manufacturer (NVIDIA, AMD, etc.). Download the latest GPU drivers for your specific model.
- Install GPU Drivers:
- Run the downloaded driver installer and follow the on-screen instructions to install the latest graphics card drivers.
- Restart Your PC:
- After installation, restart your computer to apply the changes.
Motherboard Drivers:
- Download Chipset and Peripheral Drivers:
- Visit the official website of your motherboard manufacturer and download the latest chipset, LAN, audio, and USB drivers.
- Install Motherboard Drivers:
- Run the downloaded installers to install the necessary motherboard drivers.
VR Platform Installation:
- Choose Your VR Platform:
- Decide on the VR platform you want to use, like Oculus, SteamVR, or Windows Mixed Reality. Some VR headsets may have their dedicated software.
- Download VR Platform Software:
- Visit the official website of your chosen VR platform and download the required software.
- Install VR Platform Software:
- Run the downloaded installer and follow the on-screen instructions to install the VR platform software.
- Create an Account (if necessary):
- Some VR platforms may require you to create an account. Follow the registration process to set up your VR platform account.
VR Headset Setup:
- Connect VR Headset:
- Connect your VR headset to your gaming PC using the provided cables. Ensure a secure connection to both USB and HDMI/DisplayPort ports.
- Power On VR Headset:
- Power on your VR headset according to the manufacturer’s instructions. Some headsets may have an external power source.
- Follow On-Screen Setup:
- Complete the on-screen setup prompts provided by the VR platform software. This may involve configuring room-scale settings, defining a play area, and calibrating sensors.
- Sensor or Base Station Placement:
- If your VR system requires external sensors or base stations, follow the guidelines for proper placement. Ensure they have a clear line of sight to the VR headset.
VR Controller Setup:
- Pair VR Controllers:
- Pair your VR controllers with the VR headset according to the platform’s instructions. This usually involves pressing specific buttons on the controllers.
- Calibrate VR Controllers:
- Calibrate your VR controllers within the VR platform’s settings to ensure accurate Tracking and responsiveness.
Room-Scale Setup (if applicable):
- Define Play Area:
- If your VR system supports room-scale experiences, use the VR platform software to define your play area. Follow on-screen instructions to set boundaries.
Additional VR Software:
- Explore VR App Stores:
- Explore the VR app store associated with your chosen platform (Oculus Store, SteamVR, etc.). Download and install VR games and applications based on your preferences.
- Install VR Games and Apps:
- Follow the platform’s interface to browse and install VR games and applications. Some may be free, while others may require purchase.
Update VR Firmware:
- Check for Firmware Updates:
- Regularly check for firmware updates for your VR headset and controllers. Firmware updates can provide performance improvements and bug fixes.
- Update as Needed:
- If updates are available, follow the platform’s instructions to update the firmware for your VR components.
Performance Optimization:
- Adjust Graphics Settings:
- Within the VR platform software, explore graphics settings and adjust them based on your PC’s capabilities—the balance between visual quality and performance.
- Test VR Experiences:
- Test a variety of VR experiences to ensure smooth performance. Adjust settings as needed for specific applications.
Configure VR Audio:
- Check Audio Settings:
- Configure audio settings within the VR platform software. Ensure that spatial audio and 3D sound are enabled for an immersive experience.
- Use VR Headphones (if applicable):
- If your VR headset supports external headphones, consider using them for enhanced audio quality.
User Account and Cloud Sync:
- Enable Cloud Sync:
- If the VR platform offers cloud sync, enable it to synchronize your VR settings and preferences and save games across devices.
- Customize User Account:
- Explore customization options within your VR platform account, like avatar settings and friend management.
Regular Updates and Maintenance:
- Check for Updates:
- Regularly check for updates to your VR platform software and installed VR applications. Keep everything up to date for optimal performance and access to new features.
- System Maintenance:
- Conduct regular system maintenance, including updating GPU drivers and ensuring your PC meets VR platform requirements.
This comprehensive guide will equip your gaming PC with the necessary software and configure it for your chosen VR platform. This sets the stage for a seamless and immersive virtual reality gaming experience.
Installing Operating System
Installing the operating system is critical in setting up your gaming PC for virtual reality. Here is a step-by-step guide on how to install the operating system on your PC.
Prepare Installation Media:
- Select the OS:
- Choose the operating system you want to install. Windows is a common choice for VR gaming. But Linux and others may be compatible with specific VR applications.
- Create Installation Media:
- Download the official installation tool from the OS’s official website. For Windows, you can use the Media Creation Tool. Follow the tool’s instructions to create a bootable USB drive or DVD.
BIOS/UEFI Settings:
- Access BIOS/UEFI:
- Restart your PC and enter the BIOS/UEFI. The key to access it varies (common keys include Del, F2, F10, Esc). Check your Motherboard’s manual for guidance.
- Set Boot Priority:
- In the BIOS/UEFI settings, set the boot priority to your installation media (USB or DVD drive) so that the system boots from it first.
- Save and Exit:
- Save the changes and exit the BIOS/UEFI. Your PC will restart.
Install the Operating System:
- Windows Installation:
- For Windows, the installation process is straightforward. Follow the on-screen prompts, and select your language, time, and keyboard input preferences.
- Enter Product Key:
- Enter the product key when prompted. You can usually find this key on a sticker on your PC or with your OS purchase.
- Select Installation Type:
- Choose the type of installation. If you are installing Windows on a new PC, select “Custom” to perform a clean installation.
- Partition and Format:
- Create partitions on your storage drive (SSD or HDD) if needed. Format the selected partition to prepare it for installation.
- Install:
- Begin the installation process. Windows will copy files and install the necessary components. This may take some time.
- Set Up User Account:
- Follow the on-screen instructions to set up your user account. Create a strong password and choose security settings.
- Configure Settings:
- Configure your region, time zone, and other settings according to your preferences.
- Connect to Network:
- Connect to your Wi-Fi or wired network during the setup process.
- Windows Updates:
- Allow Windows to search for updates and install them. This ensures your system is updated with the latest security patches and features.
- Install Drivers:
- After the OS installation is complete, install the necessary drivers, especially graphics card and motherboard drivers. You can use the drivers provided by the manufacturers or download the latest versions from their official websites.
Post-Installation Steps:
- Create a System Restore Point:
- Create a system restore point once your OS is installed and drivers are updated. This can be helpful in case of future issues.
- Install Essential Software:
- Install essential software like web browsers, antivirus, and productivity tools.
- Set Up VR Platform and Software:
- Refer to the previous section on “Software Installation and VR Platform Setup” to install and set up your chosen VR platform.
- Activate VR License (if applicable):
- If your VR platform requires a license or activation, ensure it is activated according to the instructions.
Final Checks:
- Verify VR Compatibility:
- Double-check that your gaming PC meets the VR platform and application requirements.
- Test VR Environment:
- Test your VR environment by launching the VR platform and trying a simple VR application to ensure everything works as expected.
- Optimize Graphics Settings:
- Adjust graphics settings within the VR platform software to optimize performance based on your PC’s capabilities.
Congratulations! Your gaming PC now has the operating system installed. And you are ready to dive into the exciting world of virtual reality gaming.
Configuring VR Software
Configuring VR software is crucial to ensure optimal performance, comfort, and an immersive experience. Here is a comprehensive guide on configuring VR software after the installation.
Launch VR Platform Software:
- Open VR Platform:
- Launch the VR platform software you installed (Oculus, SteamVR, Windows Mixed Reality).
- Login or Create Account:
- Log in with your account credentials or create a new account if required by the platform.
VR Headset Configuration:
- Check Headset Connection:
- Ensure that your VR headset is connected correctly to your PC. Check for any error messages regarding the headset connection.
- Run Setup Wizard:
- Most VR platforms provide a setup wizard. Run through the wizard to configure your VR headset. This may include adjusting the headset straps, setting up room-scale boundaries, and calibrating sensors.
- Adjust IPD (Interpupillary Distance):
- If your VR headset allows for IPD adjustment, measure your IPD and adjust the headset accordingly for optimal clarity.
Room-Scale Setup:
- Define Play Area:
- If your VR system supports room-scale experiences, use the VR platform’s settings to define your play area. This helps prevent collisions with physical objects while in VR.
Controller Configuration:
- Pair Controllers:
- Ensure that your VR controllers are paired and recognized by the VR platform. Follow on-screen instructions to pair them if needed.
- Calibrate Controllers:
- Calibrate your VR controllers within the VR platform’s settings to ensure accurate Tracking and responsiveness.
- Customize Button Mapping (if applicable):
- Some VR platforms allow you to customize button mapping for specific applications or personal preferences. Explore these settings based on your needs.
Graphics Settings:
- Adjust Graphics Quality:
- Explore graphics settings within the VR platform software. Adjust settings based on your PC’s capabilities. Options may include resolution, anti-aliasing, and texture quality.
- Enable Asynchronous Spacewarp (ASW) or Reprojection:
- Enable features like Asynchronous Spacewarp (ASW) for Oculus or Reprojection for SteamVR, depending on your VR platform. These technologies help maintain smooth performance in VR.
Audio Settings:
- Configure Spatial Audio:
- Ensure that spatial audio is enabled for an immersive 3D sound experience. Adjust audio settings to your preferences within the VR platform.
- Use External Headphones (if applicable):
- If your VR headset supports external headphones, consider using them for enhanced audio quality.
VR Safety Settings:
- Activate Guardian System (Oculus) or Chaperone System (SteamVR):
- Ensure that safety systems are activated to alert you if you are nearing physical boundaries while in VR. Customize these settings based on your preferences.
Performance Monitoring:
- Monitor Frame Rates:
- Utilize performance monitoring tools provided by the VR platform to check real-time frame rates and system performance during VR experiences.
- Adjust Render Resolution:
- Some VR platforms allow you to adjust the render resolution. Experiment with these settings to find the right balance between visual quality and performance.
Update Firmware:
- Check for Firmware Updates:
- Regularly check for firmware updates for your VR headset and controllers within the VR platform’s settings. Firmware updates can provide performance improvements and bug fixes.
- Update as Needed:
- If updates are available, follow the platform’s instructions to update the firmware for your VR components.
Experiment with VR Experiences:
- Test VR Applications:
- Test a variety of VR experiences to ensure that the configuration settings provide a comfortable and enjoyable experience. Adjust settings as needed for specific applications.
- Comfort Settings:
- Some VR platforms offer comfort settings, like vignettes during rapid movements or teleportation options. Customize these settings for a comfortable experience.
Backup Configurations:
- Save Profiles:
- If your VR platform allows, save configuration profiles. This can be useful if you share the VR system with others or want to switch between different setups easily.
Regular Software Updates:
- Check for Updates:
- Regularly check for updates to your VR platform software. Keep everything up to date for optimal performance and access to new features.
- Application Updates:
- Keep your installed VR applications and games updated to benefit from the latest improvements and bug fixes.
Troubleshooting:
- Consult Support Resources:
- If you encounter issues, refer to the VR platform’s support resources, forums, or community discussions. Troubleshoot and seek solutions to common problems.
- Driver Updates:
- Ensure that your graphics card drivers are up to date. Sometimes, issues can be resolved with the latest driver updates.
By thoroughly configuring your VR software, you enhance the overall VR experience on your gaming PC. Regularly revisit and adjust settings based on your preferences and the requirements of different VR applications. This ensures that you make the most of your virtual reality gaming sessions.
Setting Up VR Libraries and Platforms
Setting up VR libraries and platforms involves efficiently organizing and accessing your VR content. Here is a guide on how to set up VR libraries and platforms for a seamless virtual reality experience.
Organizing VR Libraries:
- Create Dedicated Folders:
- Organize your VR content by creating dedicated folders for VR games, applications, and experiences. This makes it easier to locate and manage your VR content.
- Categorize Content:
- Categorize content within folders based on genres, themes, or preferences. This organization helps streamline your VR library, especially as it grows.
- Backup Content:
- Regularly back up your VR content to an external drive. This ensures you do not lose your VR games and applications in case of system issues.
Utilize VR Platform Libraries:
- Oculus Library:
- Using an Oculus VR headset, use the Oculus Library to manage and organize your VR content. Oculus provides features for categorizing, sorting, and filtering your VR games and apps.
- SteamVR Library:
- For users with SteamVR-compatible headsets, the SteamVR Library is a centralized hub for managing VR content. Organize your games, view VR-specific information, and launch titles directly from SteamVR.
- Windows Mixed Reality Portal:
- If you use a Windows Mixed Reality headset, utilize the Windows Mixed Reality Portal to access and organize your VR content. The portal provides a library for managing your VR applications.
VR Launcher Software:
- Third-Party Launchers:
- Consider using third-party VR launcher software that provides additional features for organizing and launching VR content. Some launchers offer customization options and enhanced organization features.
- Customize Launcher Settings:
- Adjust settings within the VR launcher software to customize the appearance and organization of your VR library. This may include sorting options, virtual environments, and additional features.
Create VR Playlists:
- Group Similar Content:
- Some VR platforms and launchers allow you to create playlists or groups for similar VR content. For example, you can create a playlist for your favorite action games or relaxing experiences.
- Quick Access:
- Use playlists to quickly access specific VR content types without searching your entire library.
Explore VR Marketplaces:
- Browse VR Stores:
- Explore VR marketplaces associated with your VR platform (Oculus Store, SteamVR Store, etc.). Browse for new VR games and applications to add to your library.
- Purchase and Install:
- Purchase and install VR content directly from the marketplace. This ensures that your library stays updated with the latest VR releases.
Manage Updates:
- Automatic Updates:
- Enable automatic updates for your VR content. This ensures that your games and applications receive the latest patches and improvements without manual intervention.
- Review Patch Notes:
- Stay informed about updates by reviewing patch notes provided by VR developers. Some updates may introduce new features or optimizations.
Cross-Platform Libraries:
- Link Multiple Platforms:
- If you have VR headsets from different platforms (Oculus, SteamVR, Windows Mixed Reality), explore options to link libraries and access content seamlessly across platforms.
- Third-Party Tools:
- Some third-party tools and applications allow you to integrate and manage content from various VR platforms in one unified library.
User Ratings and Reviews:
- Utilize Platform Ratings:
- Take advantage of user ratings and reviews within VR platforms. This helps you discover high-quality VR content and make informed decisions.
- Rate and Review:
- Contribute to the VR community by rating and reviewing the VR content you have experienced. Your feedback can assist other users in their VR library exploration.
Explore VR Social Features:
- Join VR Communities:
- Participate in VR communities and forums associated with your chosen VR platform. Connect with other users, share recommendations, and discover hidden gems in the VR landscape.
- VR Events and Meetups:
- Explore VR events and meetups within your chosen platform. These events may introduce you to new VR experiences and provide opportunities to connect with fellow VR enthusiasts.
By implementing these steps, you will have an organized and efficient setup for managing your VR libraries and platforms. This enhances your overall VR experience. It also makes discovering and enjoying a diverse range of virtual reality content easier.
Troubleshooting Common VR Issues
Virtual reality experiences can sometimes encounter issues that may impact performance and overall enjoyment. Here is a troubleshooting guide to address common VR issues.
VR Headset Connection Issues:
- Check Cables:
- Ensure all cables connecting your VR headset to the PC are securely plugged in. Loose cables can lead to connection issues.
- USB Port Issues:
- Connect the VR headset to different USB ports on your PC. Some USB ports may provide better stability and power.
- Reconnect Headset:
- Disconnect and reconnect the VR headset to reset the connection.
- Update USB Drivers:
- Ensure that your Motherboard’s USB drivers are up to date. Visit the motherboard manufacturer’s website for the latest drivers.
Sensor or Base Station Tracking Issues:
- Check Placement:
- Ensure that external sensors or base stations are placed securely and have an unobstructed view of the VR headset. Check for reflective surfaces that may interfere with Tracking.
- Clean Sensors:
- Clean the sensors on the VR headset and external sensors with a microfiber cloth. Dust or smudges can affect Tracking.
- Update Firmware:
- Check for firmware updates for your VR headset and external sensors. Firmware updates may include improvements to Tracking.
Frame Rate and Performance Issues:
- Adjust Graphics Settings:
- Lower graphics settings within the VR platform or individual applications to improve performance. This may include resolution, anti-aliasing, and texture quality.
- Update Graphics Drivers:
- Ensure that your graphics card drivers are up to date. Visit the official website of your graphics card manufacturer to download the latest drivers.
- Close Background Applications:
- Close unnecessary applications running in the background to free up system resources for VR.
- Monitor Temperature:
- Monitor the temperature of your GPU and CPU using software tools. Overheating can lead to performance issues. Ensure that your PC is adequately cooled.
VR Motion Sickness:
- Adjust VR Settings:
- Experiment with comfort settings within the VR platform, like turning on vignettes during rapid movements or adjusting locomotion options.
- Take Breaks:
- Take regular breaks during VR sessions to prevent motion sickness. Gradually increase the duration as your tolerance improves.
- Limit VR Sessions:
- Avoid extended VR sessions, especially when you are still acclimating to virtual reality. Start with shorter sessions and gradually increase the time.
Audio Issues:
- Check Audio Settings:
- Verify that the VR headset’s audio settings are correctly configured. Check both the VR platform settings and the Windows audio settings.
- Use External Headphones:
- If your VR headset supports external headphones, consider using them for improved audio quality.
Application Crashes or Freezes:
- Update Applications:
- Ensure that your VR applications are up to date. Check for updates through the VR platform or the application’s official website.
- Verify System Requirements:
- Confirm that your PC meets the system requirements for the VR applications you are using. Inadequate hardware may lead to crashes.
- Check for Conflicts:
- Investigate whether third-party software or conflicting applications are causing crashes. Disable or uninstall such software and test the VR application again.
General System Issues:
- Update Operating System:
- Ensure that your operating system is updated with the latest updates and patches.
- Check for Malware:
- Run a malware scan to ensure your PC is not affected by malicious software that could impact VR performance.
- Memory Issues:
- Check your PC’s memory usage during VR sessions. Upgrade your RAM if necessary to ensure smooth VR experiences.
USB Bandwidth Issues:
- Distribute USB Devices:
- Avoid connecting too many USB devices to the same controller. Distribute USB devices across different controllers to prevent bandwidth issues.
- USB Hub Consideration:
- If using a USB hub, ensure it is powered and capable of handling the bandwidth requirements of your VR headset.
Wireless Connection Issues (Wireless VR):
- Check Wireless Signal:
- If using a wireless VR system, ensure a strong and stable wireless signal between the headset and the receiver. Minimize interference from other wireless devices.
- Update Wireless Drivers:
- Check for and install the latest wireless drivers for both the headset and the receiver.
- Adjust Router Settings:
- If wireless interference is suspected, adjust router settings to use less congested wireless channels.
Microphone or Camera Issues:
- Check Microphone Settings:
- Verify that the microphone is enabled and correctly configured in the VR platform settings.
- Review Camera Settings:
- If applicable, review camera settings within the VR platform. Adjust privacy settings or enable/disable the camera as needed.
Consult VR Community and Support:
- Online Forums:
- Visit VR community forums associated with your VR platform. Users may share solutions to common issues.
- Contact Support:
- If troubleshooting steps do not resolve the issue, contact the customer support of the VR platform or the manufacturer of your VR headset for assistance.
By addressing these common VR issues systematically, you can enhance the stability and performance of your virtual reality experiences. If specific problems persist, consulting the support resources provided by the VR community or the headset manufacturer can provide valuable assistance.
GPU Driver Problems
Encountering issues with GPU drivers can affect the performance and stability of your virtual reality experiences. Here is a guide to troubleshooting and resolving GPU driver problems.
Update GPU Drivers:
- Check for Updates:
- Visit the official website of your GPU manufacturer (NVIDIA, AMD, etc.) to download and install the latest GPU drivers compatible with your graphics card model.
- Automatic Updates:
- Enable automatic updates for GPU drivers if available. This ensures that you receive the latest updates automatically.
Clean GPU Driver Installation:
- Use Display Driver Uninstaller (DDU):
- Download and run Display Driver Uninstaller (DDU) to cleanly uninstall your GPU drivers.
- Reinstall Drivers:
- After using DDU, reinstall the latest GPU drivers from the official website. Follow the installation instructions carefully.
Roll Back to Previous Driver:
- Access Device Manager:
- Open Device Manager on your PC.
- Locate GPU:
- Under “Display adapters,” right-click on your GPU and choose “Properties.”
- Driver Tab:
- Go to the “Driver” tab and select “Roll Back Driver” if the option is available.
Check for Conflicting Software:
- Third-Party Software:
- Identify and uninstall third-party software that may conflict with GPU drivers, like overclocking utilities or third-party graphics control panels.
- Antivirus and Security Software:
- Some antivirus or security software may interfere with GPU drivers. Temporarily disable or adjust the settings to see if it resolves the issue.
Adjust Power Settings:
- Power Options:
- Go to the “Power Options” in the Control Panel and set it to “High Performance.” This ensures that your GPU operates at its maximum potential.
- Disable Power-Saving Features:
- Disable any power-saving features that may affect performance during VR use in the GPU driver settings.
Check for Overheating:
- Monitor GPU Temperature:
- Use monitoring software to check the temperature of your GPU. Overheating can lead to driver crashes and performance issues.
- Clean Dust:
- Ensure that your GPU and its cooling system are free from dust. Overheating may occur if the cooling system is compromised.
Adjust GPU Settings:
- NVIDIA Control Panel or AMD Radeon Settings:
- Access the control panel for your GPU (NVIDIA Control Panel or AMD Radeon Settings) and adjust settings for VR compatibility. This may include adjusting resolution, refresh rate, or other VR-specific features.
Windows Updates:
- Check for Windows Updates:
- Ensure that your operating system is up to date with the latest Windows updates. Some updates may include compatibility fixes for GPU drivers.
Reinstall VR Platform:
- Uninstall VR Platform:
- Uninstall the VR platform software associated with your VR headset.
- Reinstall VR Platform:
- Reinstall the VR platform software after ensuring that the GPU drivers are updated. Follow the installation instructions provided by the VR platform.
Contact GPU Manufacturer Support:
- Support Resources:
- If issues persist, contact the customer support of your GPU manufacturer. They may provide specific guidance or have solutions for common problems.
- Online Forums:
- Visit official forums or communities associated with your GPU manufacturer. Users often share experiences and solutions for driver-related issues.
System Restore:
- Restore to a Previous Point:
- If issues started after a recent change or update, consider using System Restore to revert your system to a point before the problem occurred.
- Hardware Check:
- GPU Hardware Issues:
- If all else fails, consider the possibility of hardware issues with your GPU. If possible, test your GPU in another system or consult a professional for diagnostics.
By systematically addressing these steps, you can troubleshoot and resolve GPU driver problems that may impact your VR experiences. Remember to follow instructions carefully. Back up important data, and consider seeking professional assistance if needed.
USB Compatibility and Bandwidth Issues
USB compatibility and bandwidth issues can impact the performance of your virtual reality setup. That is particularly true with VR headsets that rely on USB connections for tracking and data transmission. Here is a guide to troubleshooting and addressing USB-related problems.
Check USB Ports:
- USB 3.0/3.1 Ports:
- Ensure your VR headset is connected to your PC’s USB 3.0 or USB 3.1 port. USB 2.0 ports may not provide sufficient bandwidth for some VR headsets.
- Try Different Ports:
- Test your VR headset on different USB ports. Some motherboards have multiple USB controllers. And using different controllers may resolve compatibility issues.
USB Hub Consideration:
- Avoid USB Hubs:
- Connect your VR headset directly to the PC rather than using a USB hub. USB hubs may not provide the necessary power or bandwidth for VR devices.
- Powered USB Hub:
- If you must use a hub, use a powered USB hub to ensure an adequate power supply and prevent bandwidth issues.
Check USB Power Management:
- Disable USB Selective Suspend:
- Open the Power Options in the Control Panel, go to “Change plan settings,” and then “Change advanced power settings.” Disable USB selective suspend to prevent USB power management issues.
Update USB Drivers:
- Update Motherboard/USB Drivers:
- Visit the motherboard manufacturer’s website and update the USB drivers. Outdated drivers may cause compatibility problems.
- Update BIOS/UEFI:
- Ensure that your Motherboard’s BIOS/UEFI firmware is up to date. BIOS updates may improve USB compatibility.
- Check USB Bandwidth:
- USB Bandwidth Monitoring Tools:
- Use USB bandwidth monitoring tools to check the usage of each USB port. This helps identify potential bandwidth constraints.
- Reduce USB Load:
- Disconnect unnecessary USB devices to reduce the overall load on the USB controller and free up bandwidth for the VR headset.
Dedicated USB Controller Card:
- PCIe USB Expansion Card:
- Consider adding a PCIe USB expansion card to your system. This can provide additional USB ports with a dedicated controller. That can reduce the load on existing controllers.
USB Compatibility Mode:
- Compatibility Mode (Oculus):
- Some VR platforms, like Oculus, have a compatibility mode that adjusts the USB power management settings. Enable this mode within the VR platform settings.
Check VR Platform Settings:
- USB Compatibility Check:
- Review the VR platform settings for USB compatibility checks. Some platforms provide tools to ensure that your USB setup meets the requirements.
Power Supply Considerations:
- Adequate Power Supply:
- Ensure that your PC has an adequate power supply. Insufficient power may lead to USB issues. Consider upgrading the power supply if needed.
USB Device Removal:
- Device Manager:
- In the Device Manager, uninstall the USB devices associated with your VR headset. Reconnect the headset, and Windows will reinstall the drivers.
Test on another PC:
- Isolate Hardware Issues:
- If possible, test your VR headset on another PC. This helps isolate whether the issue relates to your current PC or the VR hardware.
Contact VR Support:
- VR Manufacturer Support:
- If issues persist, contact the customer support of your VR headset manufacturer. They may provide specific guidance or solutions for USB-related problems.
USB PCIe Card with Individual Controllers:
- Individual USB Controllers:
- Consider a USB PCIe card with individual controllers for each USB port. This helps distribute the load and prevent conflicts.
Reinstall USB Drivers:
- Uninstall and Reinstall Drivers:
- In the Device Manager, uninstall the USB controllers associated with your VR headset. Reboot your PC, and Windows will reinstall the drivers.
Adjust Power Plan Settings:
- Balanced Power Plan:
- If using a balanced power plan, switch to a high-performance power plan. This ensures that USB ports receive sufficient power.
By systematically addressing these steps, you can troubleshoot and resolve USB compatibility and bandwidth issues affecting your VR experience. Always follow instructions carefully. Back up important data, and consider seeking professional assistance if needed.
VR-Related Software Glitches
Software glitches in VR-related applications can disrupt your virtual reality experience. Here is a guide to troubleshooting and resolving common VR-related software glitches.
Restart VR Platform:
- Close and Reopen:
- Close the VR platform (Oculus, SteamVR) and reopen it. This can help refresh the software and resolve minor glitches.
- Reboot PC:
- Perform a full system reboot to ensure that all background processes are restarted.
Update VR Platform and Applications:
- Check for Updates:
- Ensure that your VR platform and VR applications are up to date. Update to the latest versions to benefit from bug fixes and improvements.
- Automatic Updates:
- Enable automatic updates within the VR platform settings if available.
Verify System Requirements:
- Check Hardware Compatibility:
- Confirm that your PC meets the minimum system requirements for the VR platform and applications you are using.
Graphics Driver Update:
- Update GPU Drivers:
- Ensure that your graphics card drivers are up to date. Visit the official website of your GPU manufacturer to download and install the latest drivers.
- Clean GPU Driver Installation:
- Use tools like Display Driver Uninstaller (DDU) to perform a clean uninstallation of GPU drivers and reinstall the latest version.
Check VR Headset Connections:
- Secure Connections:
- Ensure that all cables connecting your VR headset are securely plugged into both the headset and the PC.
- USB and HDMI Ports:
- Test your PC’s different USB and HDMI ports to rule out port-related issues.
Adjust In-Game Graphics Settings:
- Lower Graphics Settings:
- Adjust graphics settings within VR applications. Lowering settings can improve performance and reduce glitches.
- Experiment with Resolutions:
- Try different resolution settings to find a balance between visual quality and performance.
Reinstall VR Applications:
- Uninstall and Reinstall:
- Uninstall glitchy VR applications and reinstall them. This can resolve issues related to corrupted installations.
- Check Application Forums:
- Visit forums or community discussions related to the specific VR application. Users often share solutions to common glitches.
Reposition VR Sensors:
- Sensor Placement:
- If using external sensors, ensure they are placed securely and have a clear line of sight to the VR headset. Reposition sensors if necessary.
- Calibrate Sensors:
- Run the calibration or setup process for sensors within the VR platform settings.
Update Operating System:
- Windows Updates:
- Ensure that your operating system is current with the latest Windows updates. Some glitches may be resolved through system updates.
Clear Environment for VR:
- Ensure Adequate Space:
- Make sure you have enough physical space for VR activities. Clear the play area of obstacles that could interfere with Tracking.
Check VR Platform Settings:
- Performance Settings:
- Review performance settings within the VR platform. Adjust options based on your PC’s capabilities.
- Audio and Display Settings:
- Confirm that audio and display settings within the VR platform match your preferences and hardware.
Check for Interference:
- Wireless Interference:
- If using wireless VR, minimize interference from other nearby wireless devices.
Reinstall VR Platform:
- Uninstall and Reinstall VR Platform:
- Uninstall the VR platform and reinstall it. This can address issues related to the platform’s core software.
Update BIOS/UEFI:
- Check for Updates:
- Ensure that your Motherboard’s BIOS/UEFI firmware is up to date. BIOS updates may include improvements for VR compatibility.
Contact VR Support:
- Customer Support:
- If glitches persist, contact the customer support of your VR headset or the VR platform. They may provide specific guidance or solutions.
Check VR Community Forums:
- Online Discussions:
- Visit official VR community forums associated with your platform. Users may share experiences and solutions for common glitches.
Following these steps, you can systematically troubleshoot and resolve software glitches affecting your virtual reality experience. Always refer to official support resources and community discussions for additional assistance.
Future-Proofing Your VR Gaming PC
Future-proofing your VR gaming PC involves selecting components and adopting best practices. That ensures your system remains capable and compatible with upcoming virtual reality technologies. Here is a guide to help you future-proof your VR gaming PC.
Invest in High-End Components:
- Powerful GPU:
- Opt for a high-end graphics card that exceeds the current VR system requirements. VR applications are likely to become more demanding. A powerful GPU will ensure smooth performance.
- Latest CPU Architecture:
- Choose a CPU with the latest architecture and a high core count. VR experiences can benefit from a strong CPU, especially as applications become more sophisticated.
- Ample RAM:
- Ensure your PC has ample RAM (16GB or more). VR applications may require more memory as they evolve. And having sufficient RAM will contribute to a smoother experience.
- Fast Storage:
- Invest in fast storage options like SSDs. Quick loading times and data access are crucial for VR gaming. And advancements in storage technology are likely to enhance overall system performance.
Consider Future-Proof VR Headsets:
- Modular Headsets:
- Consider VR headsets with modular designs that allow for easy upgrades. This can extend the lifespan of your headset as new components and features become available.
- Compatibility with Upcoming Standards:
- Choose VR headsets that are compatible with emerging industry standards. This ensures that your headset remains relevant as new technologies are adopted.
Upgradeable Motherboard:
- PCIe Slots:
- Select a motherboard with multiple PCIe slots for potential future GPU upgrades or the addition of expansion cards.
- Latest Connectivity Standards:
- Ensure the Motherboard supports the latest USB and other connectivity standards. This is important for compatibility with future VR peripherals and accessories.
- Future-Proof GPU Considerations:
- Ray Tracing Support:
- Choose a graphics card with ray tracing capabilities. While not currently a VR staple, ray tracing may become more prevalent in future VR titles.
- VR-Ready Features:
- Look for GPUs with VR-specific features like variable rate shading and foveated rendering. These technologies aim to improve VR performance and may become more widely adopted.
VR-Focused Software Updates:
- Firmware Updates:
- Regularly check for firmware updates for your VR headset and components. Manufacturers often release updates that enhance performance, introduce new features, or address compatibility issues.
- Driver Updates:
- Keep GPU and other drivers up to date. Updated drivers often include optimizations for new VR titles and improve overall system stability.
Upgradeable Memory and Storage:
- Additional RAM Slots:
- Choose a motherboard with additional RAM slots for easy memory upgrades in the future.
- M.2 Slots for NVMe SSDs:
- Ensure your Motherboard has M.2 slots for NVMe SSDs. These provide faster storage options, and available slots allow for easy storage upgrades.
Future-Proofing Connectivity:
- Wi-Fi 6 and Bluetooth 5:
- Select a motherboard with Wi-Fi 6 and Bluetooth 5 support. These standards offer improved wireless connectivity, which is important for VR applications and peripherals.
- USB-C and Thunderbolt:
- Ensure your PC has USB-C and Thunderbolt ports. These versatile connectors are becoming more common in VR peripherals and accessories.
Monitor VR Industry Trends:
- Stay Informed:
- Keep an eye on industry trends and announcements related to VR gaming. This knowledge can guide your future purchases and upgrades.
- Participate in VR Communities:
- Join VR forums and communities to stay informed about upcoming technologies, software updates, and user experiences. This collective knowledge can be valuable for making informed decisions.
Budget for Periodic Upgrades:
- Plan for Upgrades:
- Allocate a budget for periodic upgrades. While it is challenging to future-proof entirely, planning for occasional component upgrades can help keep your system current.
- Monitor Component Lifespan:
- Keep track of the expected lifespan of critical components. This includes GPUs, CPUs, and storage devices. Upgrading before these components become outdated can extend the useful life of your system.
VR-Ready Peripherals:
- Upgradeable Peripherals:
- Choose VR peripherals with upgradable or modular components. This allows you to adapt to evolving technologies without replacing the entire peripheral.
- Adapt to New Standards:
- Ensure that your peripherals can adapt to new industry standards. For example, if a new tracking technology becomes prevalent, having peripherals incorporating this technology will be beneficial.
By adopting these strategies, you can enhance the longevity and adaptability of your VR gaming PC. That makes it more resilient to the evolving landscape of virtual reality technology.
Upgrade Paths for GPU and CPU
Planning for future upgrades to your GPU and CPU involves considering compatibility, performance gains, and your budget. Here is a guide on upgrade paths for both components.
GPU (Graphics Processing Unit) Upgrade:
- Compatibility Check:
- Ensure that your Motherboard has the necessary PCIe slots to accommodate newer GPUs. Check the physical space inside your PC case for the size of the upgraded GPU.
- Check Power Supply Unit (PSU):
- Confirm that your PSU can handle the power requirements of the new GPU. High-end GPUs often demand more power. Upgrading your GPU might necessitate a more powerful PSU.
- Future-Proof Features:
- Consider GPUs with features that may become standard in future VR titles, like ray tracing support, variable rate shading, or advanced VR-specific technologies.
- Budget Considerations:
- Determine your budget for the GPU upgrade. High-end GPUs can be expensive. So, find a balance between performance gains and your budget constraints.
- Monitor Resolution and Refresh Rate:
- Choose a GPU based on your monitor’s resolution and refresh rate. Higher resolutions and refresh rates require more GPU power for optimal performance.
- Consider VR-Specific Features:
- If you are focused on VR gaming, look for GPUs with features that enhance VR experiences, like foveated rendering support or improved VR-specific optimizations.
CPU (Central Processing Unit) Upgrade:
- Socket Compatibility:
- Ensure that the new CPU is compatible with your Motherboard’s socket. Upgrading to a newer CPU may require a motherboard with a compatible socket.
- Check BIOS/UEFI Compatibility:
- Confirm that your Motherboard’s BIOS/UEFI supports the new CPU. You may need to update the BIOS before installing a newer CPU.
- Consider Multi-core Processors:
- VR applications and games can benefit from CPUs with multiple cores. Consider upgrading to a multi-core processor for improved multitasking and overall system performance.
- Clock Speed and Performance:
- Look for CPUs with higher clock speeds for better single-threaded performance. Many VR applications still rely on strong single-threaded performance.
- Budget Constraints:
- Determine your budget for the CPU upgrade. Consider CPUs that offer a good balance of performance and cost within your budget.
- Future-Proof for VR Development:
- Consider CPUs that align with the recommended specifications for future VR titles. VR development may push the need for more powerful CPUs, so future-proofing is essential.
Upgrade Strategies:
- Upgrading Both GPU and CPU:
- If budget allows, upgrading both GPU and CPU simultaneously can provide a balanced boost in gaming performance. This ensures that neither component becomes a bottleneck for the other.
- Phased Upgrades:
- If on a tight budget, consider phased upgrades. Please start with the component that provides the most immediate performance improvement based on your usage, whether gaming or VR applications.
- Sell or Repurpose Old Components:
- If your current GPU or CPU is still functional, consider selling it or repurposing it in another system. This can offset the cost of your upgrade.
- Consider Used or Previous-Gen Components:
- If new components are too expensive, consider purchasing used or previous-generation components. They can offer a significant performance boost at a more affordable price.
- Check Upgradeable Features:
- When upgrading, consider features that enhance VR experiences, like improved ray tracing capabilities, AI enhancements, or better support for VR-specific technologies.
Remember to research and compare benchmark results for potential GPU and CPU upgrades, considering your specific use case, whether focused on VR gaming, general gaming, content creation, or multitasking. Additionally, stay informed about upcoming releases to make informed decisions on the latest hardware offerings.
Staying Ahead of VR Technological Advances
Staying ahead of VR technological advances involves a combination of staying informed and investing in versatile hardware. In addition, it involves participating in the VR community and being prepared for emerging trends. Here is a guide to help you stay ahead in VR technology.
Stay Informed:
- Follow VR News and Blogs:
- Regularly read VR-focused news websites, blogs, and forums to stay updated on the latest developments, product releases, and industry trends.
- Subscribe to Newsletters:
- Subscribe to newsletters from VR hardware manufacturers, software developers, and industry publications to receive timely updates directly in your inbox.
- Social Media Monitoring:
- Follow VR-related accounts and hashtags on social media platforms to stay in the loop about announcements, events, and discussions within the VR community.
Participate in VR Communities:
- Join Online Forums:
- Participate in VR forums and communities where enthusiasts, developers, and industry professionals share insights, experiences, and information about the latest VR technologies.
- Engage in Social Media Groups:
- Join VR-focused groups on platforms like Reddit or Facebook to discuss and share your experiences with other VR enthusiasts.
- Attend VR Events and Meetups:
- Attend virtual or physical VR events, conferences, and meetups to network with professionals. Learn about emerging technologies and try out new VR hardware and software.
Invest in Versatile Hardware:
- Modular VR Headsets:
- Choose VR headsets with modular designs that allow for easy upgrades. This flexibility ensures that your headset can adapt to new technologies and features.
- Upgradable Components:
- Invest in a gaming PC with upgradable components, like a motherboard with multiple PCIe slots, to accommodate future GPU upgrades and enhancements.
- Future-Proof Features:
- Look for VR hardware with features that will likely become standard in the future, like eye-tracking, wireless capabilities, and improved haptic feedback.
Explore Emerging Technologies:
- Experiment with New VR Applications:
- Explore and experiment with new VR applications, especially those that showcase emerging technologies. This hands-on experience will give you insight into the direction of VR development.
- Keep an Eye on VR Research:
- Stay informed about VR research initiatives, especially those related to breakthrough technologies, interface innovations, and improvements in VR interaction.
Learn about VR Development:
- Develop VR Applications:
- Consider learning about VR development by exploring VR development platforms and tools. This hands-on experience will deepen your understanding of the technology and its possibilities.
- Follow VR Developers:
- Follow VR developers and development communities to keep track of upcoming VR projects, experimental applications, and breakthroughs in VR development.
Subscribe to VR Platforms:
- Subscribe to VR Content Platforms:
- Subscribe to VR content platforms like SteamVR, Oculus Store, and others. This lets you receive updates on new releases and innovations directly from the content creators.
- Explore Beta Programs:
- Participate in beta programs offered by VR platforms and developers. Beta versions often provide early access to experimental features and improvements.
Be Prepared for Emerging Trends:
- AI in VR:
- Stay informed about integrating artificial intelligence (AI) in VR applications, as AI can enhance interactions, create dynamic environments, and improve overall immersion.
- Health and Wellness in VR:
- Monitor advancements related to health and wellness in VR, like VR fitness programs, mental health applications, and ergonomic improvements in VR hardware.
- Wireless VR Technology:
- Keep an eye on developments in wireless VR technology. As this area advances, it can significantly improve the freedom of movement and overall user experience in VR.
- Augmented Reality (AR) Integration:
- Explore how VR and AR technologies are converging. Understanding the integration of AR elements into VR experiences may become increasingly relevant.
Network with Industry Professionals:
- Connect with VR Professionals:
- Network with professionals in the VR industry. Attend industry events, webinars, and conferences to establish connections and gain insights from those actively involved in VR development.
- LinkedIn and Professional Networks:
- Utilize professional networking platforms like LinkedIn to connect with professionals in the VR space. Engage in discussions and share your thoughts on industry trends.
Combining these strategies lets you position yourself at the forefront of VR technological advances. Keep an open mind, be curious, and actively engage with the vibrant VR community to stay informed and prepared for the exciting developments ahead.
Monitoring and Maintaining Your System
Monitoring and maintaining your gaming PC is crucial to ensure optimal performance, stability, and longevity. Here is a comprehensive guide on effectively monitoring and maintaining your system.
Monitoring:
- Temperature Monitoring:
- Use software like HWMonitor, MSI Afterburner, or NZXT CAM to monitor the temperatures of your CPU and GPU. Overheating can lead to performance issues and hardware damage.
- System Resource Usage:
- Task Manager in Windows provides real-time information on CPU, memory, disk, and network usage. Monitoring resource usage helps identify performance bottlenecks.
- Graphics Card Performance:
- Utilize GPU monitoring tools (MSI Afterburner, GPU-Z) to track GPU temperature, usage, and clock speeds. This is especially important for VR gaming.
- Storage Health:
- Use tools like CrystalDiskInfo to check the health of your storage drives. Monitor for signs of impending failure and plan backups accordingly.
- RAM Usage:
- Keep an eye on your system’s RAM usage using Task Manager or specialized software. Ensure that there is enough RAM available for your applications and games.
- Network Performance:
- Monitor network performance with tools like Task Manager or third-party applications to identify potential issues affecting online gaming or VR experiences.
- Software and Driver Updates:
- Regularly check for updates to your operating system, drivers, and essential software. Updated software often includes performance improvements and security patches.
- BIOS/UEFI Updates:
- Check your motherboard manufacturer’s website for BIOS/UEFI updates. These updates may improve system stability and compatibility.
- VR System Software:
- Keep VR platform software (Oculus, SteamVR, etc.) up to date. Updates may include optimizations for VR experiences.
Maintenance:
- Clean Your PC:
- Dust can accumulate inside your PC and affect cooling. Regularly clean your PC using compressed air to prevent overheating.
- Check Cable Connections:
- Ensure that all cables, including those for your VR headset and peripherals, are securely connected. Loose cables can lead to disruptions.
- Update Graphics Drivers:
- Keep your GPU drivers up to date to benefit from performance improvements and compatibility fixes. Check the manufacturer’s website for the latest drivers.
- Disk Cleanup:
- Use Windows’s built-in Disk Cleanup tool to remove unnecessary files and free up storage space. This helps maintain optimal system performance.
- Defragment Hard Drives:
- If using traditional hard drives, periodically run the built-in Windows Disk Defragmenter to optimize file placement for faster access.
- Scan for Malware:
- Run regular antivirus and anti-malware scans. That ensures your system is free from malicious software that could compromise performance and security.
- Backup Important Data:
- Regularly backup important files, especially before major system changes or upgrades. Consider using cloud services or external drives for backups.
- Check VR Headset and Accessories:
- Inspect your VR headset and accessories for any signs of wear or damage. Keep lenses clean and ensure sensors are unobstructed for optimal Tracking.
- Check Power Supply:
- Monitor your power supply for any unusual noises or signs of failure. A failing power supply can cause stability issues and damage other components.
- Review Startup Programs:
- Manage startup programs to ensure only essential applications launch with Windows. This can improve boot times and system responsiveness.
- Monitor Battery Health (If Applicable):
- If you are using a laptop, monitor battery health using tools the laptop manufacturer provides. Replace the battery if it shows signs of deterioration.
- Create System Restore Points:
- Before making significant changes to your system, create a system restore point. This allows you to revert to a stable system configuration if issues arise.
Scheduled Maintenance:
- Regular System Scans:
- Schedule regular antivirus scans, disk cleanup, and disk defragmentation to occur automatically.
- Backups:
- Set up automated backup routines for important data. Many operating systems and backup tools allow you to schedule regular backups.
- System Updates:
- Enable automatic updates for your operating system, drivers, and essential software. This ensures you receive critical updates on time.
- VR Firmware Updates:
- As the manufacturer recommends, check for and apply firmware updates for your VR headset and controllers.
These monitoring and maintenance practices ensure your gaming PC remains in top condition. That provides a stable and reliable platform for your VR experiences and gaming sessions.
Conclusion
In conclusion, embarking on the journey to build a gaming PC tailored explicitly for virtual reality is a rewarding endeavor. That involves careful consideration of various components and factors. The importance of creating a system that meets current VR requirements cannot be overstated. And it also stands resilient in the face of future advancements.
Throughout this guide, we’ve delved into the intricacies of VR system building. We explored key considerations like understanding VR requirements. In addition, We discussed, choosing the right components, and the significance of graphics processing units, central processing units, memory, Storage, motherboards, and power supply solutions. Besides, We have provided detailed insights into the importance of fast storage options, and efficient cooling. In addition we discussed the role of VR peripherals and accessories in creating a comprehensive VR-ready setup.
Recap of Key Considerations
By recapping these fundamental considerations, we’ve highlighted the critical aspects of each component and the interconnected nature of building a powerful and future-proof VR gaming PC. We have stressed the significance of staying informed, participating in VR and communities. Besides we detailed that how to experiment with emerging technologies to ensure your gaming rig remains at the forefront of virtual reality experiences.
As you venture into the world of VR gaming, remember to monitor and maintain your system regularly. Keep an eye on temperatures, resource usage, and software updates. Regular cleaning, cable management, and adherence to best practices in system maintenance contribute to a stable and reliable VR gaming environment.
Enjoying an Immersive VR Gaming Experience
Ultimately, the goal is to meet the technical requirements for VR and create an immersive and enjoyable experience that transcends the boundaries of traditional gaming. The world of VR is dynamic and constantly evolving, and your VR-ready gaming PC serves as the gateway to a realm where virtual worlds come to life.
So, as you embark on this exciting journey, armed with the knowledge and insights shared in this guide, take pride in your meticulously crafted VR gaming rig. Enjoy the breathtaking landscapes, and heart-pounding adventures. Dip into immersive experiences that the world of virtual reality has to offer. May your VR gaming endeavors be both thrilling and future-proof as you step into a realm where the boundaries between the real and the virtual blur, and gaming becomes an extraordinary, immersive adventure. Happy gaming!