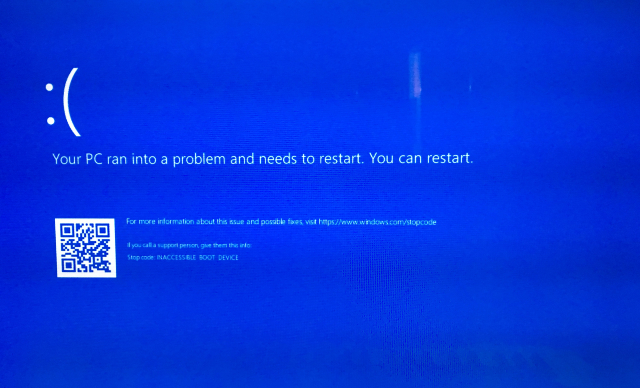
If something goes wrong, Windows 10 will throw up a lot of error messages and error codes. If BSOD or bluescreen of death error occurs, you can use the Windows 10 stop code to pinpoint the problem. Sometimes, these are linked to specific errors when you may need to undergo Windows 10 fixes a few times. You will experience the Windows 10 “Memory Management” stop code later. This article lets you know how you should fix memory management errors.
What is Windows Memory Management?
Windows memory management is essential for keeping the OS ticking over nicely, and it is a function that can adjust the system memory. If it doesn’t go right, your Operating System will begin displaying a blue screen of death errors at regular intervals.
This tool helps to track each memory location on the operating system. It helps to adjust the memory transition and procedures between your physical memory and RAM. Thus, you get to know the amount of memory available for allocation. As soon as you shut down a program, it will reallocate the memory to other methods. When it crashes, it will also take your System with it.
What is Stop Code Memory Management Error?
Stop code memory management is a common BSOD error. There are a lot of Windows 10 users who have faced this error, and this error is specific to the System’s memory management. However, you can solve this problem easily.
Causes for Stop Code Memory Management Error:
If you get a memory management BSOD, it indicates a critical memory management error. The stop code of the error is 0x0000001A. Usually, the system-side issue is related to hardware, but sometimes it can be related to software. In a few cases, the error can refer to firmware issues.
We have given here a few reasons why the stop code can be seen on display.
- Software issues, i.e., damaged or corrupted files in the system directory
- Software or hardware conflict
- RAM errors
- Faulty physical memory sticks
- Hardware problems like a graphics card
- Outdated hardware or hardware failure
- Faulty drivers or missing Disk errors
- Firmware, virus, or malware infection
- Outdated Windows 10 operating system
These are some of the few possible causes of the error. However, these are not the only ones due to which the error can occur, and it is because there may be another reason for which you can face the issue.
How to Fix Stop Code Memory Management:
-
Restart the Computer:
Try to power off the PC and then turn it on again. You can apply the fix to solve all the Windows 10 issues like this error.
-
Update Windows 10:
The first thing you must do is check if your Windows 10 is updated entirely. If your System contains outdated system files, it may create unexpected errors. Check if any update is pending because it is a fast way to find the error.
First, your task is to tap on the Windows key + I for opening the Settings panel. Thereafter, your job is to move to the Update & Security. You should go under Windows Update to check this for pending updates. Whether you see any updates available, your job is to save necessary files. Next, you should tap on the option Restart now. Finally, your System is going to restart during the process.
-
Run Windows 10 Memory Diagnostic Tool:
If you are willing to check if your RAM functions correctly, then take the help of the integrated Windows Memory Diagnostic tool. It runs after a system reboot and helps to check the system memory for errors. The tool helps you to log the Scan to a text file.
Navigate to the Start menu search bar first, and then you should write Windows Memory Diagnostic into it. Thereafter, you should choose the best match.
There are two options available— the first is to restart it instantly and run the tool, or set it to run after the next reboot. When you are going to fix the error, you should save your essential documents first. Then, you are required to restart the operating system instantly, and the tool will start running immediately after you reboot your system.
The log file is not apparent after booting back to Windows 10.
- First, you should tap on the Windows key + X, and thereafter you are required to choose the Event Viewer from the power menu.
- When you enter the Event Viewer, you should go to the Event Viewer (Local), Windows Logs, and System, respectively.
- Then, your task is to move to the right-hand column and then choose the Find option. Next, you should write MemoryDiagnostic on the box. Thereafter, you need to tap on the option Find Next. You can see the diagnostic results displayed at the bottom of your window.
- Now, your job is to investigate the specific errors.
-
Run MemTest86:
Sometimes, you are very much sure that the error is related to the RAM. But the Windows Memory Diagnostic tool is unable to display it. If something like this happens to you, then your task is to take the help of MemTest86 for performing an in-depth memory test.
It is a standalone memory testing tool used freely for x86 machines. In this case, you are required to boot MemTest86
from a USB flash drive. If you want, use a bootable disc and leave this for checking the system RAM. The process of checking generally consumes plenty of time to complete. A single-pass can take hours, but it relies on installed RAM.
-
Update the Drivers:
Updating the system drivers is another way to solve the error. Sometimes, when you have new software, it may contain new drivers, and your operating system may not receive the specific message. Nowadays, driver fault errors are rare because Windows 10 can handle driver updates.
You should tap on the Windows Key + I button to open the Settings panel. After that, your job is to choose the Update & Security option and the View update history option. You are capable of finding driver updates.
Next, you need to write device manager by going to the Start menu search bar. Thereafter, choose your best match. Navigate to the list now and check if there exists an error symbol. If you won’t find anything, then the driver status is not causing the error. Hence, you can use a third-party tool for updating the system drivers simultaneously. If necessary, then take the help of the free tools to solve most Windows issues.
IOBit’s Driver Booster and Snappy Driver Installer are the two examples.
-
Update the GPU Drivers:
You should know that if your System has outdated or brand-new GPU drivers, there is a chance of the BSOD error. The error may be the memory management stop code, but
a video memory management-specific stop code can sometimes cause an issue. 0x0000010E is the video memory management internal stop code that may refer to a faulty GPU driver.
If you are willing to update the GPU drivers, your job is to move to the manufacturer’s website. Then, you should download the recent update. In most cases, the drivers are usually either Nvidia or AMD.
If you don’t know what your GPU is using, you have to write dxdiag by going to the Start Menu search bar. Choose the one that is suitable best for you. As soon as you open the DirectX Diagnostic Tool, your job is to choose the Display tab. Now, you can see the GPU of your System available.
If you have Nvidia GPU, you can install the Nvidia GeForce Experience.
-
Run CHKDSK:
It is a Windows preloaded tool used for verification of the file system. Certain settings can solve the issue when you run. First, navigate to the Command Prompt, and then your job is to run the CHKDSK from there. The tool contains plenty of features, and it helps to identify and repair the errors to solve the BSOD.
- First, your job is to head towards the search bar and open it in the taskbar. To do this, you are required to tap on the magnifying glass icon. Using the Windows + S keyboard shortcut, it is possible to bring it up.
- Go to the search box and write Command Prompt there. As soon as it appears in the results, you are required to tap on it. Then, you should select Run as Administrator.
- If you are prompted by the User Account Control (UAC), you need to tap on the Yes button to allow the app to launch with administrative permissions.
- You need to write chkdsk C: /f /r, and then your task is to hit Enter. As soon as you apply the command in the C: drive, it will scan the errors and repair them. If you are willing to check disks, then exchange the C: with the entry letter of other disks.
- The error message can appear “Chkdsk cannot run because another process uses the drive” on display. Hence, you are required to tap on Y and next hit Enter.
- The Chkdsk tool can automatically scan and repair bad sectors when used to boot the System next time.
- Now, you need to reboot the device. Wait for a while till the tool is not analyzing your System.
-
Run SFC:
Are you still encountering the Memory management error! Then, take the help of System File Check or SFC tool. Using the Windows system tool, you can check if there are missing and corrupt Windows system files.
The System File Check tool is used to check the Windows system files mainly whereas the previous CHKDSK tool helps to scan the entire drive for errors. Before running the SFC command, you need to check that it works appropriately two times.
Deployment Image Servicing and Management or DISM is an integrated Windows tool with many functions. Use the DISM Restorehealth command to make sure that it will work accurately. To do this, perform the steps.
- First, your job is to write Command Prompt (Admin) by going to the Start menu search bar. After that, tap on the Run and then choose it as administrator. It helps you to open the elevated Command Prompt.
- You are required to write the given command and then hit Enter: DISM /online /cleanup-image /restorehealth
- Next, wait for a while till it finishes. This method may consume up to 20 minutes, but it relies on the System’s health. Sometimes, the procedure can get stuck in the middle. That’s why you need to wait for some time to finish it.
- As soon as the method completes, it would be best to write sfc /scannow and hit Enter.
-
Replace the Hardware:
If any faulty driver is the cause of the BSOD error, then there is no need to apply any software fix or Windows reinstallation process. Whether you have found an issue with your RAM while testing, then the only choice is to replace it.
-
Reset Windows 10:
Resetting the windows can help you and solve the Stop Code Memory Management error without any hassle. When you reset Windows 10, it will exchange the system files with a completely fresh set of files.
Theoretically, it can clear the lingering problems related to the memory management error and keep the essential files intact.
Step 1: First, your job is to tap on the ‘Windows + I’ so that you can enter the Settings interface. Thereafter, you are required to look for the Update & Security option. Then, you need to hit the option for accessing its interface.
Step 2: You need to find the Recovery option available from the left panel page. After that, you should hit Get Started, which is available under Reset this PC.
Step 3: When you open the Reset this PC window, you can see two options: Keep my files and Remove everything. Select the Keep my files option so that you can remove apps and settings. Then, you should tap on it.
Step 4: A list of apps will appear, which you need to remove. If you are willing to reinstall some apps later, capture a picture. After that, you are required to tap on the Next for removing your apps.
Step 5: Whether you are ready to reset the computer, you need to hit the Reset to operate. As soon as you complete the resetting procedure, the PC will reboot automatically.
-
Scan Computer for Virus or Malware Infection:
Malware infection is a major reason due to which you can experience PC issues. There are a lot of scripts and applications that can cause irreversible harm to one’s device. Due to a virus, the Stop Code Memory Management error can also occur, although it happens very rarely.
You are required to scan the System with taking help of a quality antivirus program. Whether you haven’t installed any third-party antivirus program on the computer, then you can take the help of the built-in Windows Defender.
- Head towards the search bar first available in the taskbar. To move to the search bar, you must hit the magnifying glass icon.
- If you want to bring up this, use the Windows + S keyboard shortcut.
- After that, your job is to choose Windows Security and then launch this from search results.
- Now, take the help of the home screen or the menu available in the left-side pane for switching to the Virus & Threat Protection tab. You should now tap on the Scan Options link.
- Next, you should choose the Full scan option. It will check every file on your drives to ensure that no thread can hide. You need to note that the Scan can last more than 1-2 hours, and it relies on the number of files you need on the operating system.
- You are required to tap on the Scan now button to start the scanning process. If you detect any threat, Windows 10 will remove this completely. If necessary, you should try to review the scan results to see the removed infected files.
-
Clear Temporary Files and Folders:
Windows often generate temporary folders. In case these accumulate mistakenly, it can cause affect the speed of your computer. Even due to this, you can experience stop code memory management errors. You should remove the junk files with the help of the Disk Cleanup utility, and it will help you to save space and solve issues.
- Your first task is to move to the search bar and open it in the taskbar. Tap on the magnifying glass icon to do so. You can bring this up with the Windows + S keyboard shortcut.
- You should now type Disk Cleanup there and tap on the first search result.
- Now, your job is to choose the Windows 10 system drive and thereafter hit the OK button. The operating system is generally available on disk C:
- When the new window appears, you will find the temporary files taking all space. One thing which you are required to o ensure is that you should select the Temporary Internet Files and Temporary Files. If necessary, then remove other junk files like Thumbnails or DirectX Shader Cache. As soon as you choose what you are willing to remove, you should tap on the OK button.
- Thereafter, your task is to tap on the Delete Files button to see available in the dialog box. This removal method will begin to clear space on the device. If you are willing to delete files permanently, you should hit Yes.
-
Check Latest Installed Applications:
In this case, you are required to check if there is any new software installed on your device very recently. Whether your device has newly installed applications, it might not support the operating system. Besides, it may conflict with the other available programs on the PC. It can trigger the memory management BSOD problem.
- Whether you see that some newly installed apps cause the issue, then your job is to uninstall these instantly. Then, check if the problem remains.
- Your first job is to hit the Windows icon available in the bottom left of the display. As soon as you tap on this, you can see the Start menu appearing.
- After that, you are required to select the Settings option. If you want, then use Windows + I shortcut.
- Next, you are required to tap on the Apps tile, where you can get each app installed on the PC.
- Now, your job is to sort the apps by Install date.
- Your task is to tap on a newly installed app as soon as you choose it. Thereafter, your job is to hit the Uninstall button.
- After that, you are required to tap on Uninstall again for confirmation of your choice. Next, you need to go through the on-screen instructions provided by the program’s uninstaller. You need to ensure that you have removed the software entirely.
- You need to repeat the steps for all apps available in the list. As soon as you uninstall all problematic apps, you need to reboot the PC. Then, check if the error has been fixed.
-
Install Pending Windows Updates:
If any update is pending, it can cause an error in your operating system. Therefore, you are required to look for the pending Windows Update packages. Then, you should install these to check if the problem is available.
You should first hit the Windows icon available in the bottom left of the display. As soon as you tap on this, you can see the Start menu appearing. Next, you are required to select the Settings option. If you want, then use Windows + I shortcut.
Next, you are required to tap on the Update & Security tile, where most of the Windows Update settings are available.
Now, you should see if any updates are available that are pending and install them. Your job is to hit the Install Updates button for installing the Windows Updates. You should tap on the Check for updates option if you don’t find any pending updates available. Finally, you should wait till your windows find available updates.
If you find some updates that you must download, you should tap on the Download option. Allow to download the Windows 10 components, and you should install the updates thereafter.
We recommend you check for updates daily to ensure that your operating system is always updated. The updates can squish bugs and solve the security holes.
-
Use Reimage to Repair & Replaces Corrupted System Files:
It is a strong tool that you can use for repairing and rebuilding Windows. The tool works automatically, and you don’t have to worry about losing any programs and your data.
- First, your job is to download the Reimage and install it thereafter.
- After that, you should open the tool and then run the free Scan. It can take some minutes to be complete.
- A summary of the detected problems can appear on the computer. You need to tap on the START REPAIR thereafter. As soon as you tap on this, you have to solve it automatically. In this case, it will be better to purchase the full version. Try a 60-day Money-Back Guarantee so that it can be refunded anytime if the tool doesn’t solve the issue.
-
Stop Code Memory Management on Boot Run Windows 10 in Safe Mode:
Your first task is to launch Windows 10 in safe mode, and it will boot up the operating system with nothing more than basic drivers. Besides, it lets you check if you get the Stop Code Memory Management error.
Especially, it closes any process that the PC will not require. If you find the memory management error ceasing, you get to know that it is not hardware. It may be software issues like a patch in an update or a driver. If you find the error still available, you are required to exchange some faulty hardware.
If you are willing to boot the System in Safe Mode, you must perform the steps given below.
- First, your task is to take the help of the Win+R keyboard shortcut. Then, write msconfig, and tap on Enter thereafter.
- You should choose the Boot tab available in the upper section of the display.
- Thereafter, your job is to choose Safe Boot.
- Finally, you should select the Minimal option from the list of boot options.
-
Upgrade Hardware of the Computer:
You may need to upgrade the System’s hardware, but it relies on the results of the troubleshooting adventures.
When you are going to purchase new hardware, you should first make sure that each thing is seated properly. If a hardware piece becomes loose or you have moved your machine, you need to perform the step. You should do this in case you find components filthy.
If it is a preloaded machine or does not belong to the warranty period, you must find new components to get the PC up and running again. Sometimes, the older machines don’t support the latest OS versions and PC components. It may be because your device has a new graphics card or requires more RAM. If you have applied the above methods but the error is still available, ensure that the issue is hardware-related.
-
Increase Virtual Memory Manually:
If the memory usage is full in your Windows 10, then it can cause memory management errors. In this case, if you add virtual memory, it can fix the issue.
Step 1: Hit ‘Windows+R’ first to launch the Run dialog box. Then, your task is to enter the command ‘system.cpl’ in the box. Next, you should hit the OK button for accessing System Properties.
Step 2: As soon as the System Properties window appears, you must hit the Advanced option in the toolbar. Next, you have to tap on the Settings available under Performance.
Step 3: When you open the Performance Options window, you need to hit Advanced, available in the toolbar. Thereafter, your job is to tap on the Change option available under Virtual memory.
Step 4: While you see the Virtual Memory window, you have to add virtual memory. To do so, you are required to uncheck the Automatically manage paging file size for the drives first. Thereafter, your job is to choose the system drive and then select the Custom size option. At last, you should set the actual values in the boxes of Initialize size (MB) and Maximum size (MB).
-
Perform Startup Repair:
If you cannot access your PC to execute the operations mentioned above, your job is to generate an installation media for rebooting the PC. Thereafter, you must perform the Startup Repair procedure to begin the Windows normally.
Step 1: Your first task is to attach the USB installation media to the PC. Then, you need to begin the PC. After that, you need to set the PC to boot from USB installation media to access WinRE. You should tap on the Repair your computer option and then hit the Troubleshoot.
Step 2: As soon as you see the page available, you need to tap on the Advanced options.
Step 3: While the Advanced options window appears, your job is to hit the
Startup Repair option.
Step 4: You should select an account here to continue, and then you need to enter the password to begin the repairing process.
Step 5: Now, you can see the Start Repair tool diagnosing the computer. You need to repair it again, and the process can take some time to finish.
Whether you cannot run the Start Repair process, you may try other options such as Resetting your computer, command prompt, etc.
-
Restore System:
If you have made a restore point before the Stop Code Memory Management error appears, try to perform the System restore process to fix the problem.
Step 1: Your first task is to tap on the ‘Windows+R’ key for opening the Run dialog box. Thereafter, your job is to write ‘system.cpl’ in this box. Next, you need to tap on the OK to access System Properties.
Step 2: When you see the System Properties window appearing, you should move to the System Protection tab. Thereafter, you are required to hit the System Restore option to undo system changes.
Step 3: As the System Restore window appears, your task is to tap on the Next to go on. Next, you need to choose the restore point you want, and then you should hit the Next option.
The System Restore process can uninstall the programs that you have installed.
Tap on the Scan for affected programs to check whether any essential programs will affect or not. If you have found any, you should back up these before restoring them.
Step 4: Now, the PC will get restored to the earlier restore point that you have chosen. Next, your job is to tap on the Finish to confirm the restore point.
If you don’t want to lose data, save open files before confirming the restoring point. Thereafter, you should shut down all programs.
Step 5: A pop-up window appears that displays the ‘Once started, System Restore cannot be interrupted’ option. Next, you need to hit Yes to continue. Now, the PC will restart to perform the changes automatically.
Conclusion:
Usually, the blue screen of death errors is very rare. But if you are the one who has encountered the error, then you should try to fix the problem. Generally, the stop code memory management error is a sign of an issue related to RAM. However, you may have to run the Windows Check Disk tool to check the errors with the hard drive.
If you cannot solve the error, then look at the testing for bad memory on the computer.
Frequently Asked Questions:
- What causes BSOD memory management?
The error can occur due to faulty RAM module, corrupt system files, disk drive issues, incorrectly seated RAM stick, outdated OS or drivers, etc.
- Does RAM cause BSOD?
If your device has a defective RAM module or the RAM is not placed correctly, then it can cause the error.
- How to prevent BSOD memory management?
Install the recent OS and driver updates to prevent the memory management error. Try to run CHKDSK and SFC commands if necessary. You please replace the aging memory sticks and inserted them properly.